Reviewing and Approving Invoices
This guide is for reviewers (usually project managers or assistant project managers). When an invoice is in your queue, confirm the details, check the coding, then approve it or reject it back with a comment.
For how to edit header and line coding in depth, see Working with Invoice Documents. For the full intake-to-sync picture, see Approval Workflow.
Before you start
Invoices reach you after intake, once they are auto-forwarded to a reviewer or assigned by an AP admin:
- The invoice enters Agave by email forward to your dedicated AP address, or by Upload Invoice.
- Agave extracts the document and creates it in Draft.
- An AP admin sends it to you for review. They can add a comment when they send it.
If auto-forwarding to reviewer is enabled for a project, the invoice can route to you without a manual send. See Approval Workflow.
While an invoice is waiting on you, its status is In Review.
Step 1: Find invoices to review
- Open AP Automation and go to the Inbox.
- Select the To Review tab. This lists In Review invoices assigned to you.
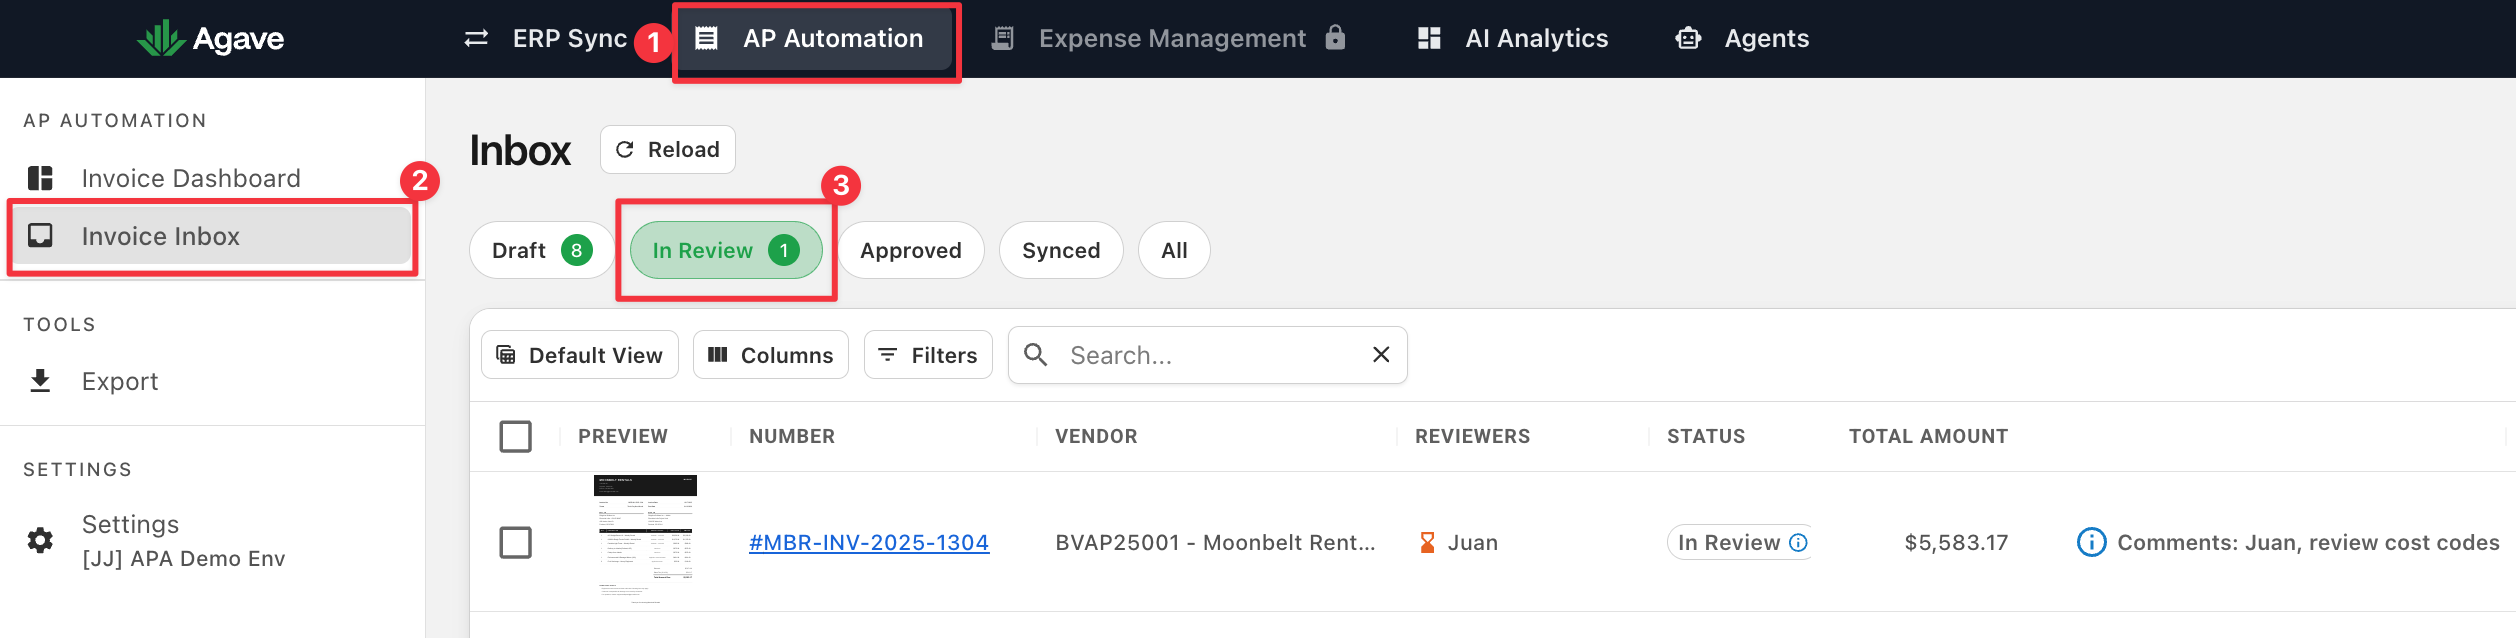
Other tabs (Draft, In Review, Approved, Synced, All) show a wider account view. Use Filters or a saved view if you want to narrow by project or vendor.
Step 2: Open and review the invoice
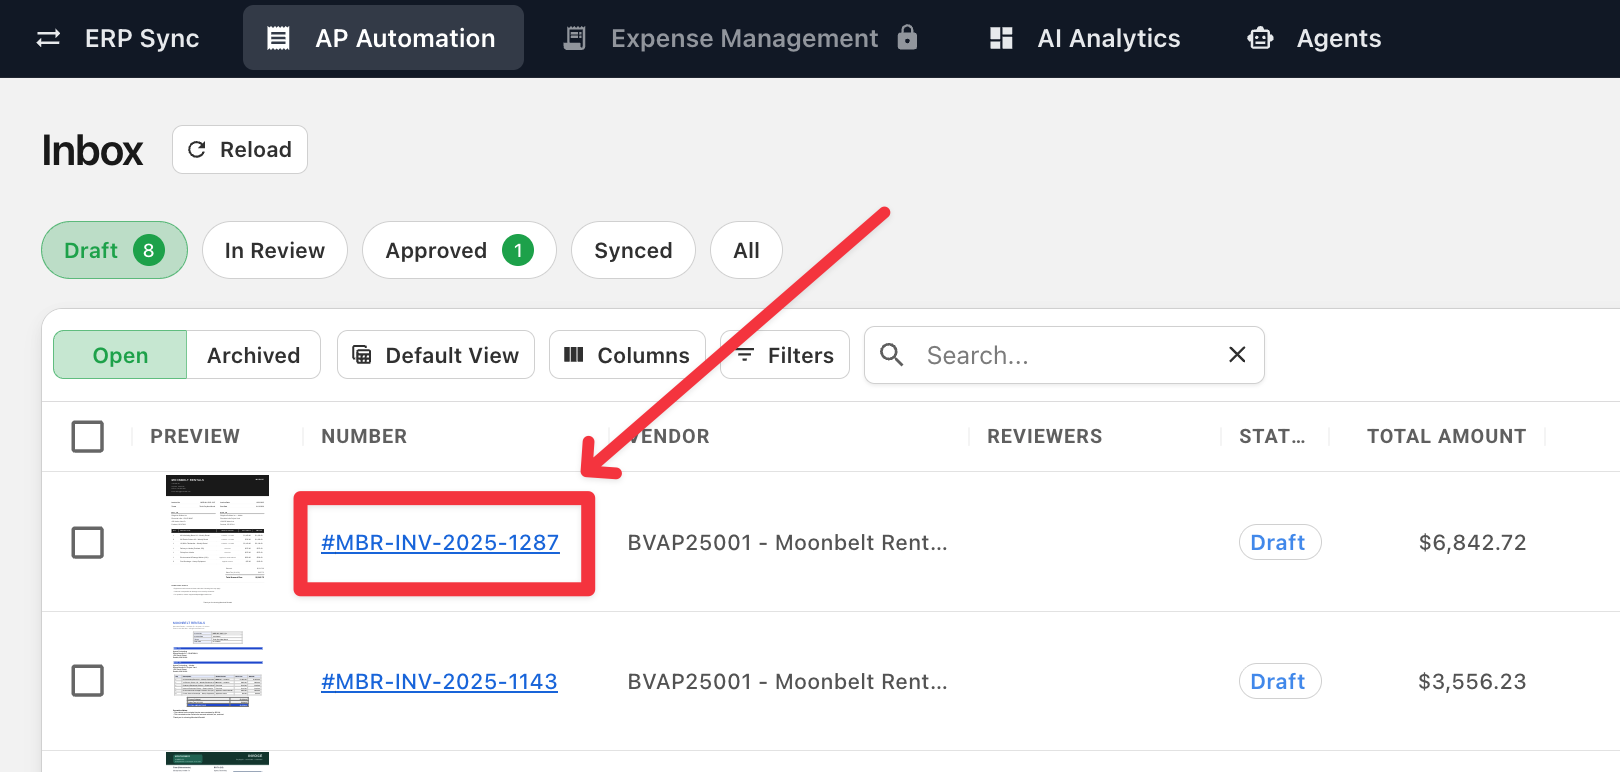
- Click the invoice Number to open it.
- Expand the line items area if you need more room to see every line.
- Compare the PDF on the left with the fields on the right.
Check the header and footer fields:
- Project, Vendor, and Contract in the header
- Total Amount, Issue Date, Number, and Due Date
- Each line’s Amount, Cost Code, Cost Type, and Description
- The line footer Remaining (should be $0.00 when amounts are fully allocated)
If Agave auto-filled a field, hover the blue information icon to see why.
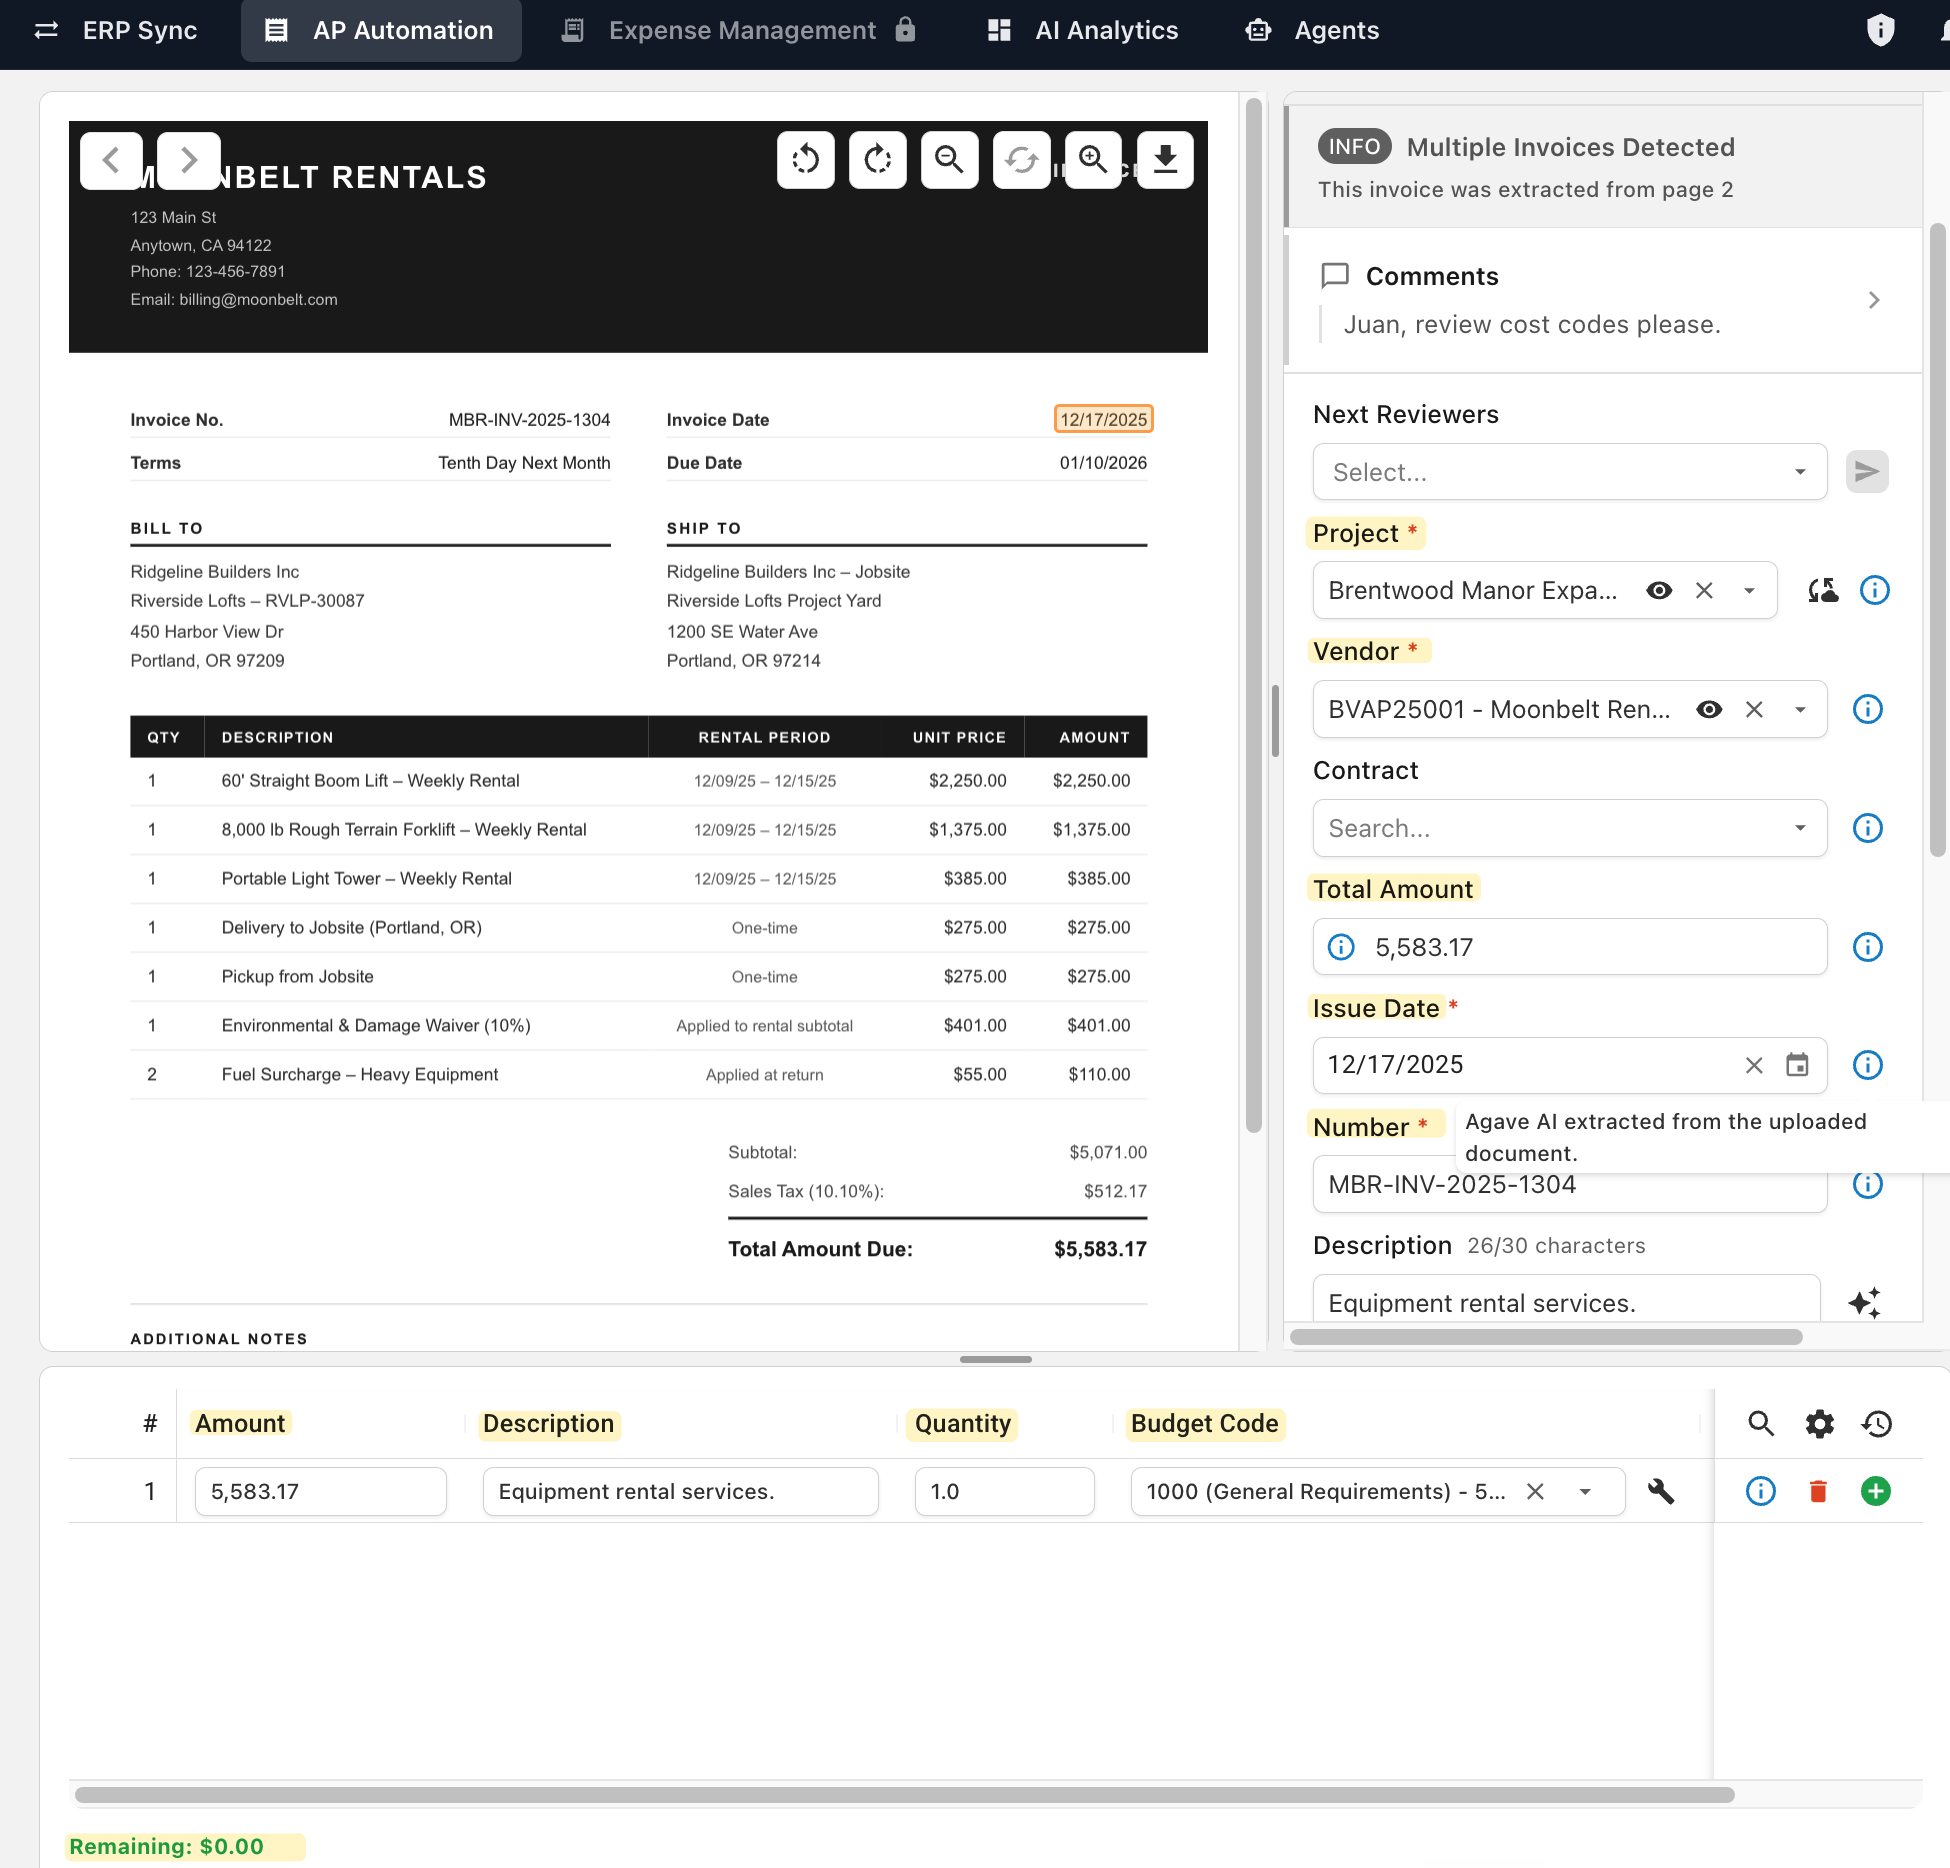
Need to change coding? Do that on this page, then approve or send to next review. Details: Working with Invoice Documents, Header Field Coding, and Line Item Coding.
Step 3: Reject an invoice
Use reject when something is wrong and an admin (or another assignee) needs to fix it.
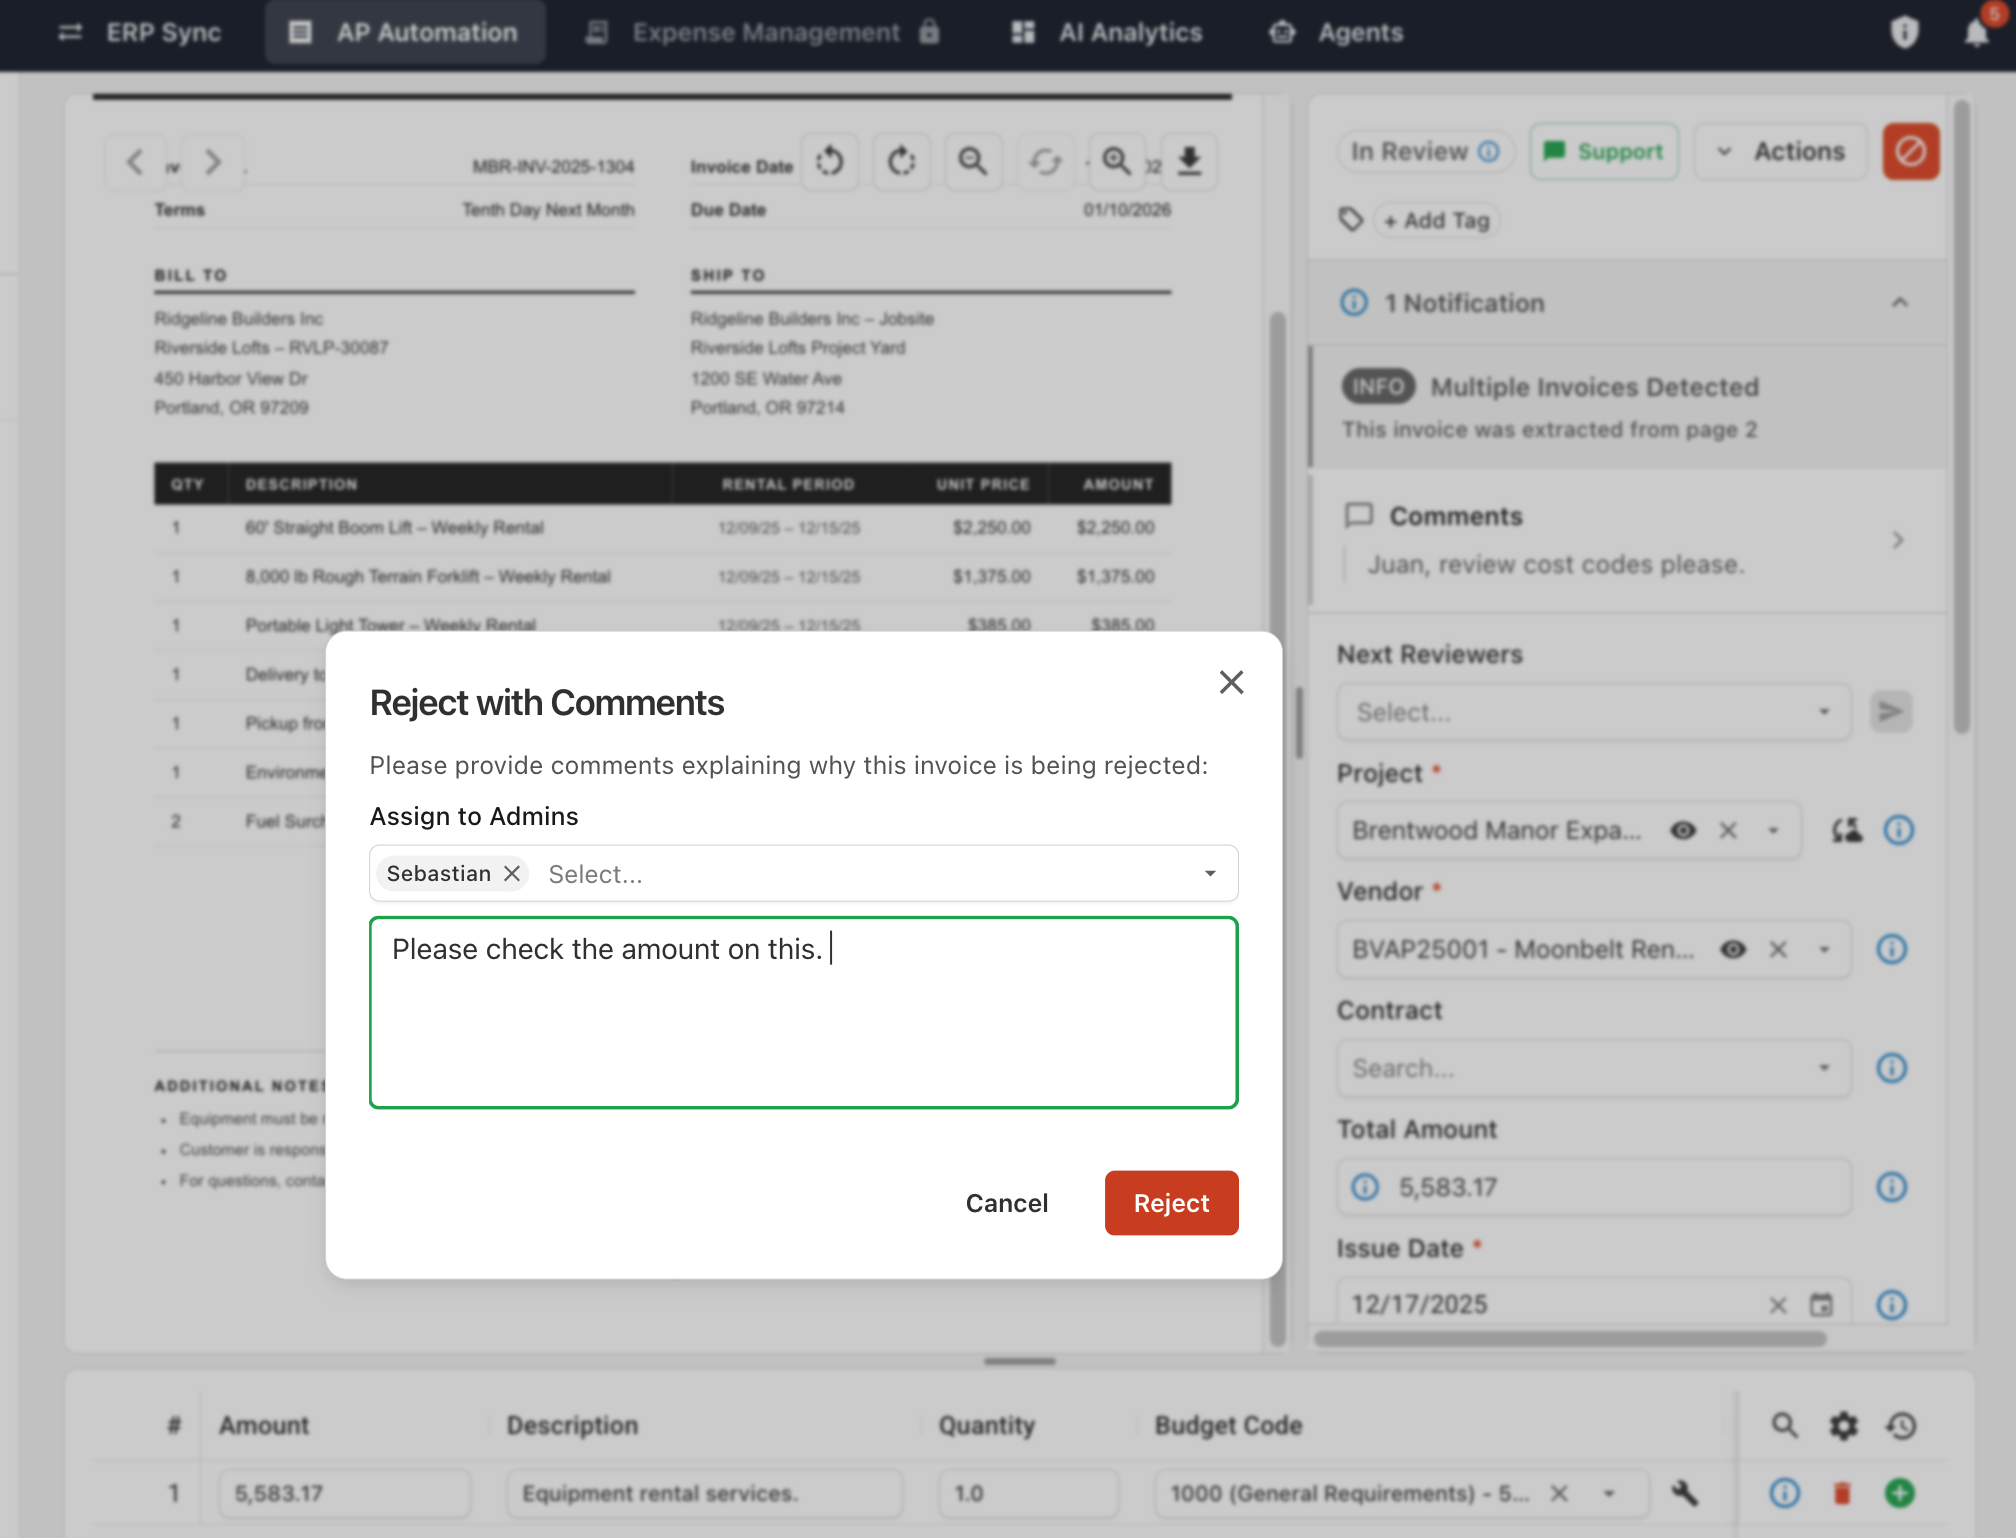
- Click Reject Invoice (red button in the top-right action bar).
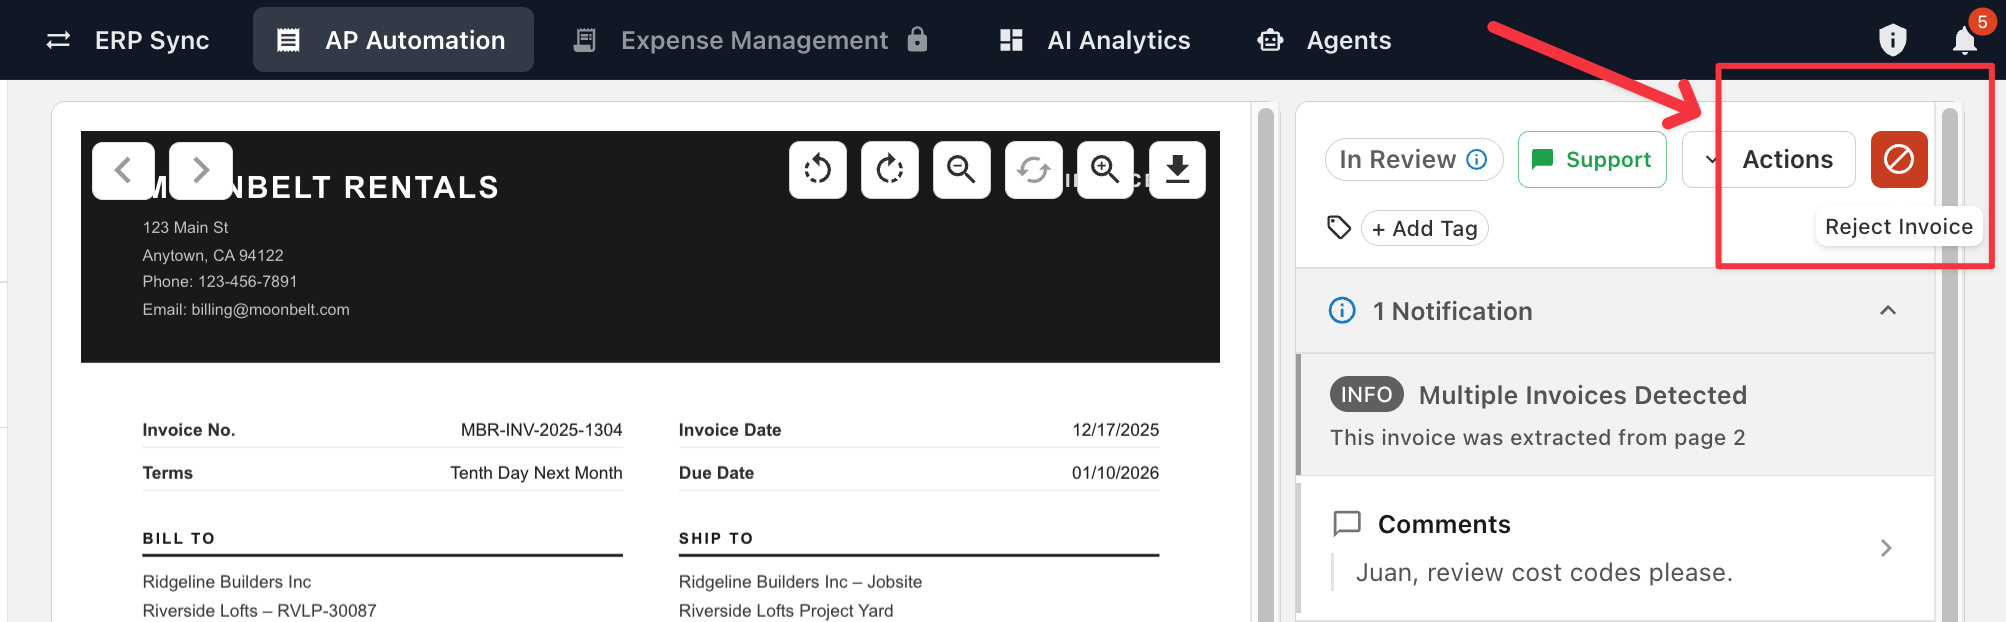
- In the Reject with Comments dialog:
- Choose who should receive it under Assign to Admins (the dropdown may list specific admins or reviewers for your account).
- Enter a comment. Comments are required on reject.
- Click Reject. Click Cancel to close without rejecting.
Step 4: Approve an invoice
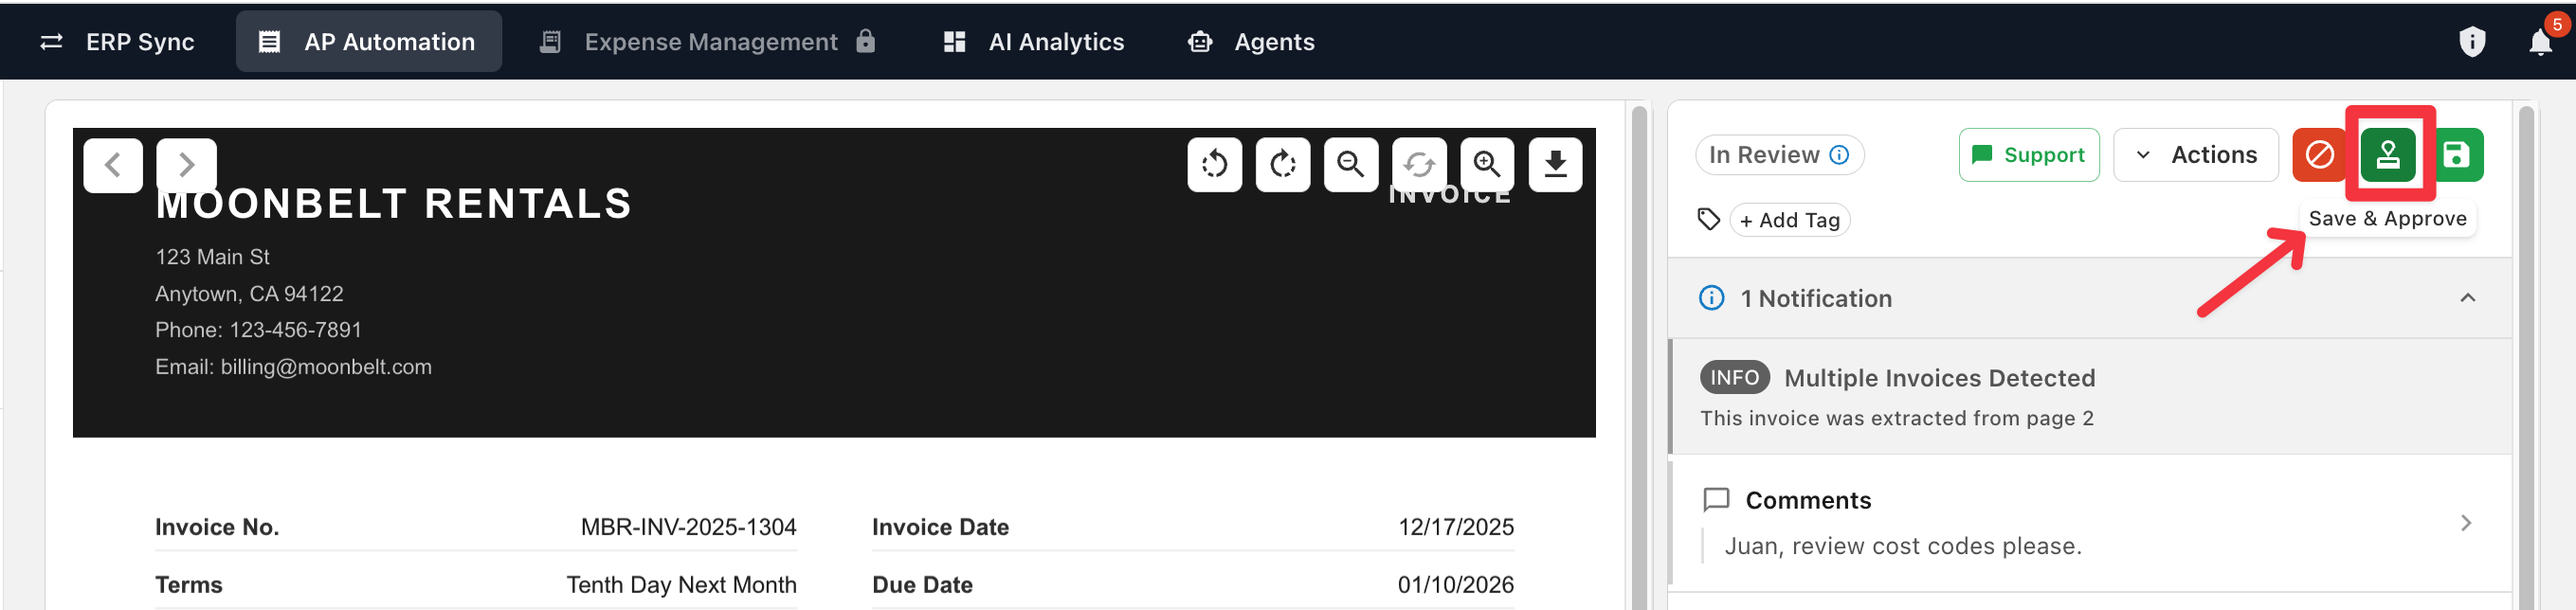
- Click the approve control in the top-right action bar. The tooltip reads Save & Approve when you are the final approver.
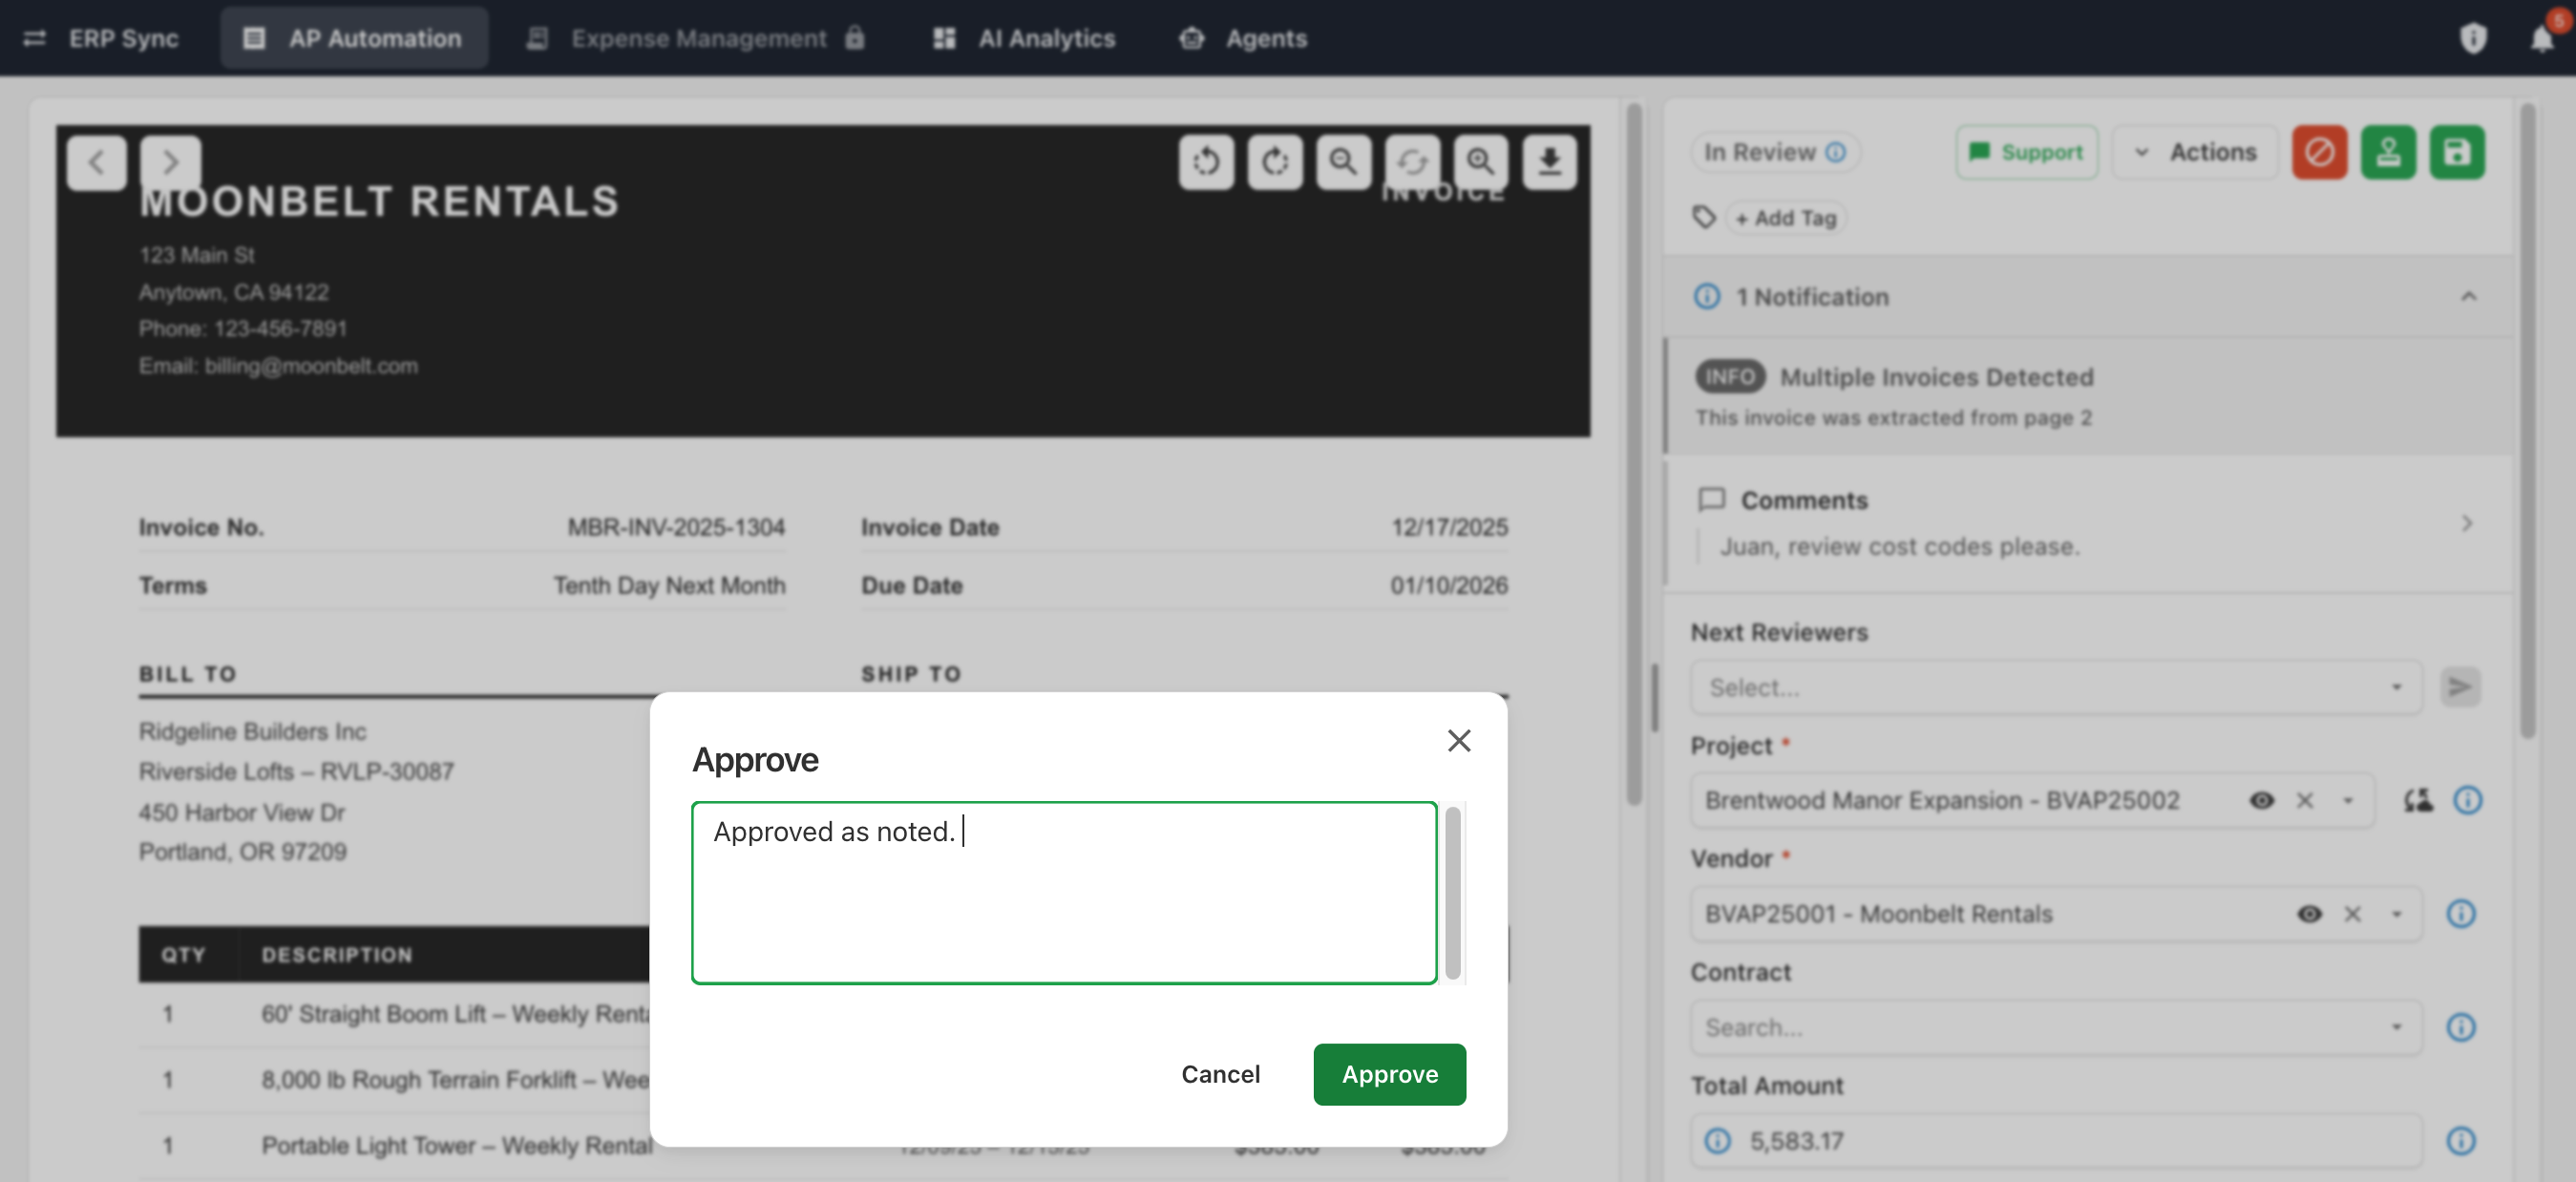
- In the Approve dialog, add an optional comment (or leave it blank).
- Click Approve. Click Cancel to close without approving.
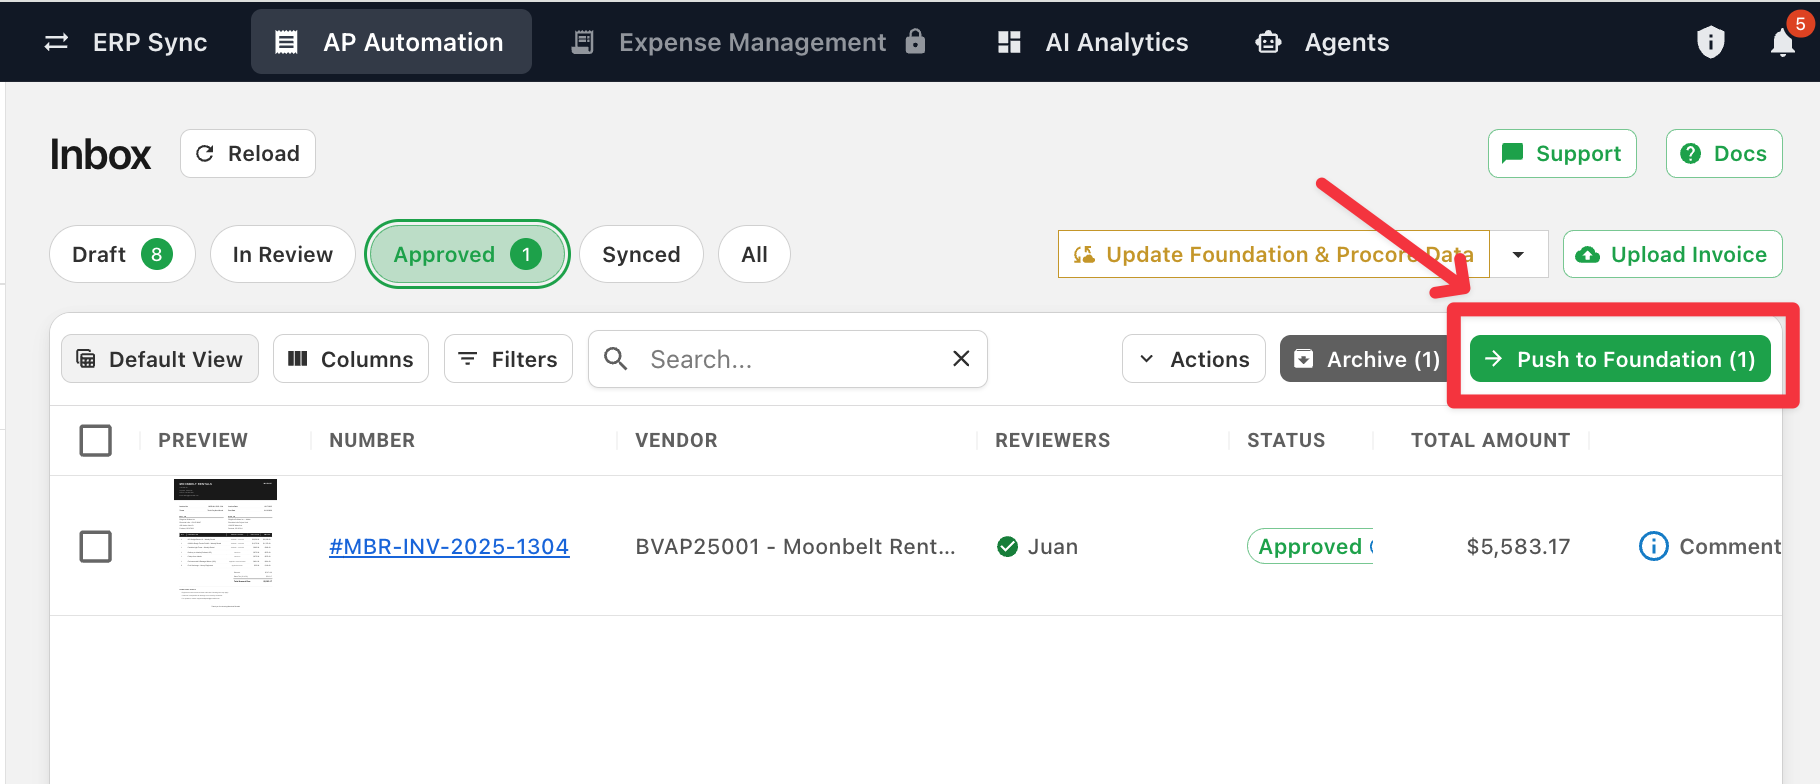
When you are the final approver, the invoice moves to the Approved bucket. From there, an AP admin syncs it to your ERP (or auto-sync does, if enabled).
Save without approving or rejecting
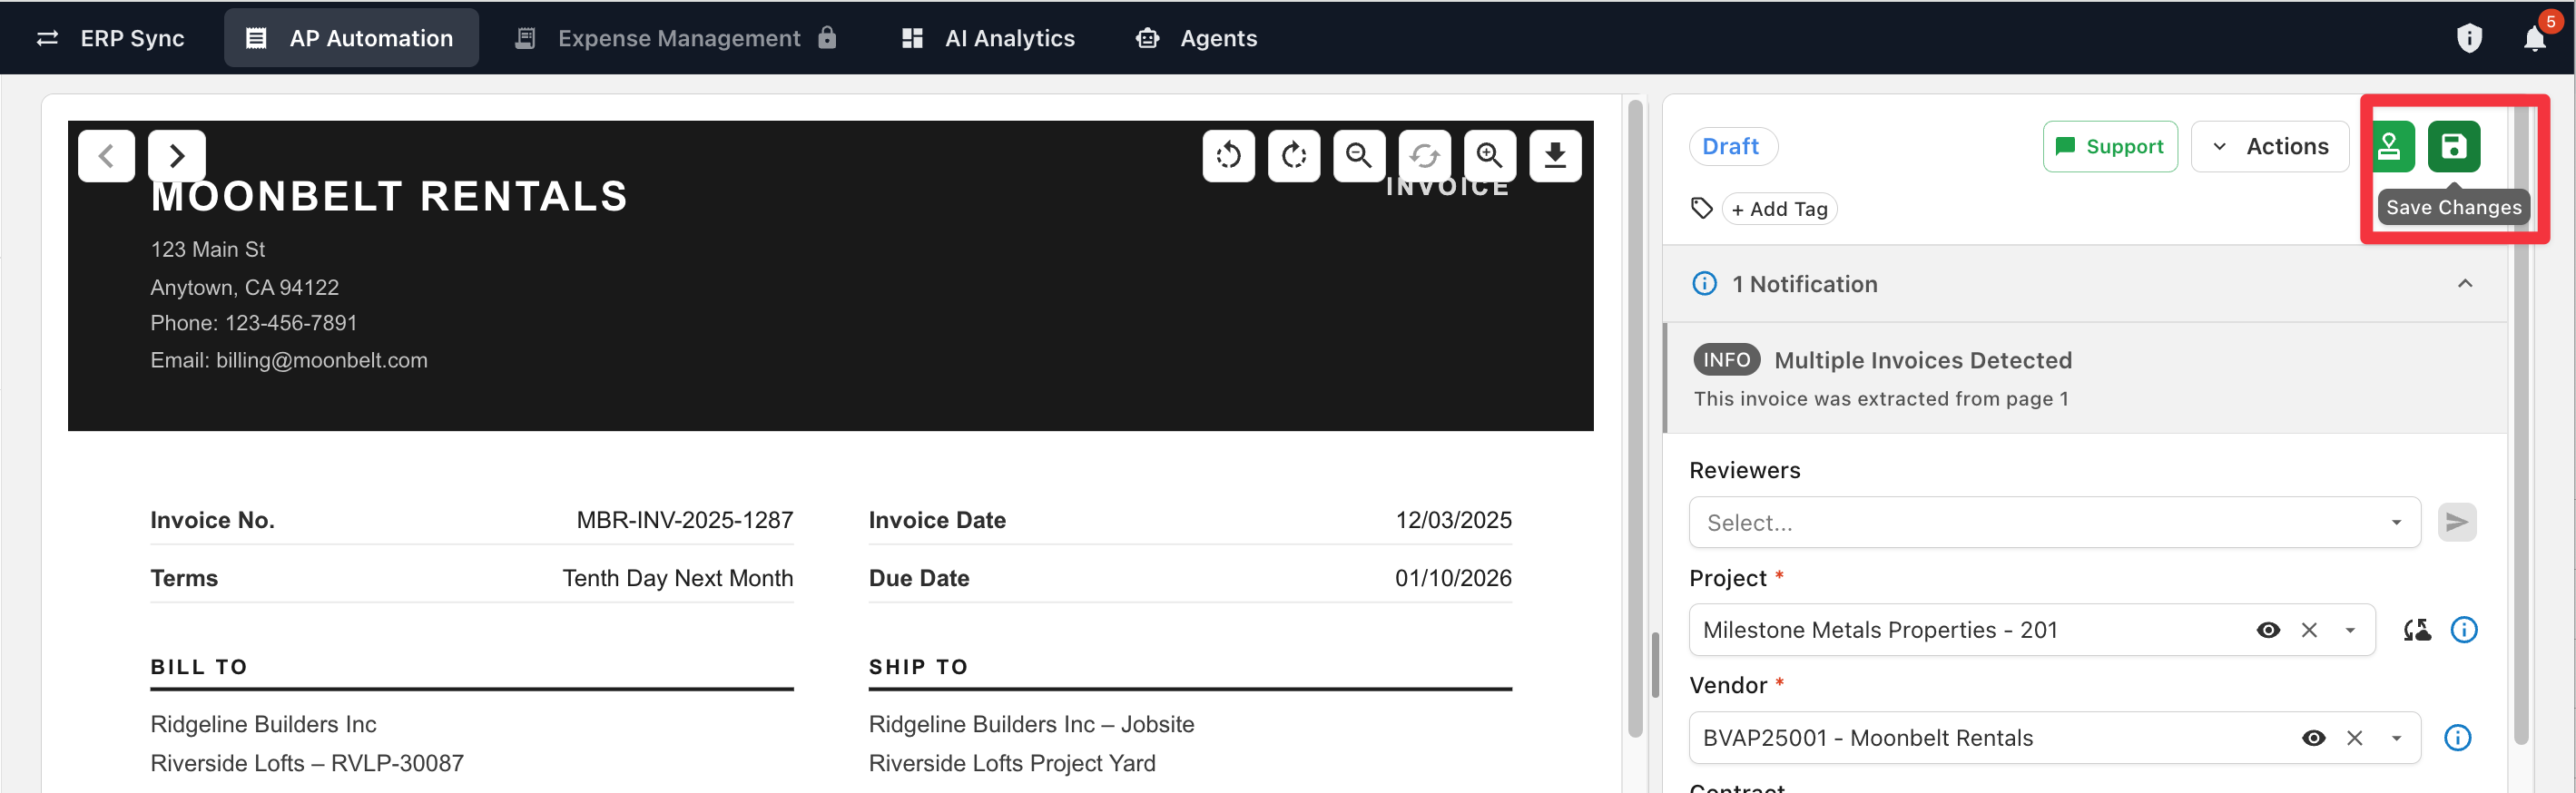
Use the disk icon in the action bar (Save Changes) to keep coding edits without approving or rejecting.
Frequently asked questions
Why can’t I approve? Required fields are still empty. Hover the approve control to see what’s missing, finish coding, then try again.
Do I need a comment to approve? No. Comments are optional on approve and required on reject.
What’s the difference between To Review and In Review? To Review is your personal queue tab (assigned to you). In Review is the status (and a separate tab) for invoices waiting on any reviewer.
What if I approved the wrong invoice? Contact your AP admin. Admins can restart the flow.
Related guides
- Working with Invoice Documents: Coding tools and document actions on the invoice page
- Approval Workflow: Intake through ERP sync
- Header Field Coding: Project, Vendor, and Contract matching
- Line Item Coding: How line items are built and matched