Uploading an Invoice
This guide is for AP clerks and admins who need to add an invoice file that did not arrive through email forwarding. Use Upload Invoice on the Inbox.
Most invoices should still come in through your forwarding rule. See Email Forwarding Setup.
Step 1: Open Upload Invoice
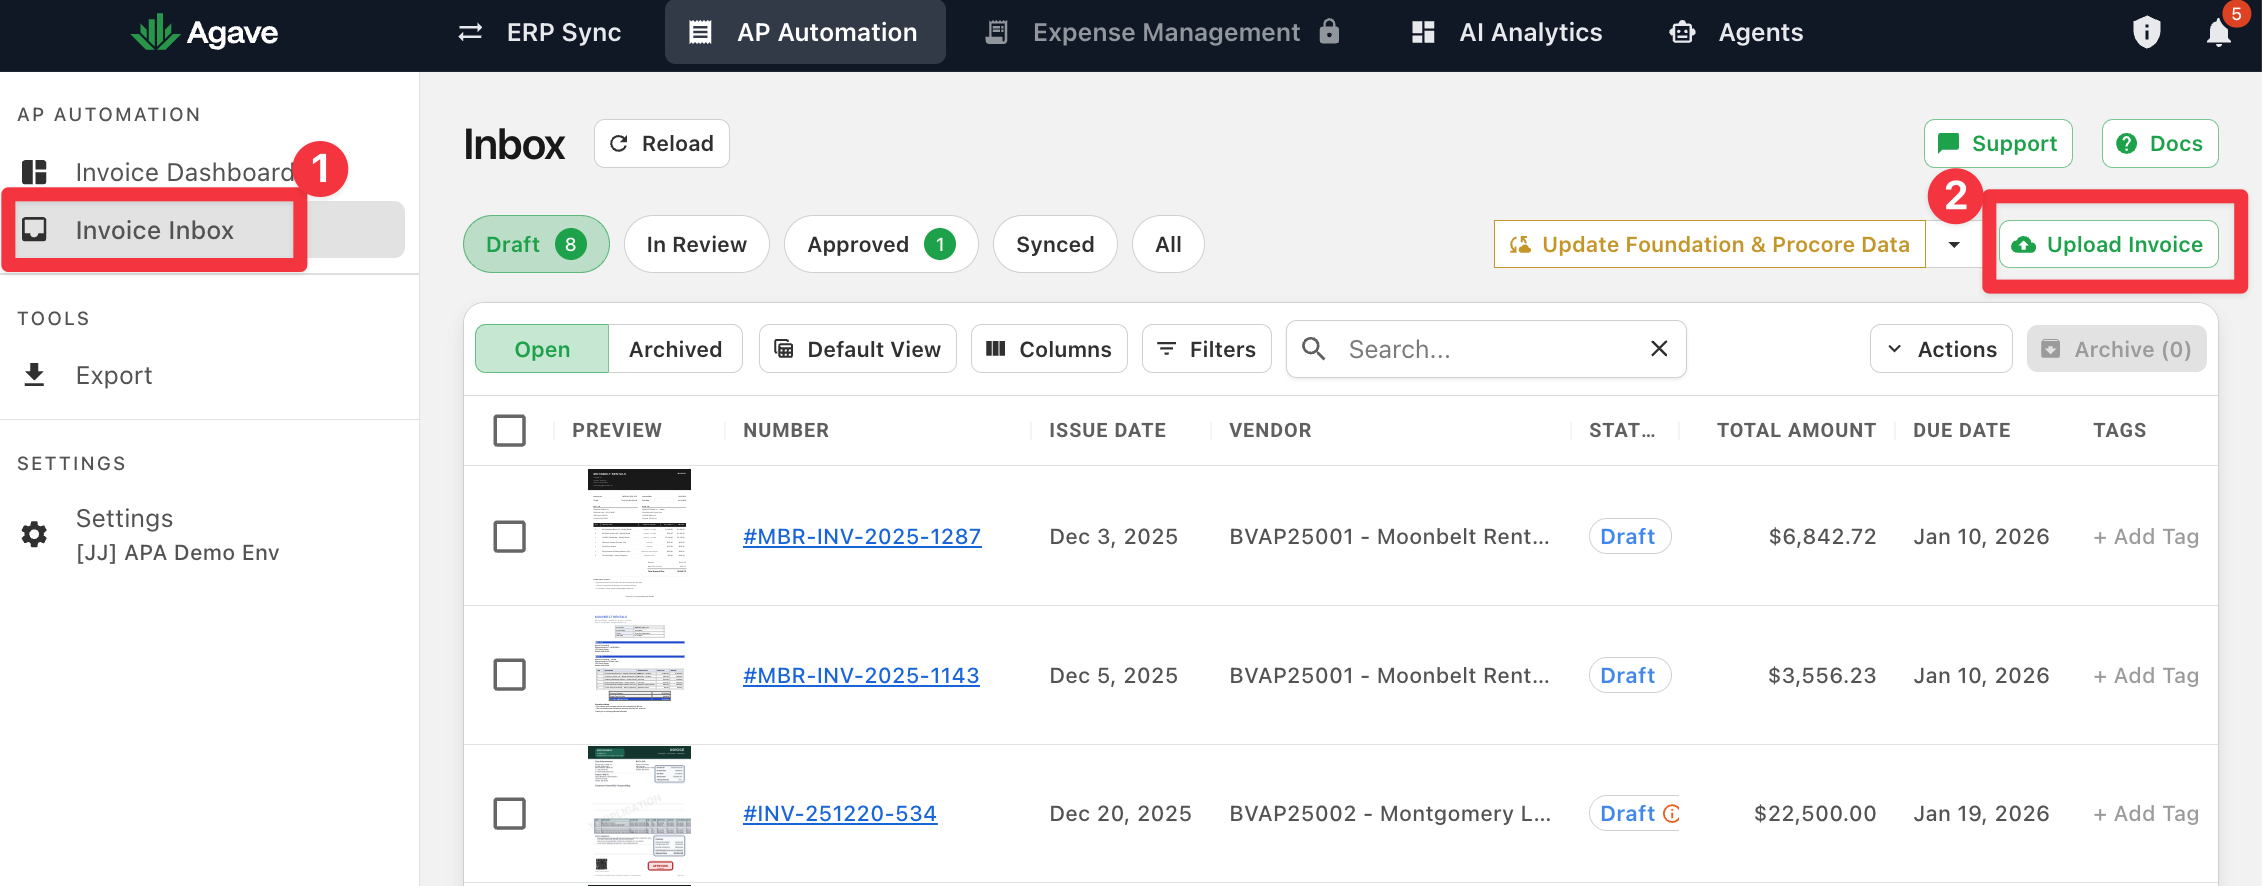
- Open AP Automation and go to Invoice Inbox.
- Click Upload Invoice in the top-right of the Inbox (next to Update Data).
Step 2: Choose the file
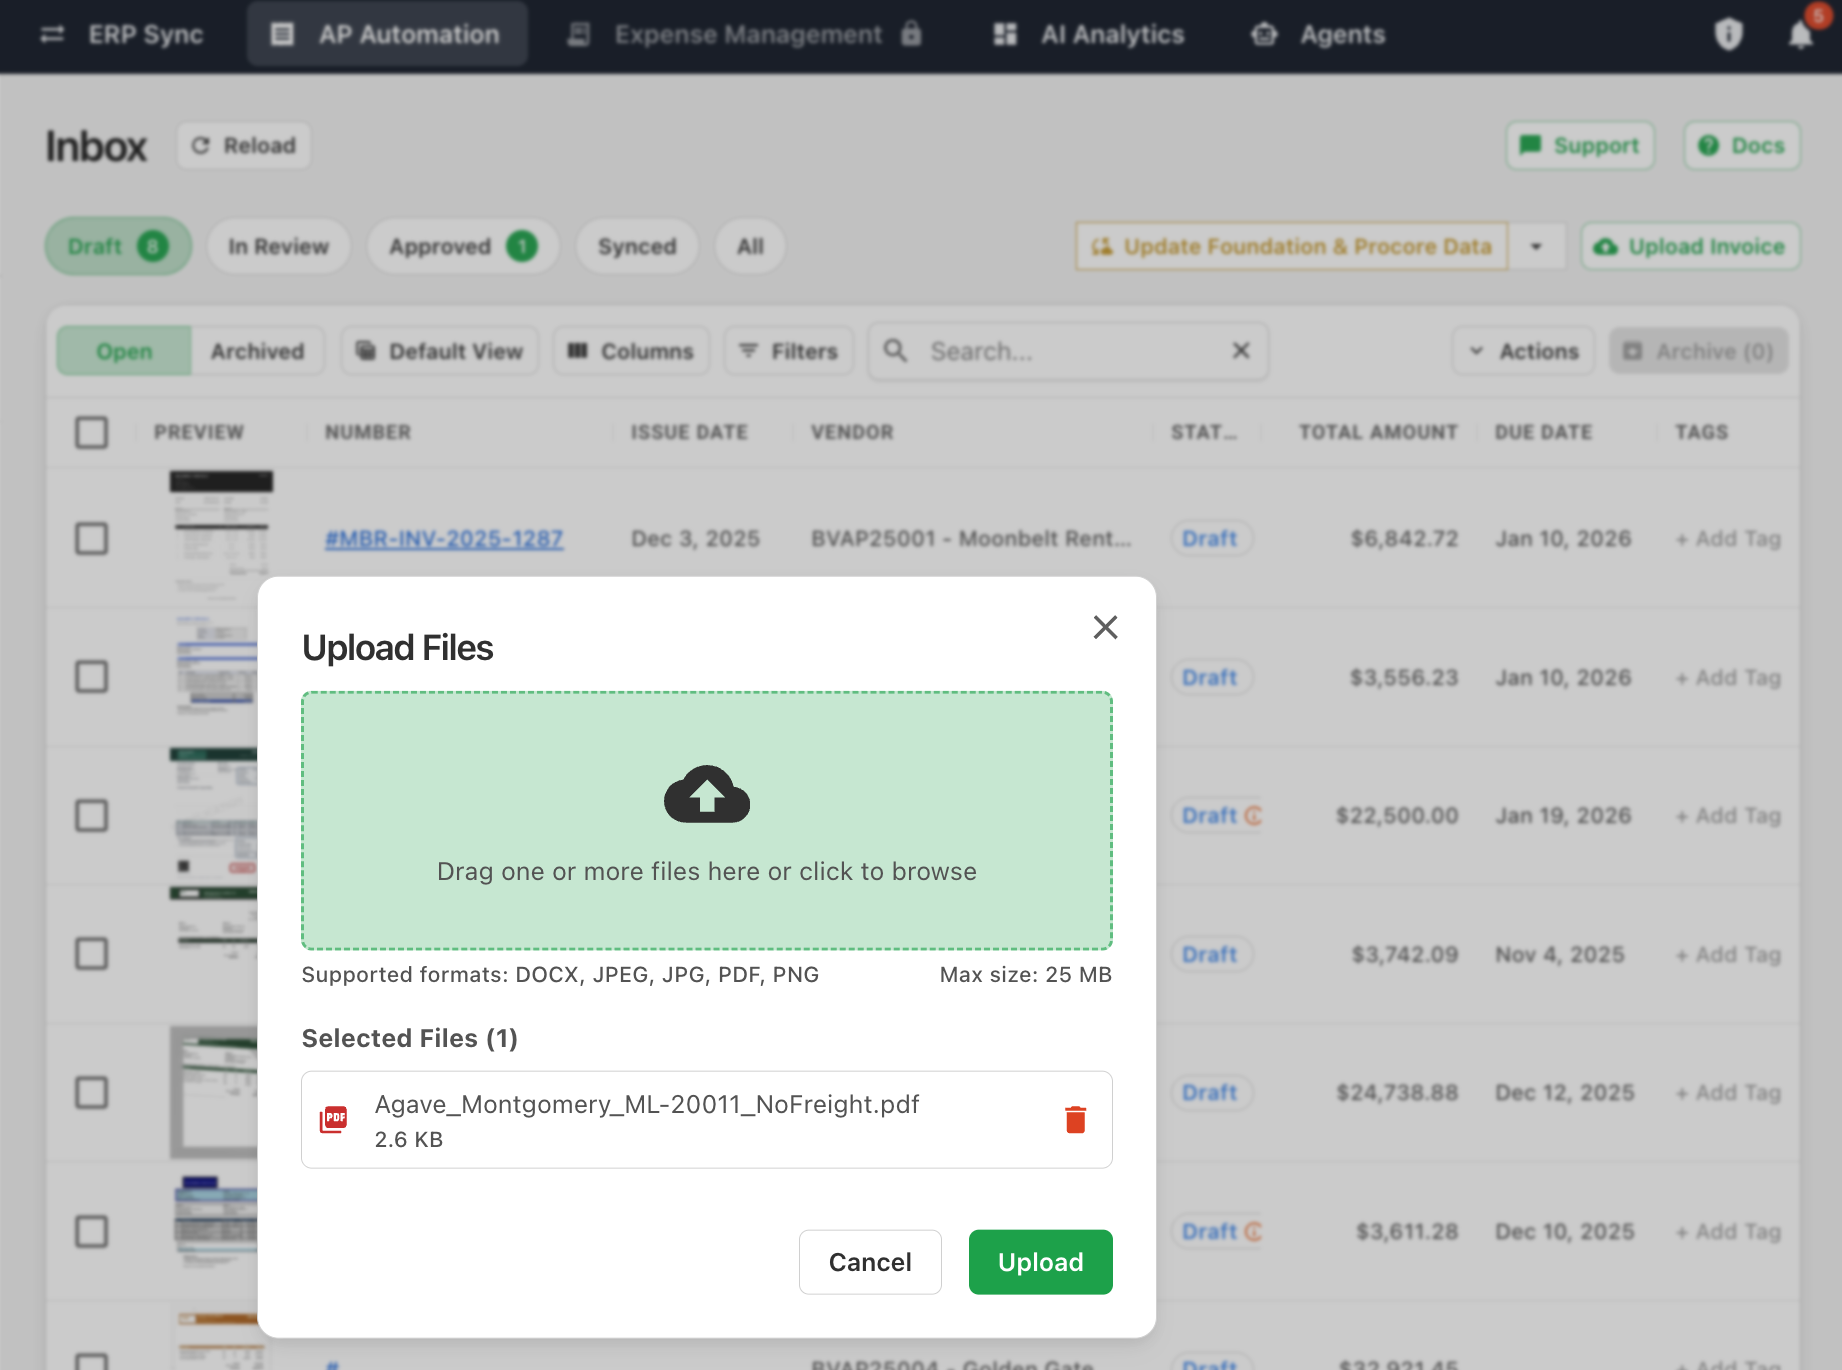
- In the Upload Files dialog, drag files into the drop zone or click to browse.
- Use a supported format. Max size is 25 MB. You can select more than one file in the same upload. See Supported File Formats for the full list.
- Optional: if delivery tickets are enabled for your company, check Upload as delivery ticket when the file is a ticket instead of an invoice.
- Click Upload.
Step 3: Find the invoice after upload
- Open the Draft tab (or All) on the Inbox.
- Click Reload if the new row is not visible yet.
- Open the invoice by Number to review coding.
From here, an admin typically sends the invoice for review. Reviewers then use Reviewing and Approving Invoices.
Related guides
- Email Forwarding Setup: Preferred intake path for most invoices
- Reviewing and Approving Invoices: Find, approve, and reject
- Working with Invoice Documents: Coding tools on the invoice page