Creating and Saving Inbox Views
This guide is for anyone who works in the Invoice Inbox (reviewers, AP clerks, and admins). Use a saved view when you keep rebuilding the same filters, grouping, or sort. Save it once, then switch back anytime from the view selector.
The selector sits in the Inbox toolbar and shows the name of the view you have open (for example Default View or Group by Vendor).
Before you start
A custom view stores:
- Filters from the Filters panel
- Row grouping (for example by Project or Vendor)
- Column sorting
It does not store which status tab you are on (Draft, To Review, In Review, Approved, Synced, All). Pick the tab you need, then switch views.
Step 1: Open the view selector
- Open AP Automation and go to Invoice Inbox.
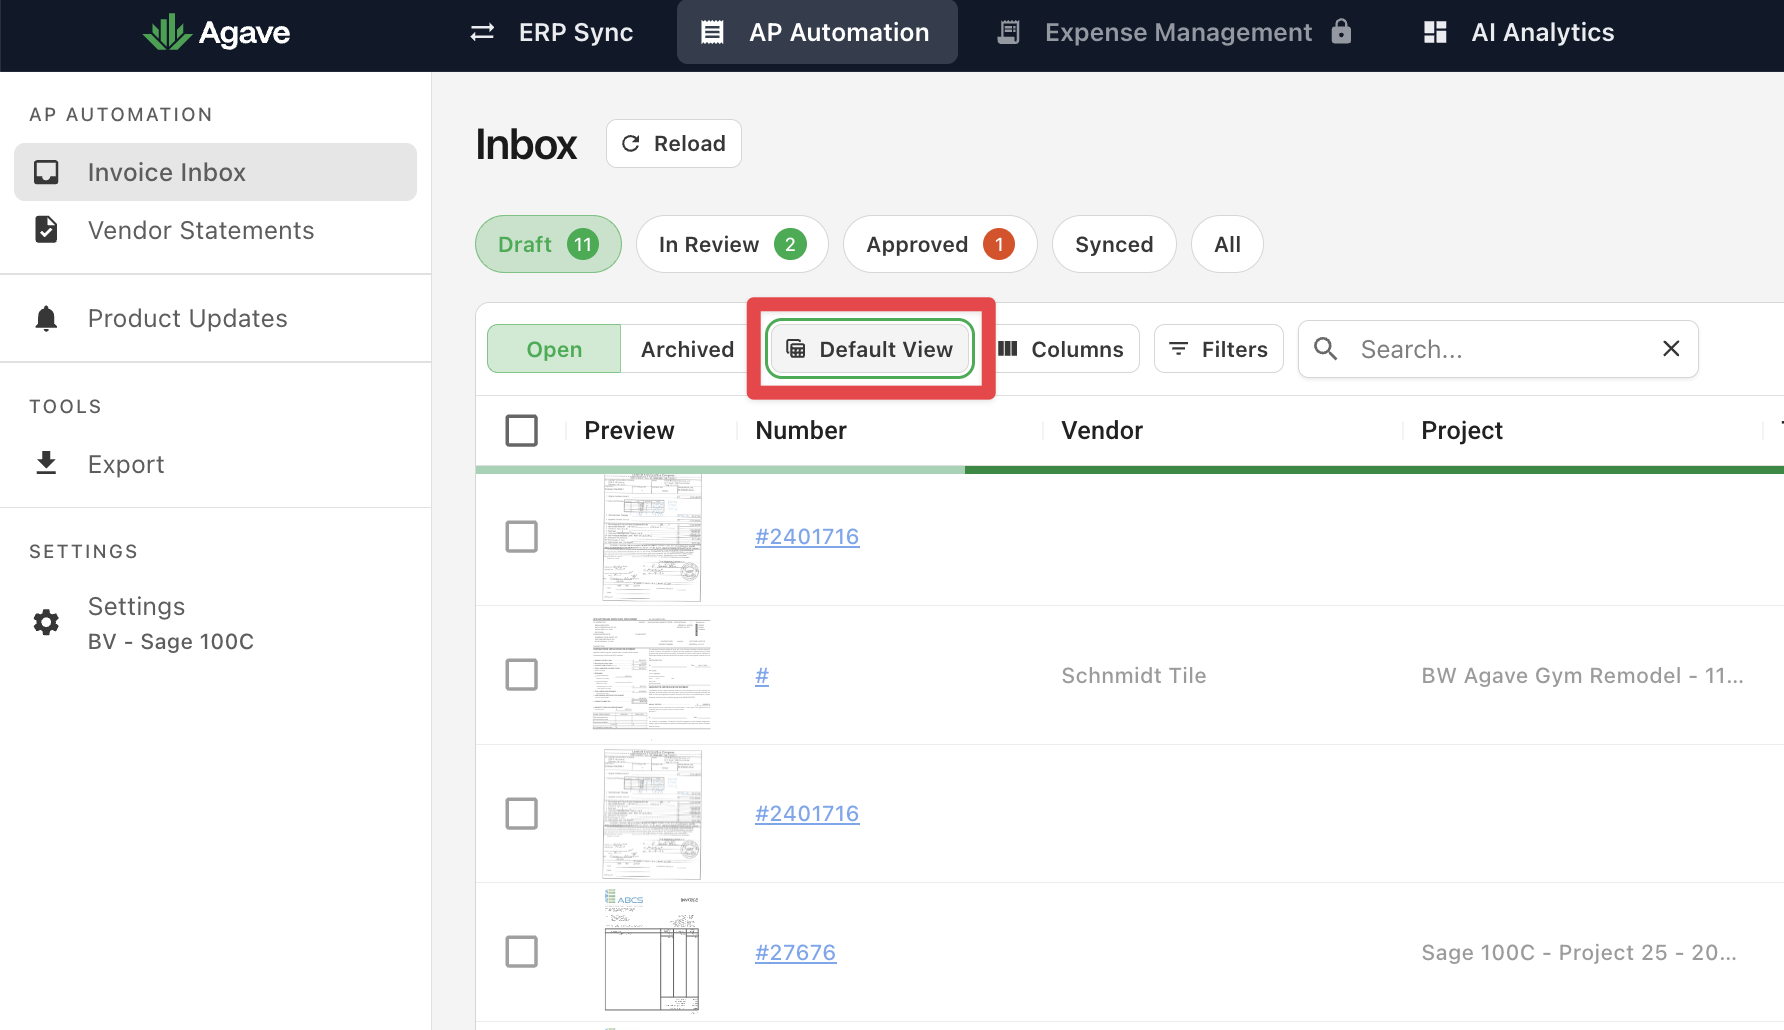
- In the toolbar (near Columns and Filters), click the view selector. It shows the current view name.
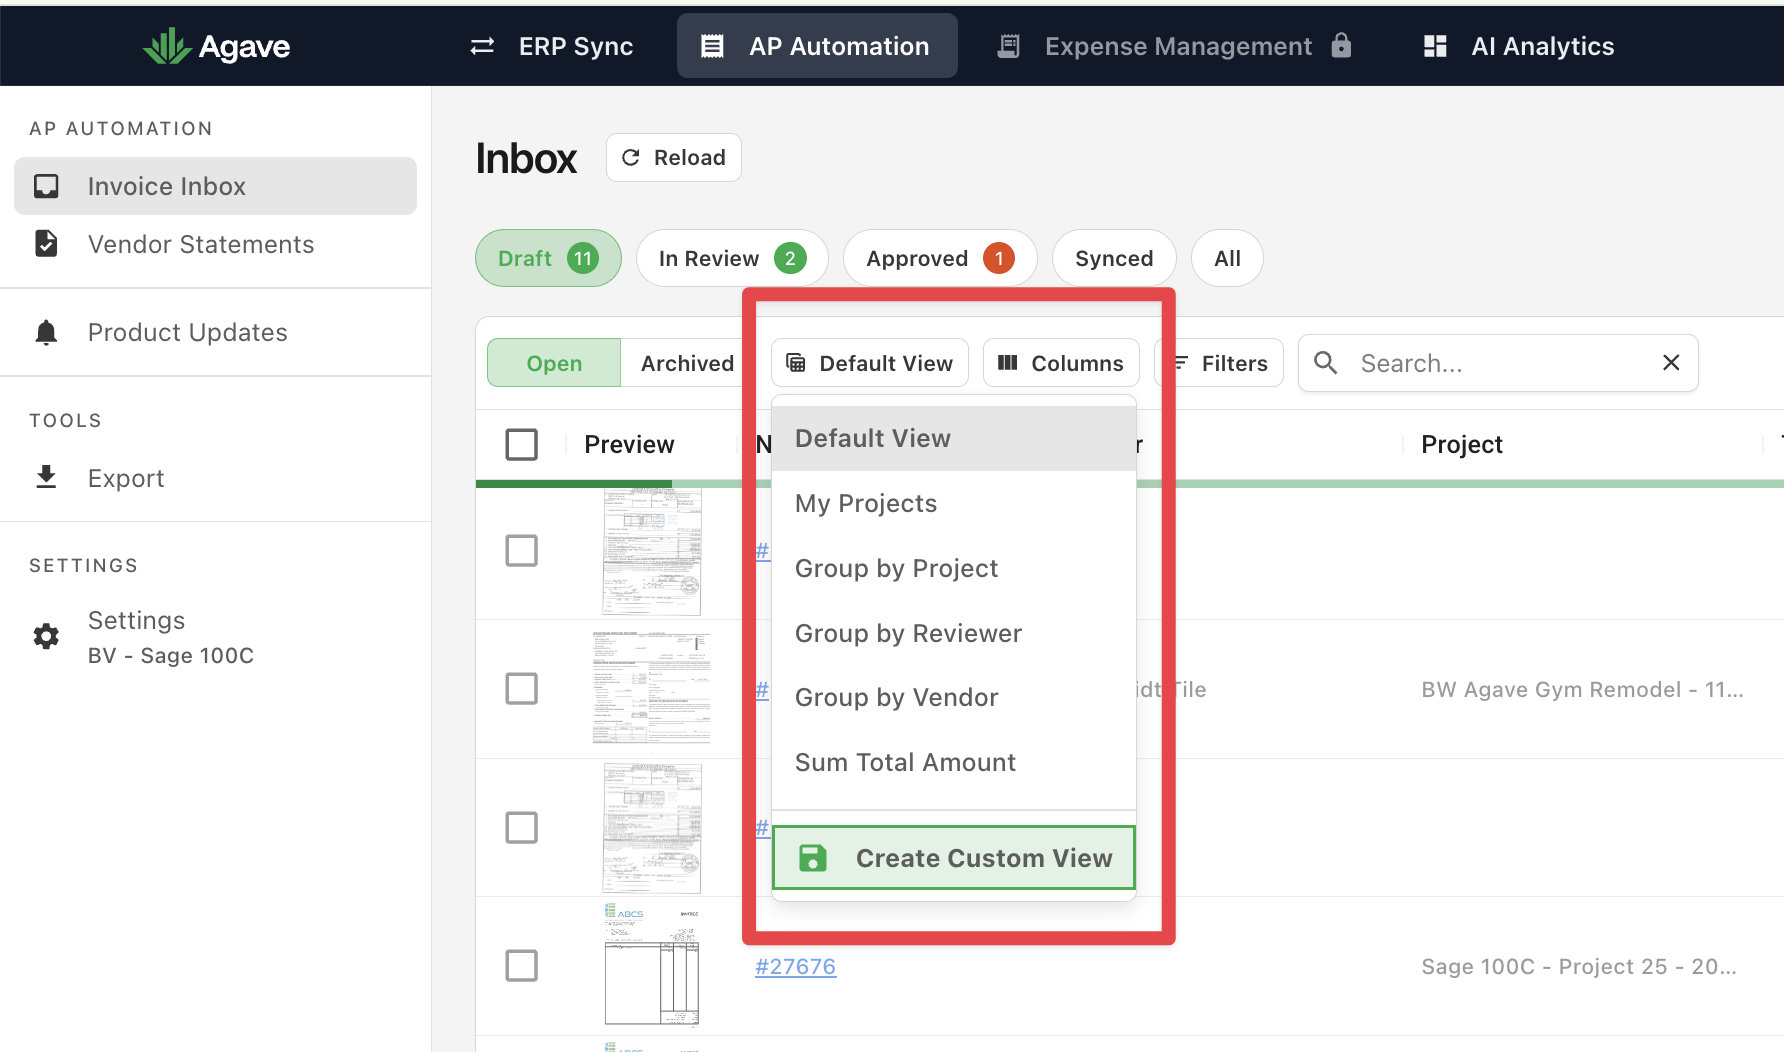
- Open the menu. Built-in views are listed first. Custom views appear below a divider when your team has any saved. At the bottom, Create Custom View starts a new save.
Step 2: Start from a built-in view (optional)
Built-in views are a fast starting point. Everyone on the account sees the same list.
| View | What it does |
|---|---|
| Default View | Standard Inbox list with no extra grouping or filters from a view |
| My Projects | Limits the Inbox to projects you are on |
| Group by Project | Groups rows by Project |
| Group by Reviewer | Groups rows by reviewer |
| Group by Vendor | Groups rows by Vendor |
| Sum Total Amount | Adds a sum on Total Amount at the bottom of the list |
Pick one (for example My Projects or Group by Vendor), then add filters or sort in the next step if you need a tighter slice.
Step 3: Set filters, grouping, or sort
You need at least one of these before you can create a custom view. Create Custom View stays disabled until something is customized.
Filters
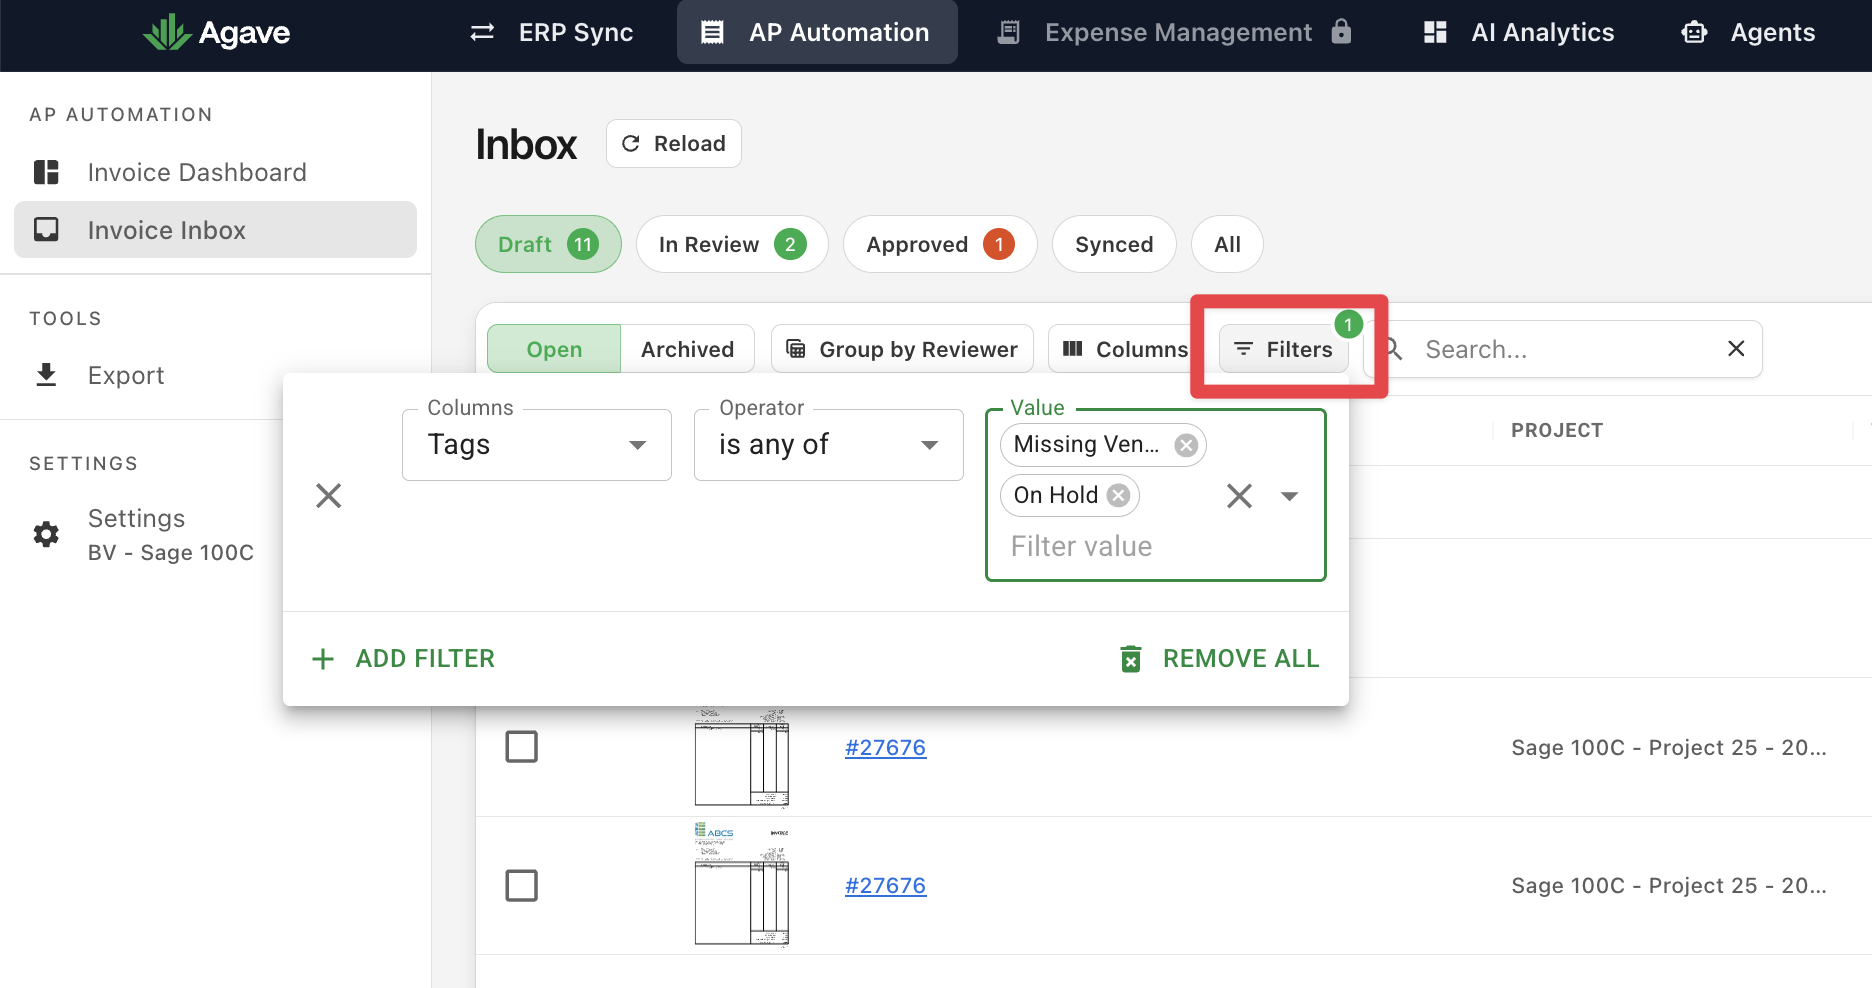
- Click Filters in the Inbox toolbar.
- Add rules on columns such as Vendor, Project, Number, Issue Date, Due Date, Total Amount, or Tags.
- When filters are on, Filters shows a count badge.
Status is not a filter inside this panel. Use the tabs across the top of the Inbox instead.
Grouping and sort
- To group: choose a built-in Group by… view, or group from the table column menu if your account uses that control.
- To sort: click a column header (for example Total Amount or Due Date) until the sort direction you want is active.
You can also use Columns to show or hide fields.
Step 4: Create a custom view
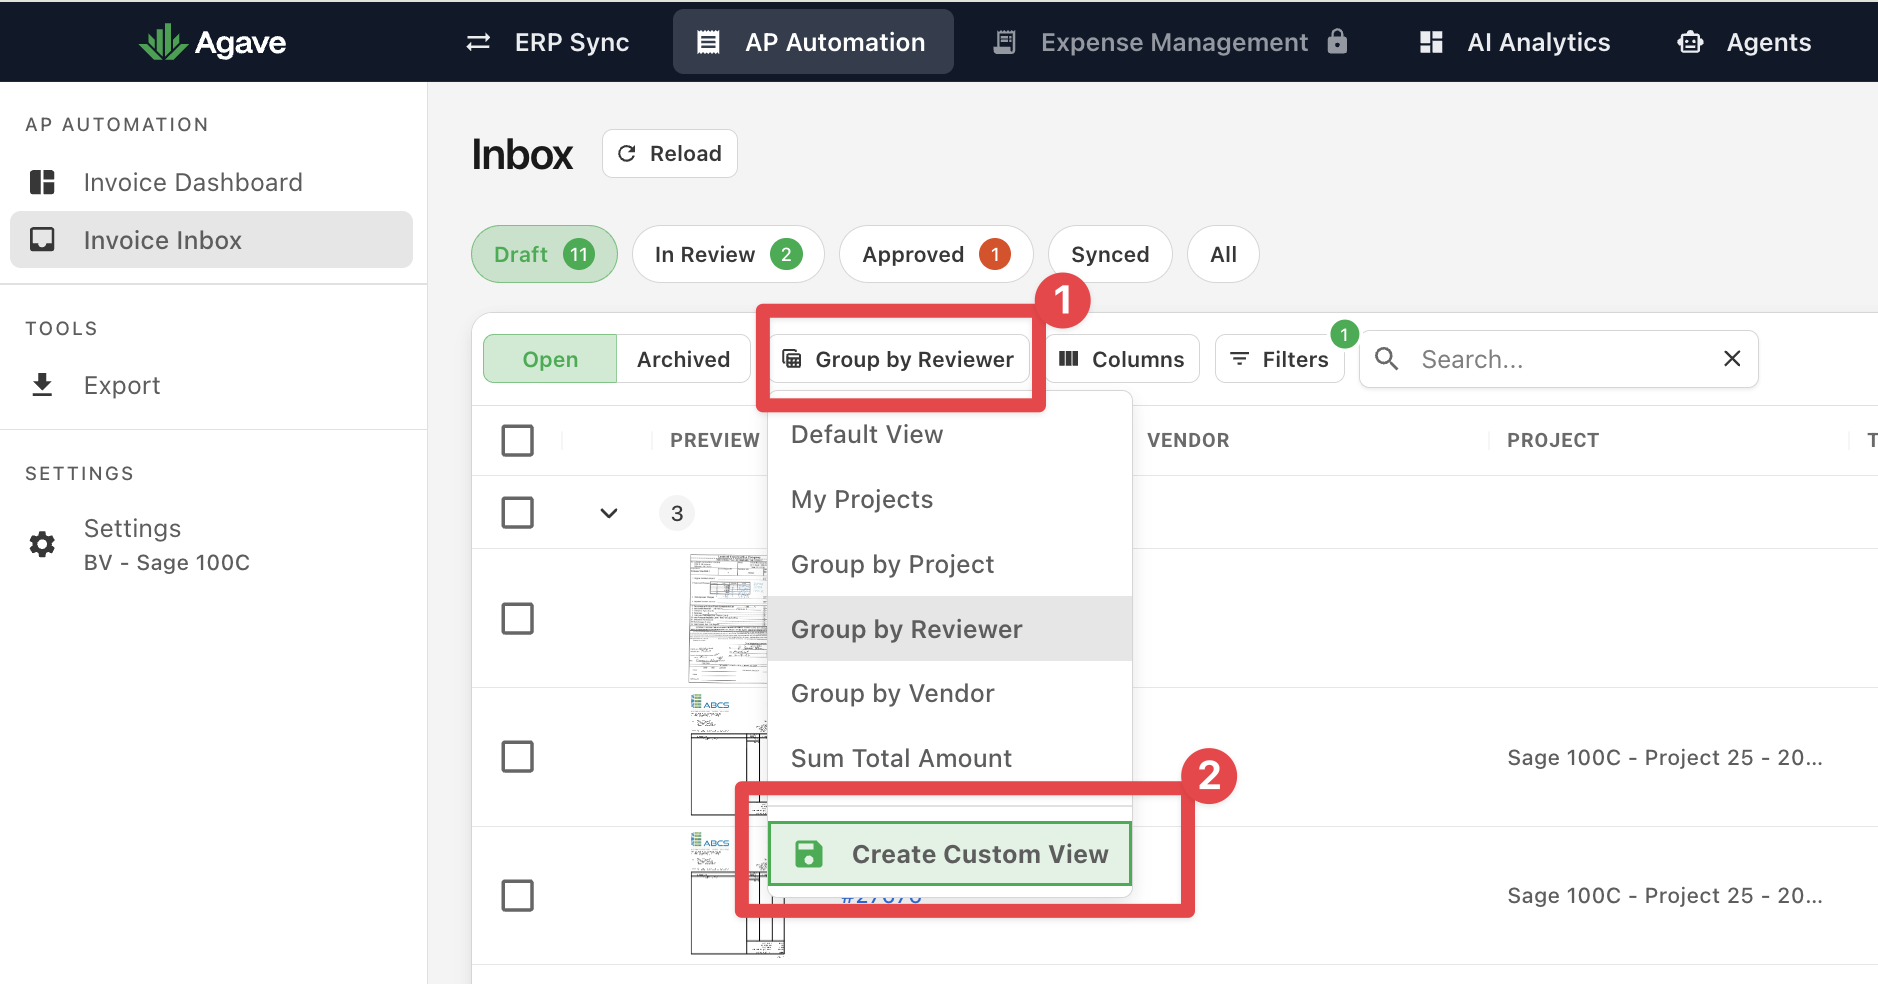
- With your filters, grouping, and/or sort in place, open the view selector.
- Click Create Custom View.
- In the Create New Saved View dialog:
- Review the summary of Grouping, Filters, and Sorting (shown when each applies).
- Enter a View Name (for example
High-value POsorMissing Vendor / On Hold).
- Click Save. Click Cancel to close without saving.
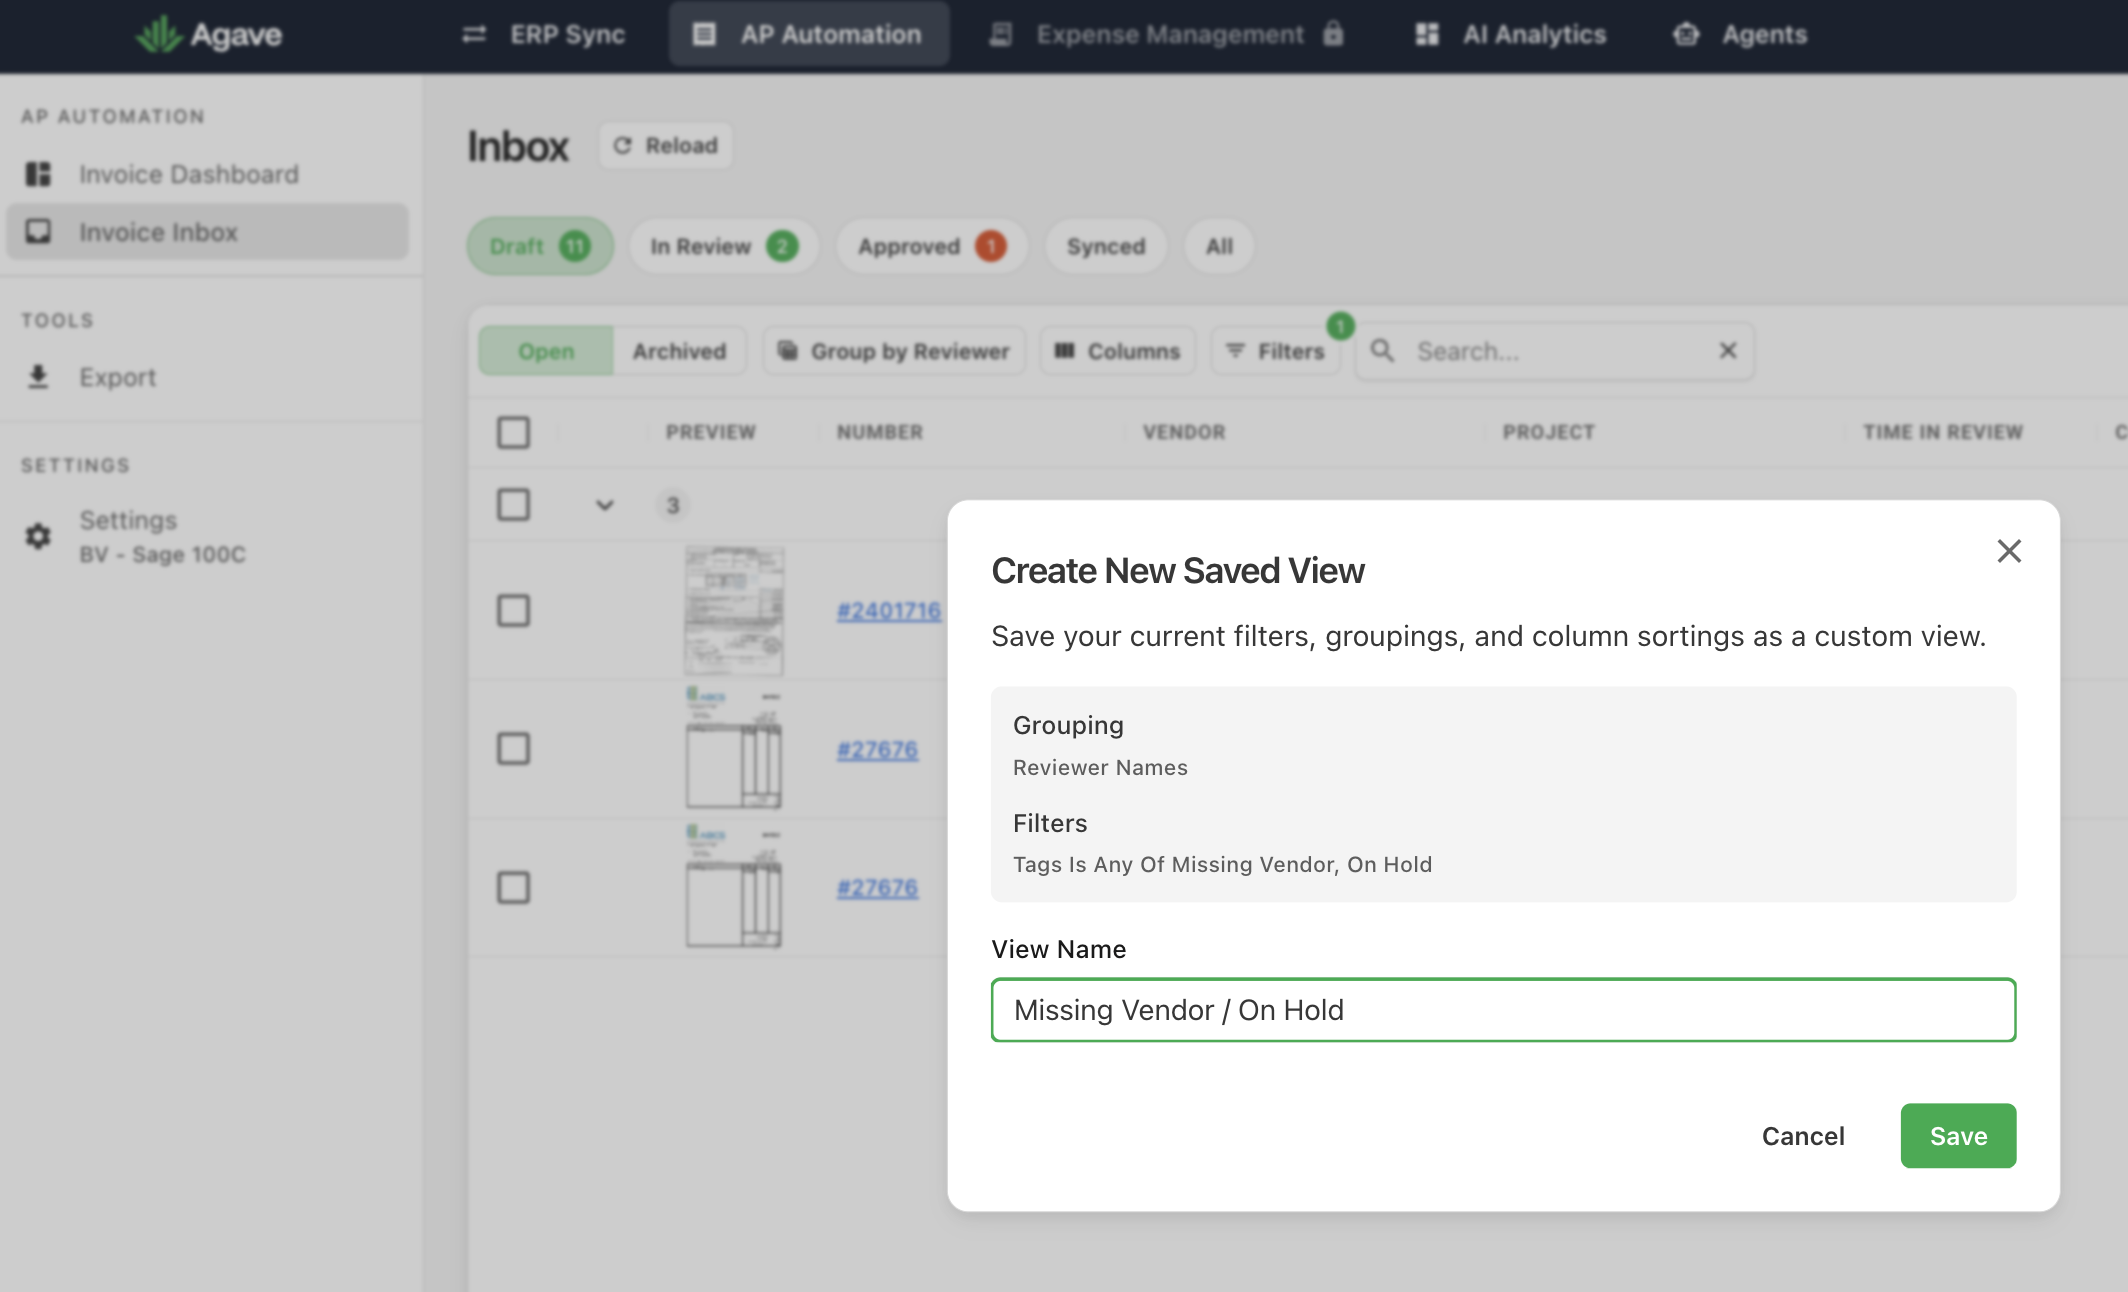
After save, Agave switches you to the new view right away. It appears in the selector under the built-in list.
If that name is already used, you will see A view with this name already exists. Pick a different name.
Step 5: Switch, update, or delete a view
Switch views
Open the view selector and click another view. The Inbox applies that view’s filters, grouping, and sort. Your status tab stays where it was.
Update a custom view
- Select the custom view.
- Change filters, grouping, or sort.
- When there are unsaved changes, a save icon appears next to the selector. Hover it for Save changes to this view, then click it.
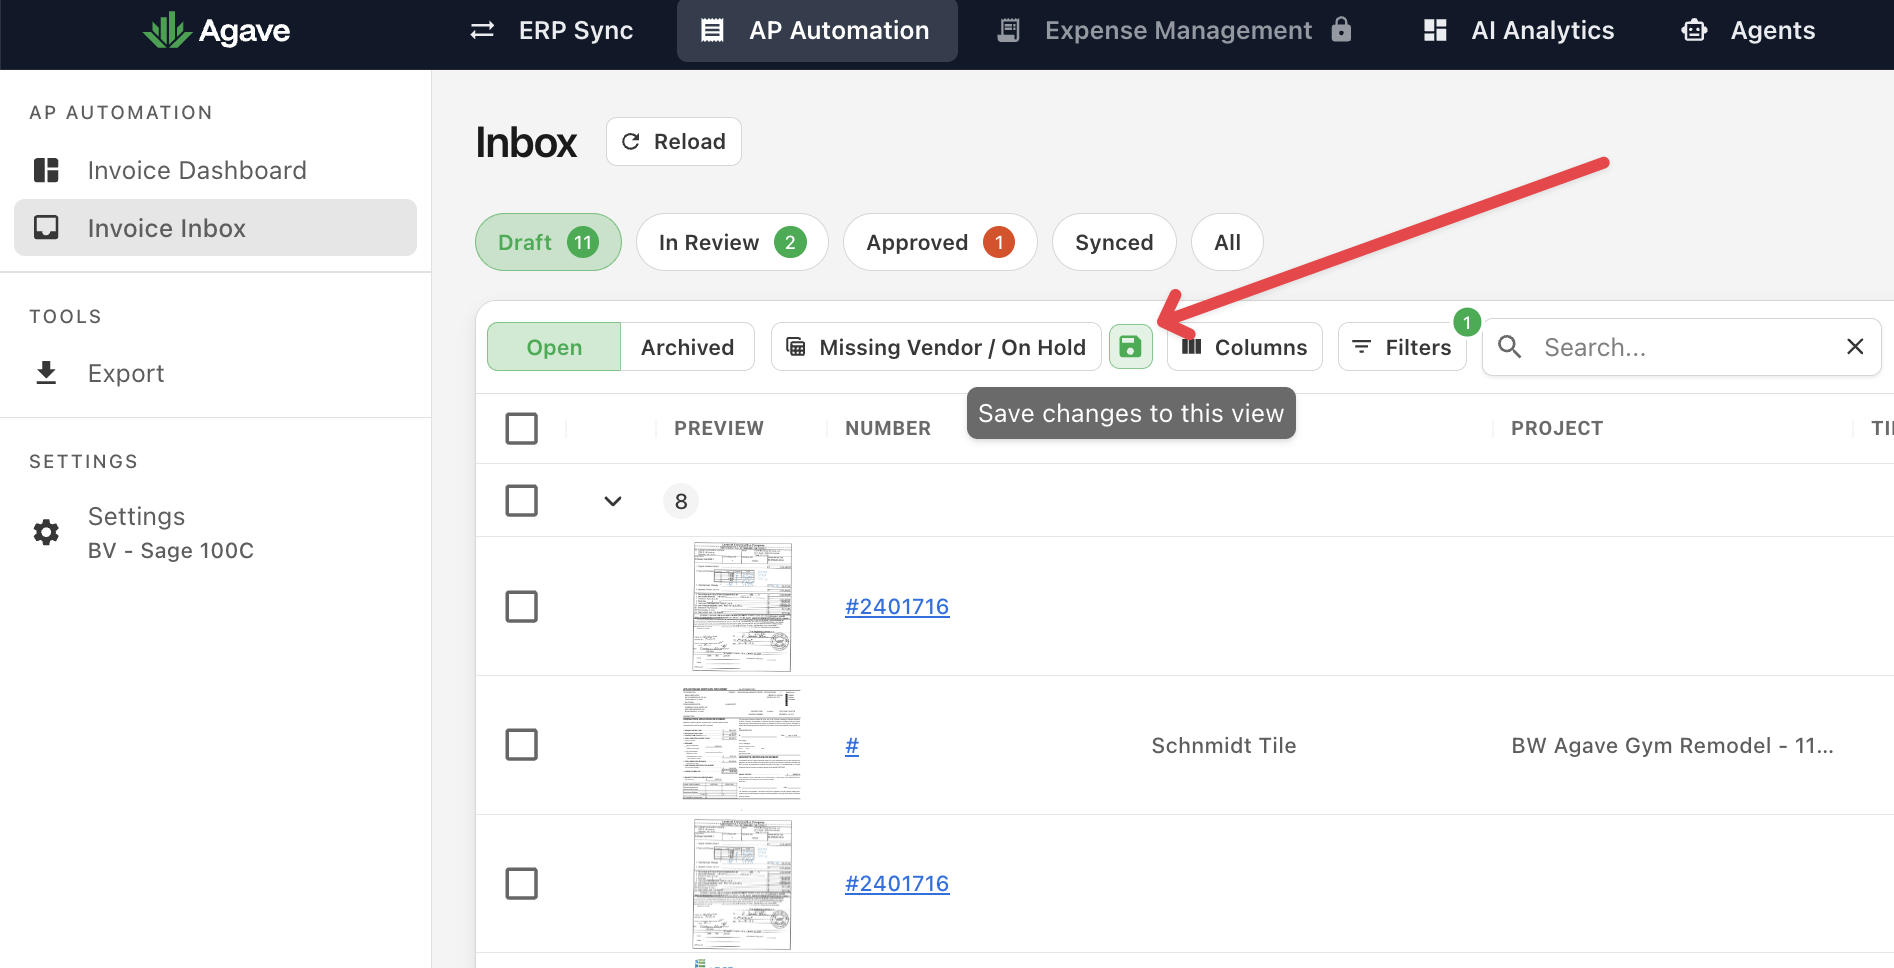
Built-in views cannot be overwritten. To keep a variant of a built-in layout, use Create Custom View instead.
Delete a custom view
- Open the view selector.
- Click the trash icon next to the custom view (not on a built-in view).
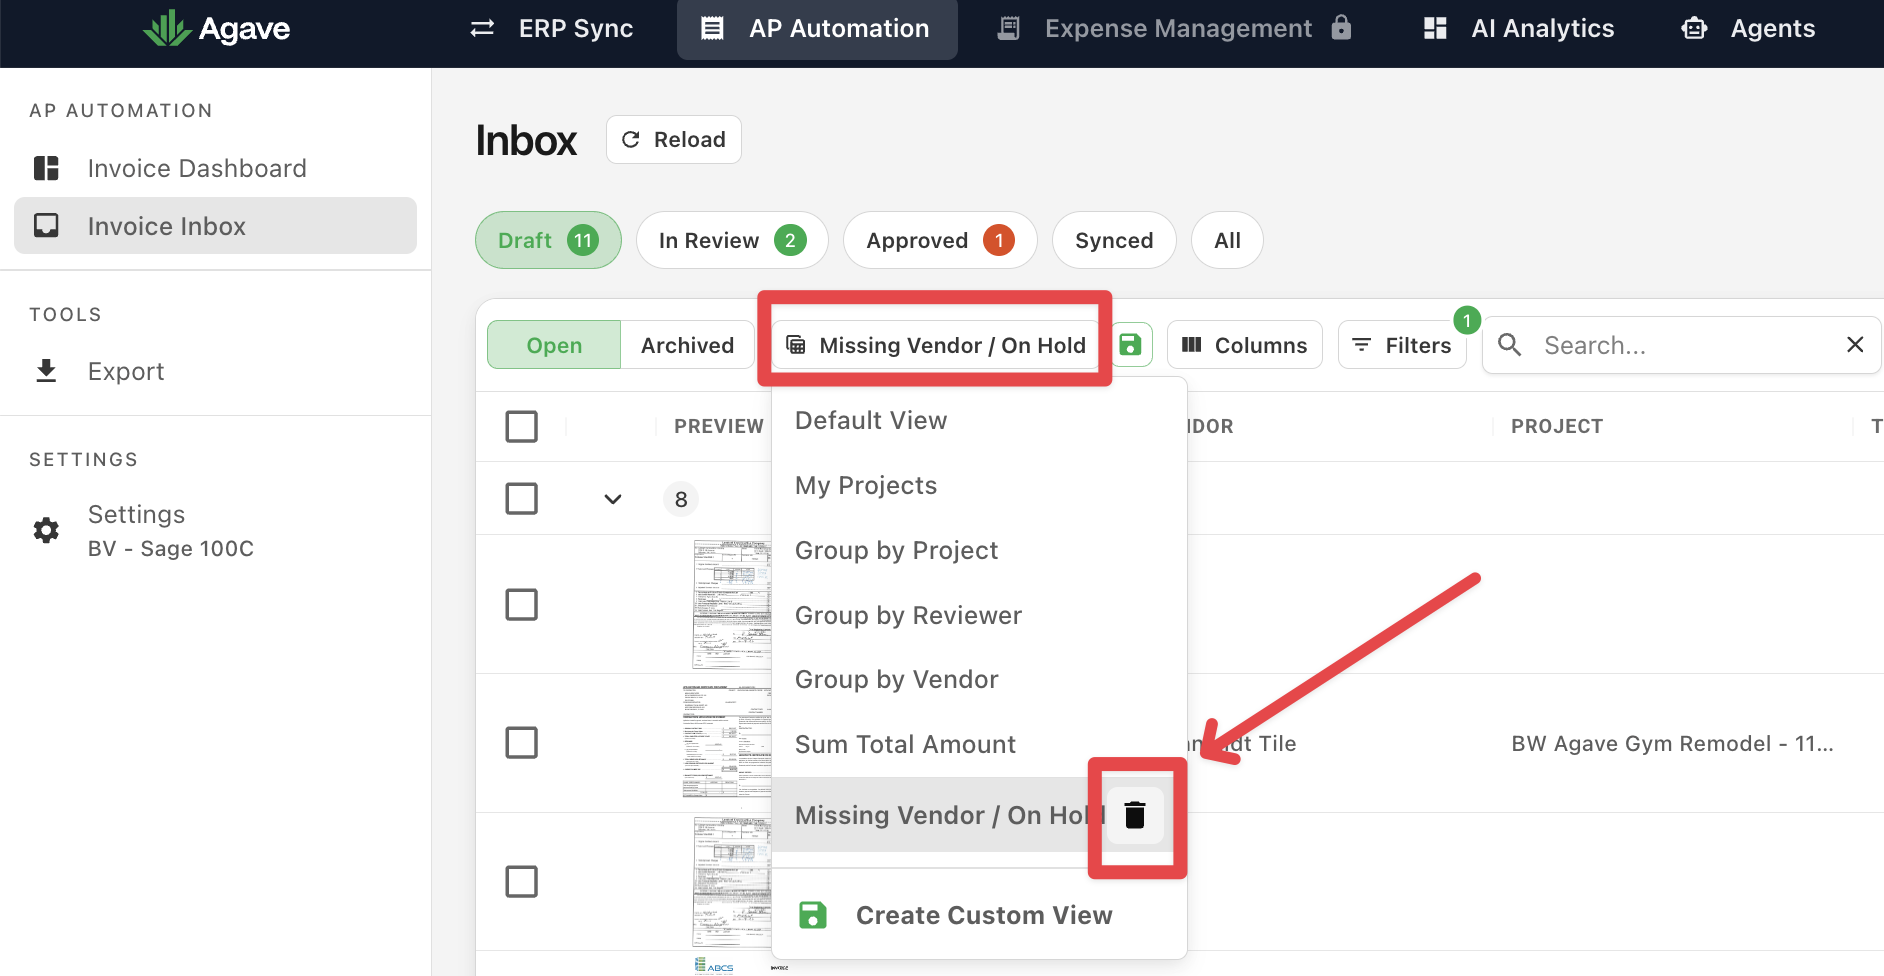
- In the Confirm Delete dialog, click Delete. Click Cancel to keep it.
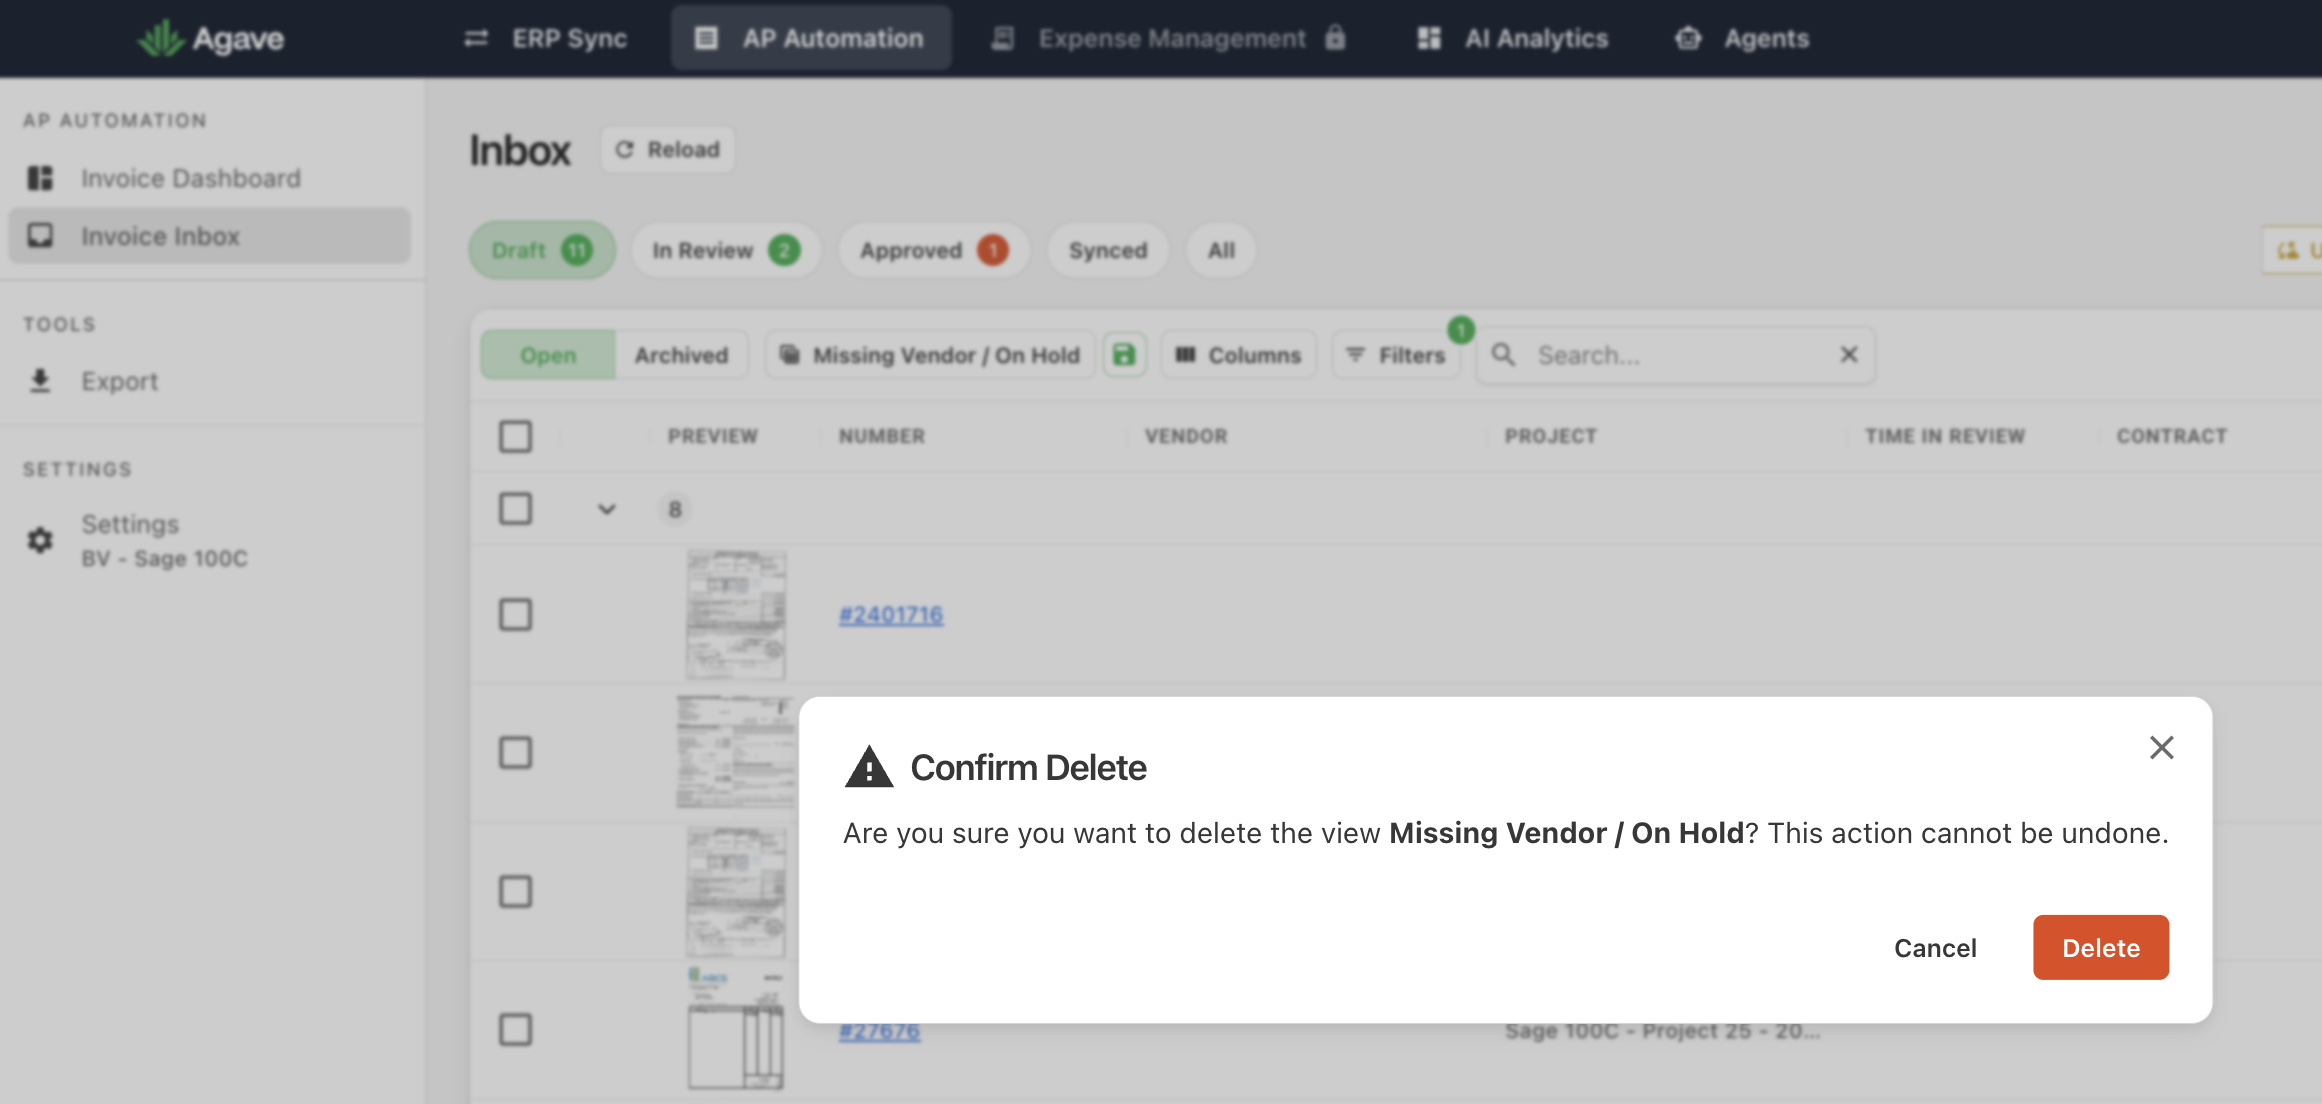
Deleting cannot be undone. If you delete the view you currently have open, the Inbox returns to Default View.
Custom views are shared for your AP Automation configuration. If you delete a view, teammates lose it too. Use clear names so everyone knows what each view is for.
Example setups
| Goal | How to set it up |
|---|---|
| High-value queue | Filter Total Amount above your threshold, sort by Total Amount, then Create Custom View |
| Month-end by vendor | Select Group by Vendor (optionally Sum Total Amount), then save |
| Everyday reviewer slice | Start from My Projects, add Group by Project or a vendor filter, then save |
Stay on To Review while you use these views if you only want invoices waiting on you.
Frequently asked questions
Why is Create Custom View grayed out? Add at least one filter, grouping, or column sort first. Opening Default View alone is not enough.
Does a view remember To Review vs Approved? No. Status tabs stay separate from saved views. Pick the tab you need, then switch views.
Why did my columns look different after I switched views? Column show/hide is per person, not part of the view. Open Columns once and set the layout you want.
Can I remove a teammate’s view from my list only? No. Deleting a custom view removes it for everyone on the configuration.
Can I rename a view? Create a new custom view with the name you want, then delete the old one if you no longer need it.
Related guides
- Reviewing and Approving Invoices: Work your To Review queue
- Working with Invoice Documents: Coding and document actions on an open invoice
- Uploading an Invoice: Manual intake into the Inbox