Accounting/ERP System Connection
Agave connects to your accounting/ERP system to automatically code your invoices and export them upon approval. Follow this guide to set up these connection.
Step 1: Log into Agave
You will receive an invite email from support@agaveapi.com when your Agave account is provisioned. Follow the activation/password reset flow and sign into Agave.
Upon login, select "AP Automation" from the welcome page to launch the tool:
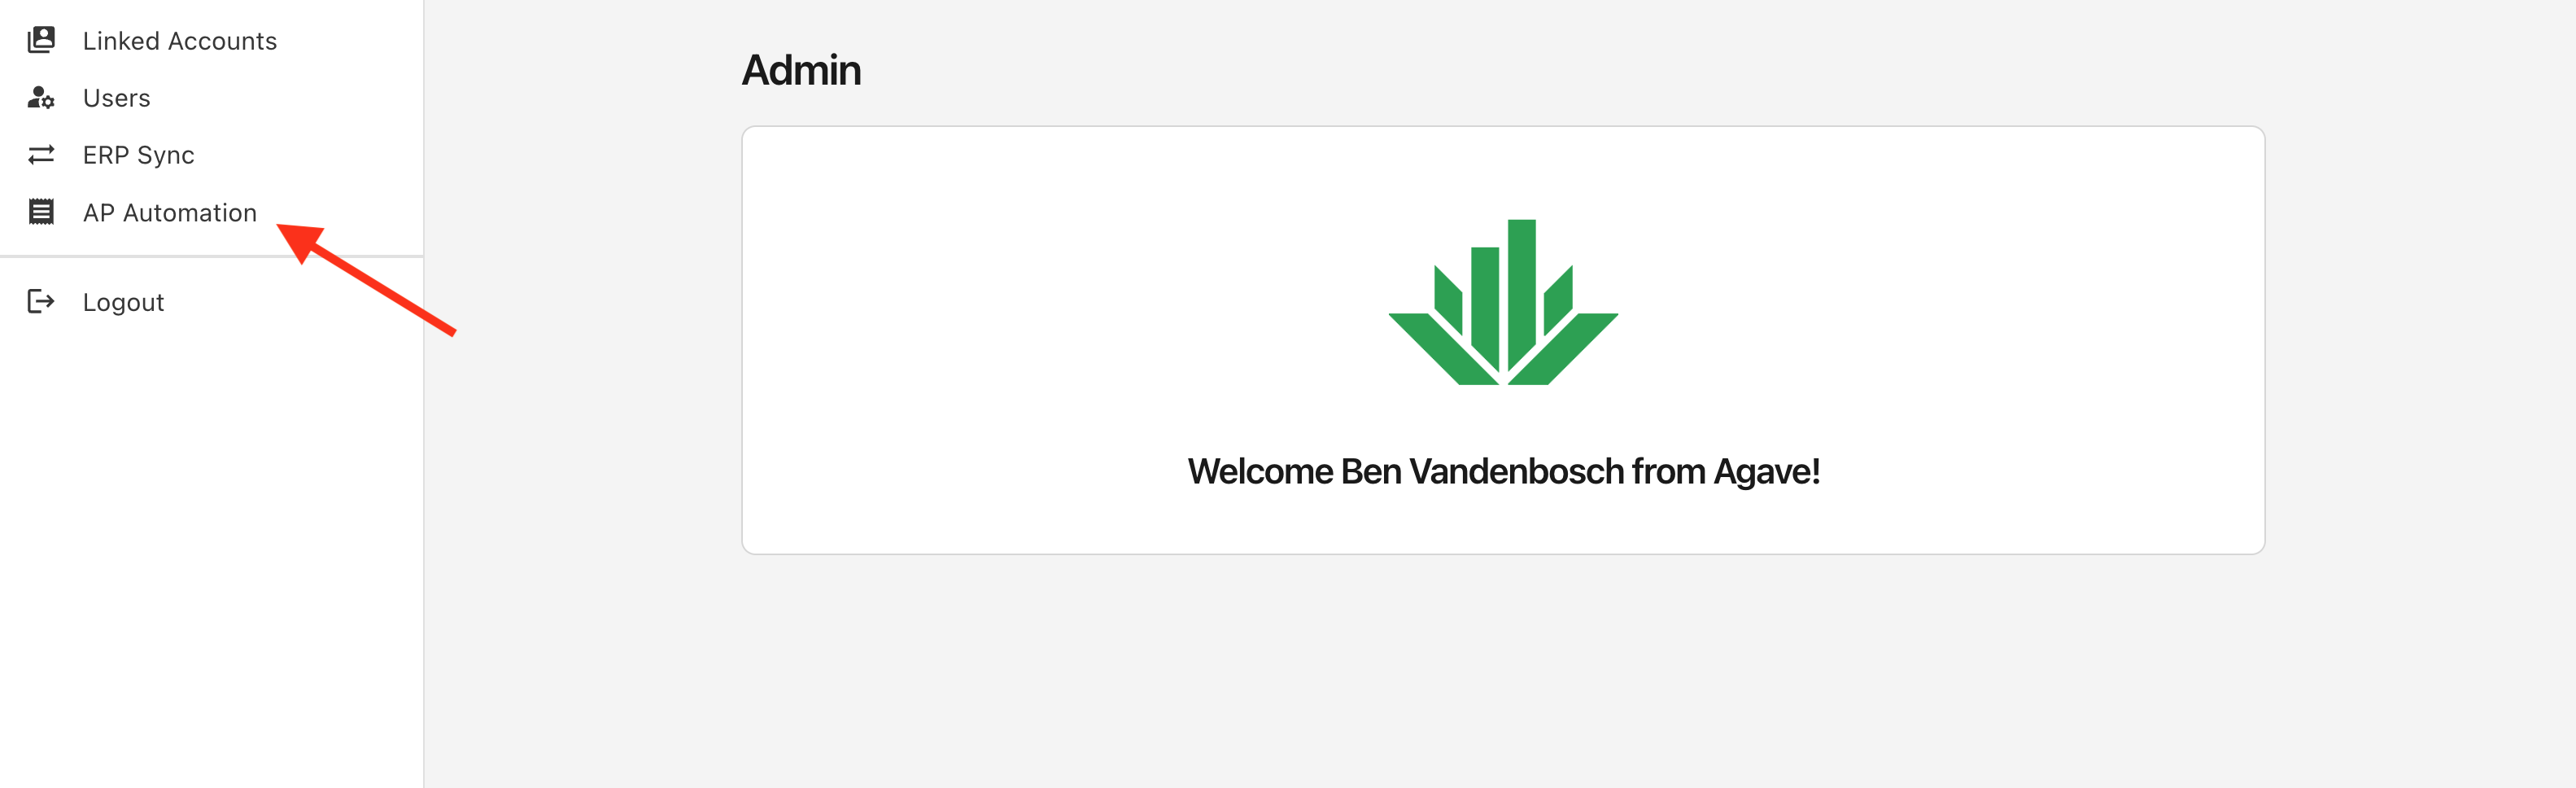
If you have trouble signing in or do not see the "AP Automation" sidebar option, reach out to your account manager or support@useagave.com.
Step 2: Connect Your Accounting System (Required)
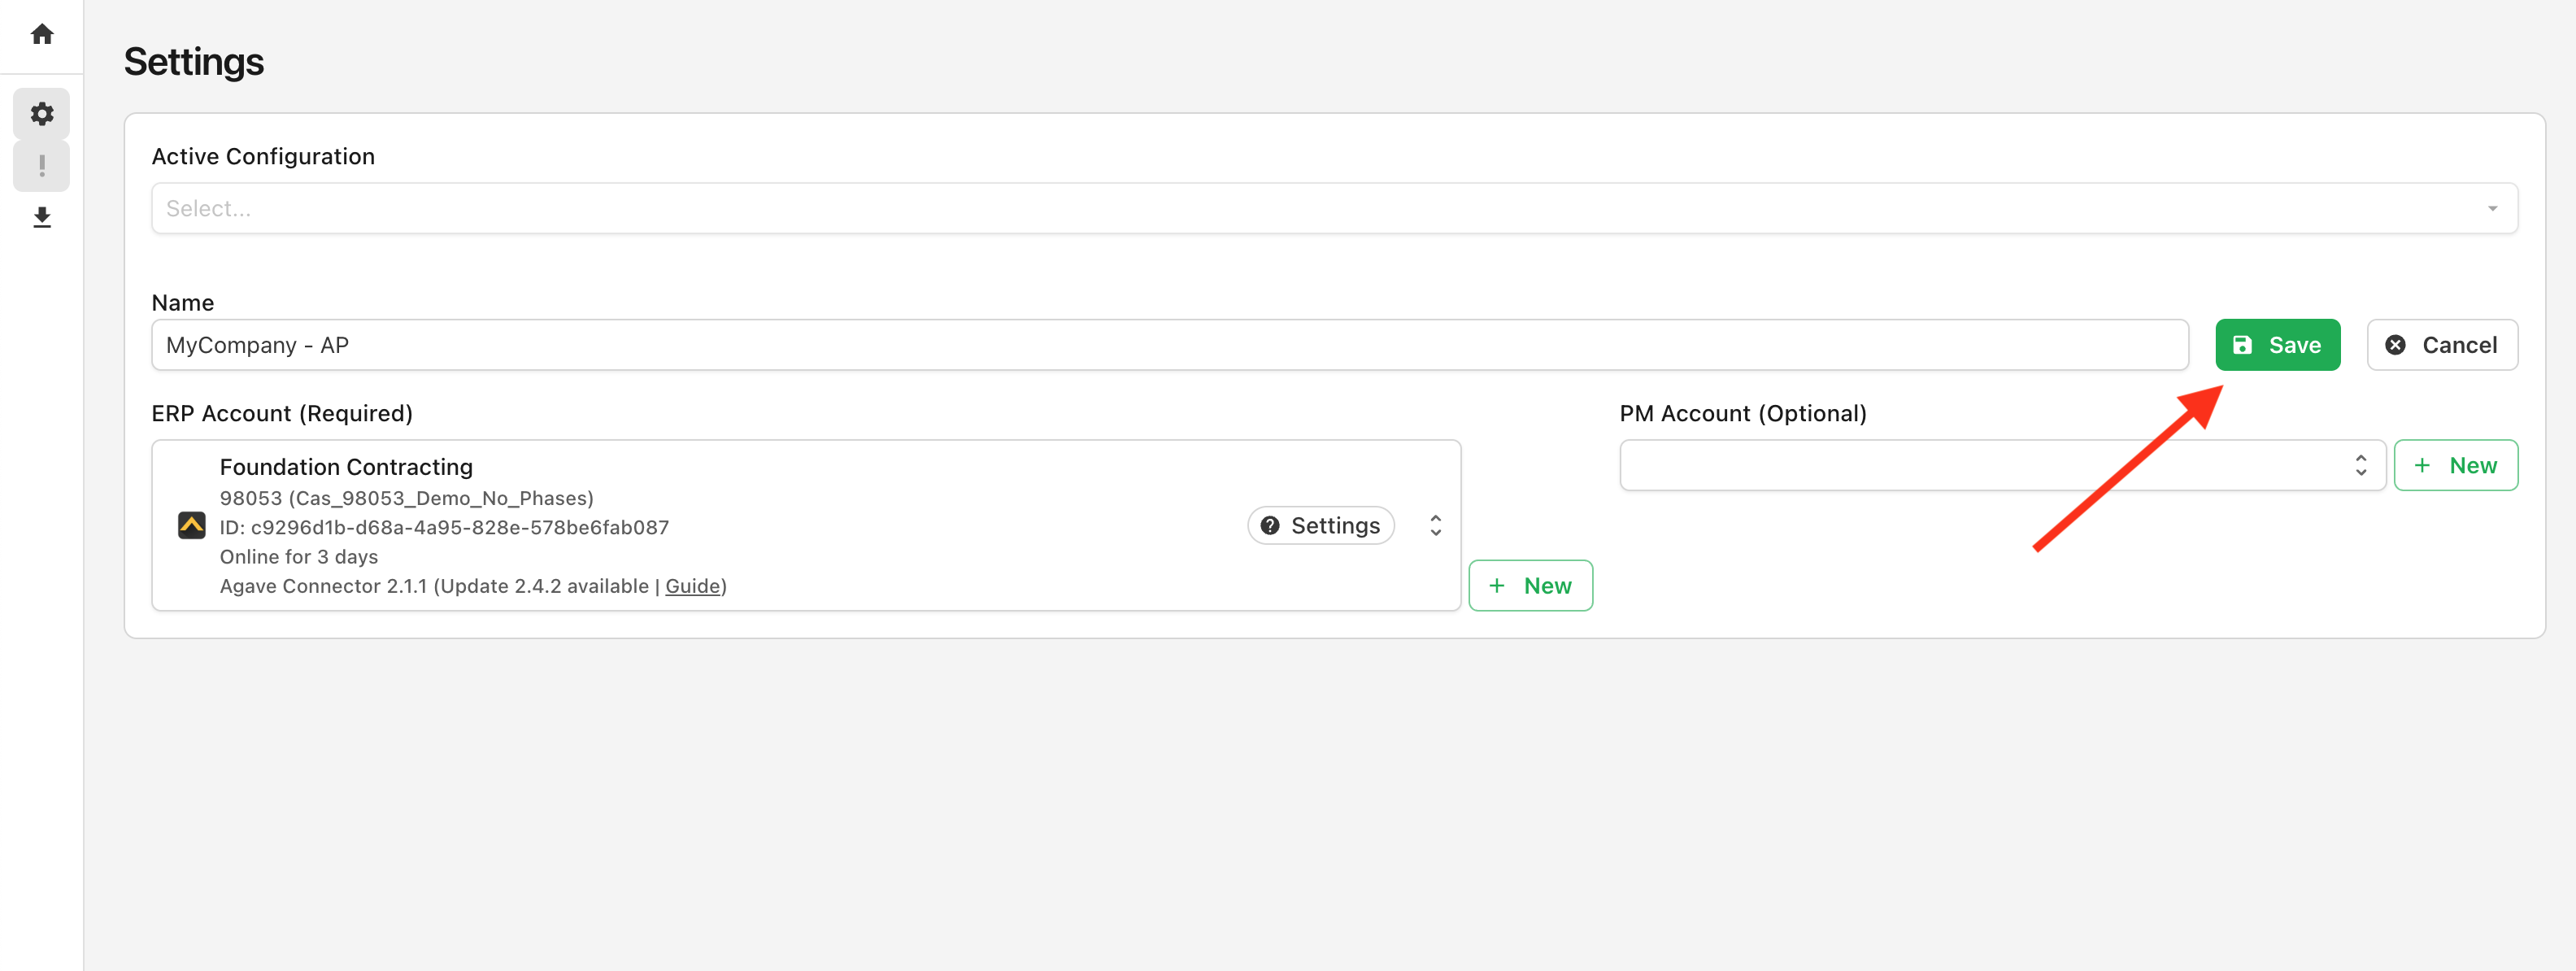
After launching AP Automation, you will see the Account Configuration page:
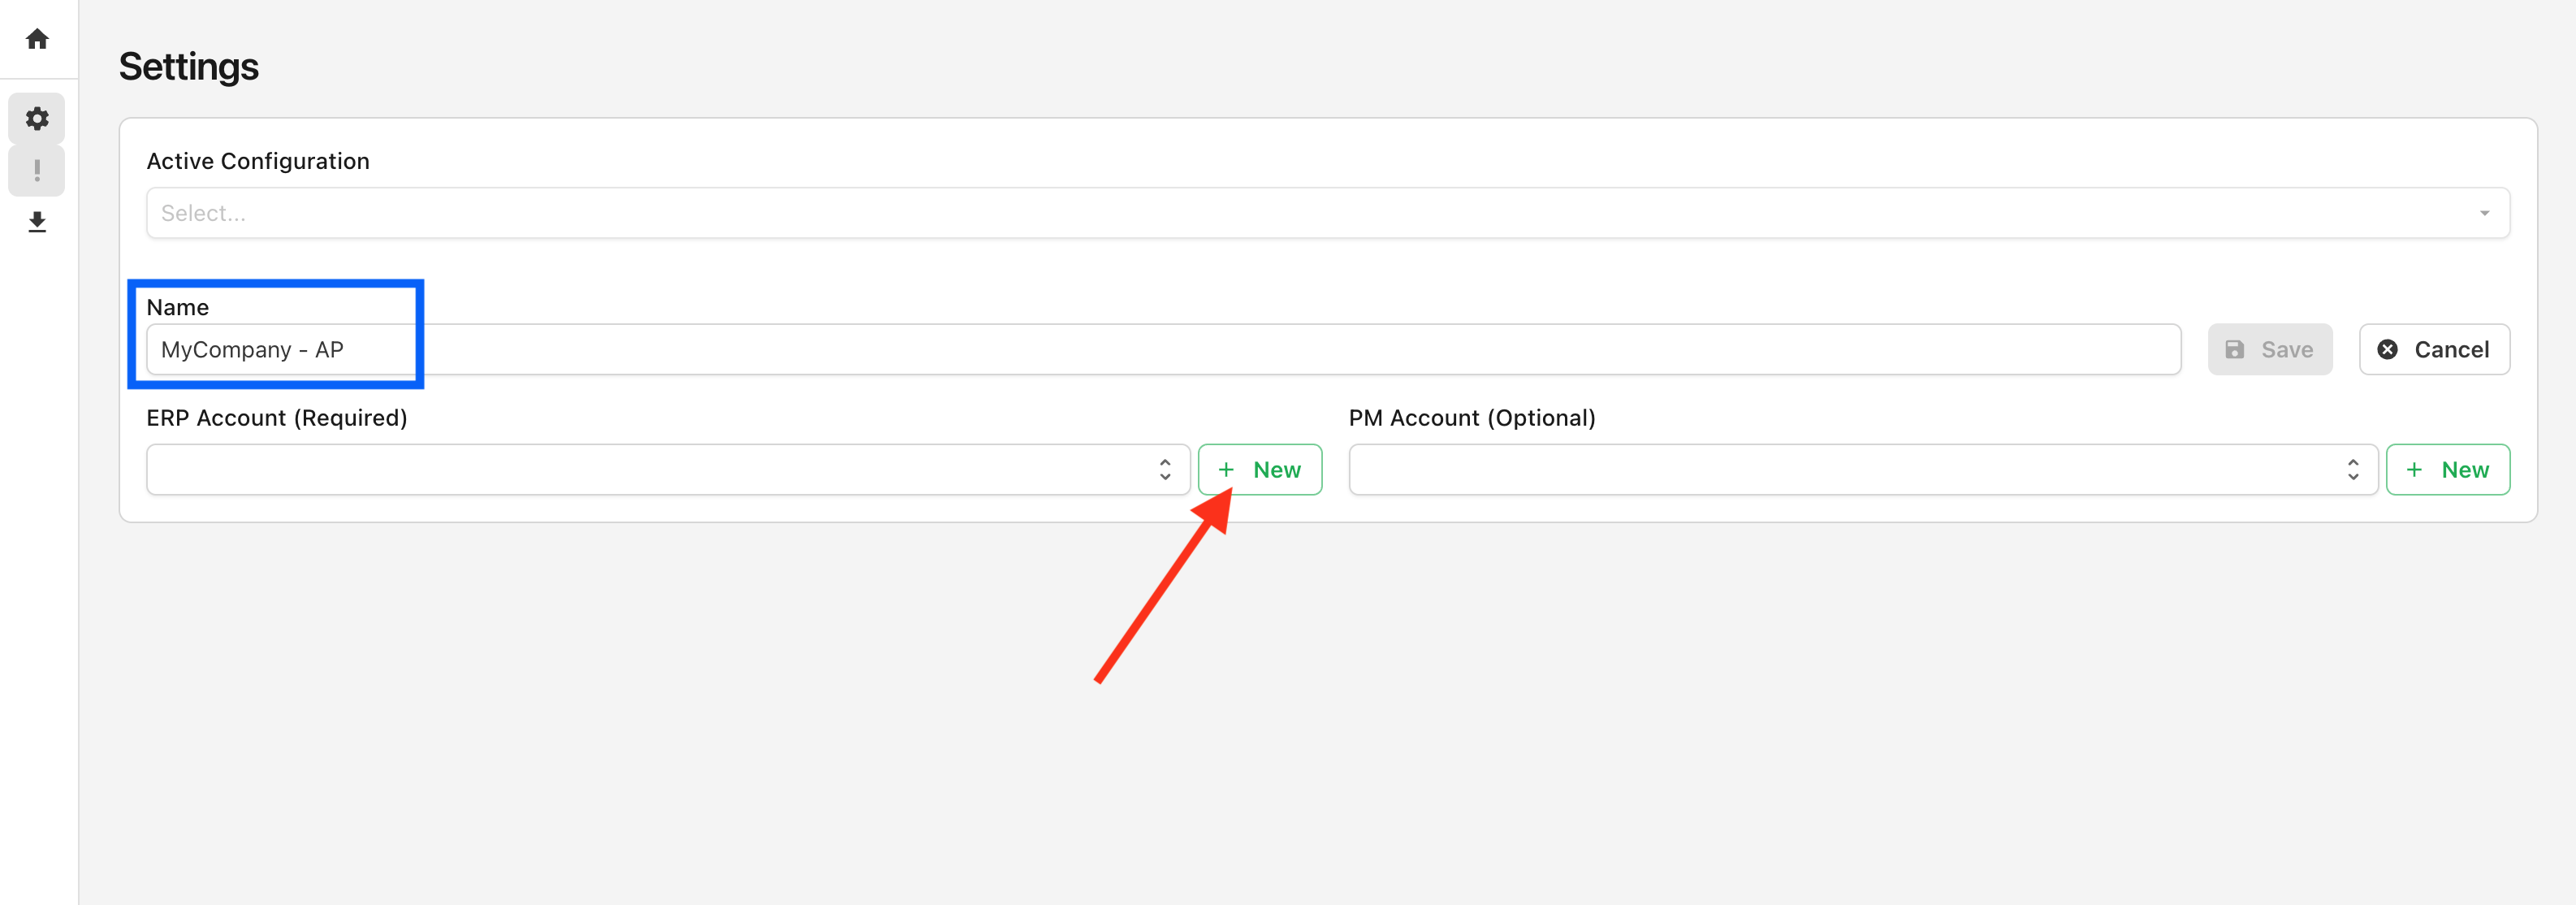
Name the configuration after your company (blue box), and click "New" to begin accounting/ERP system connection.
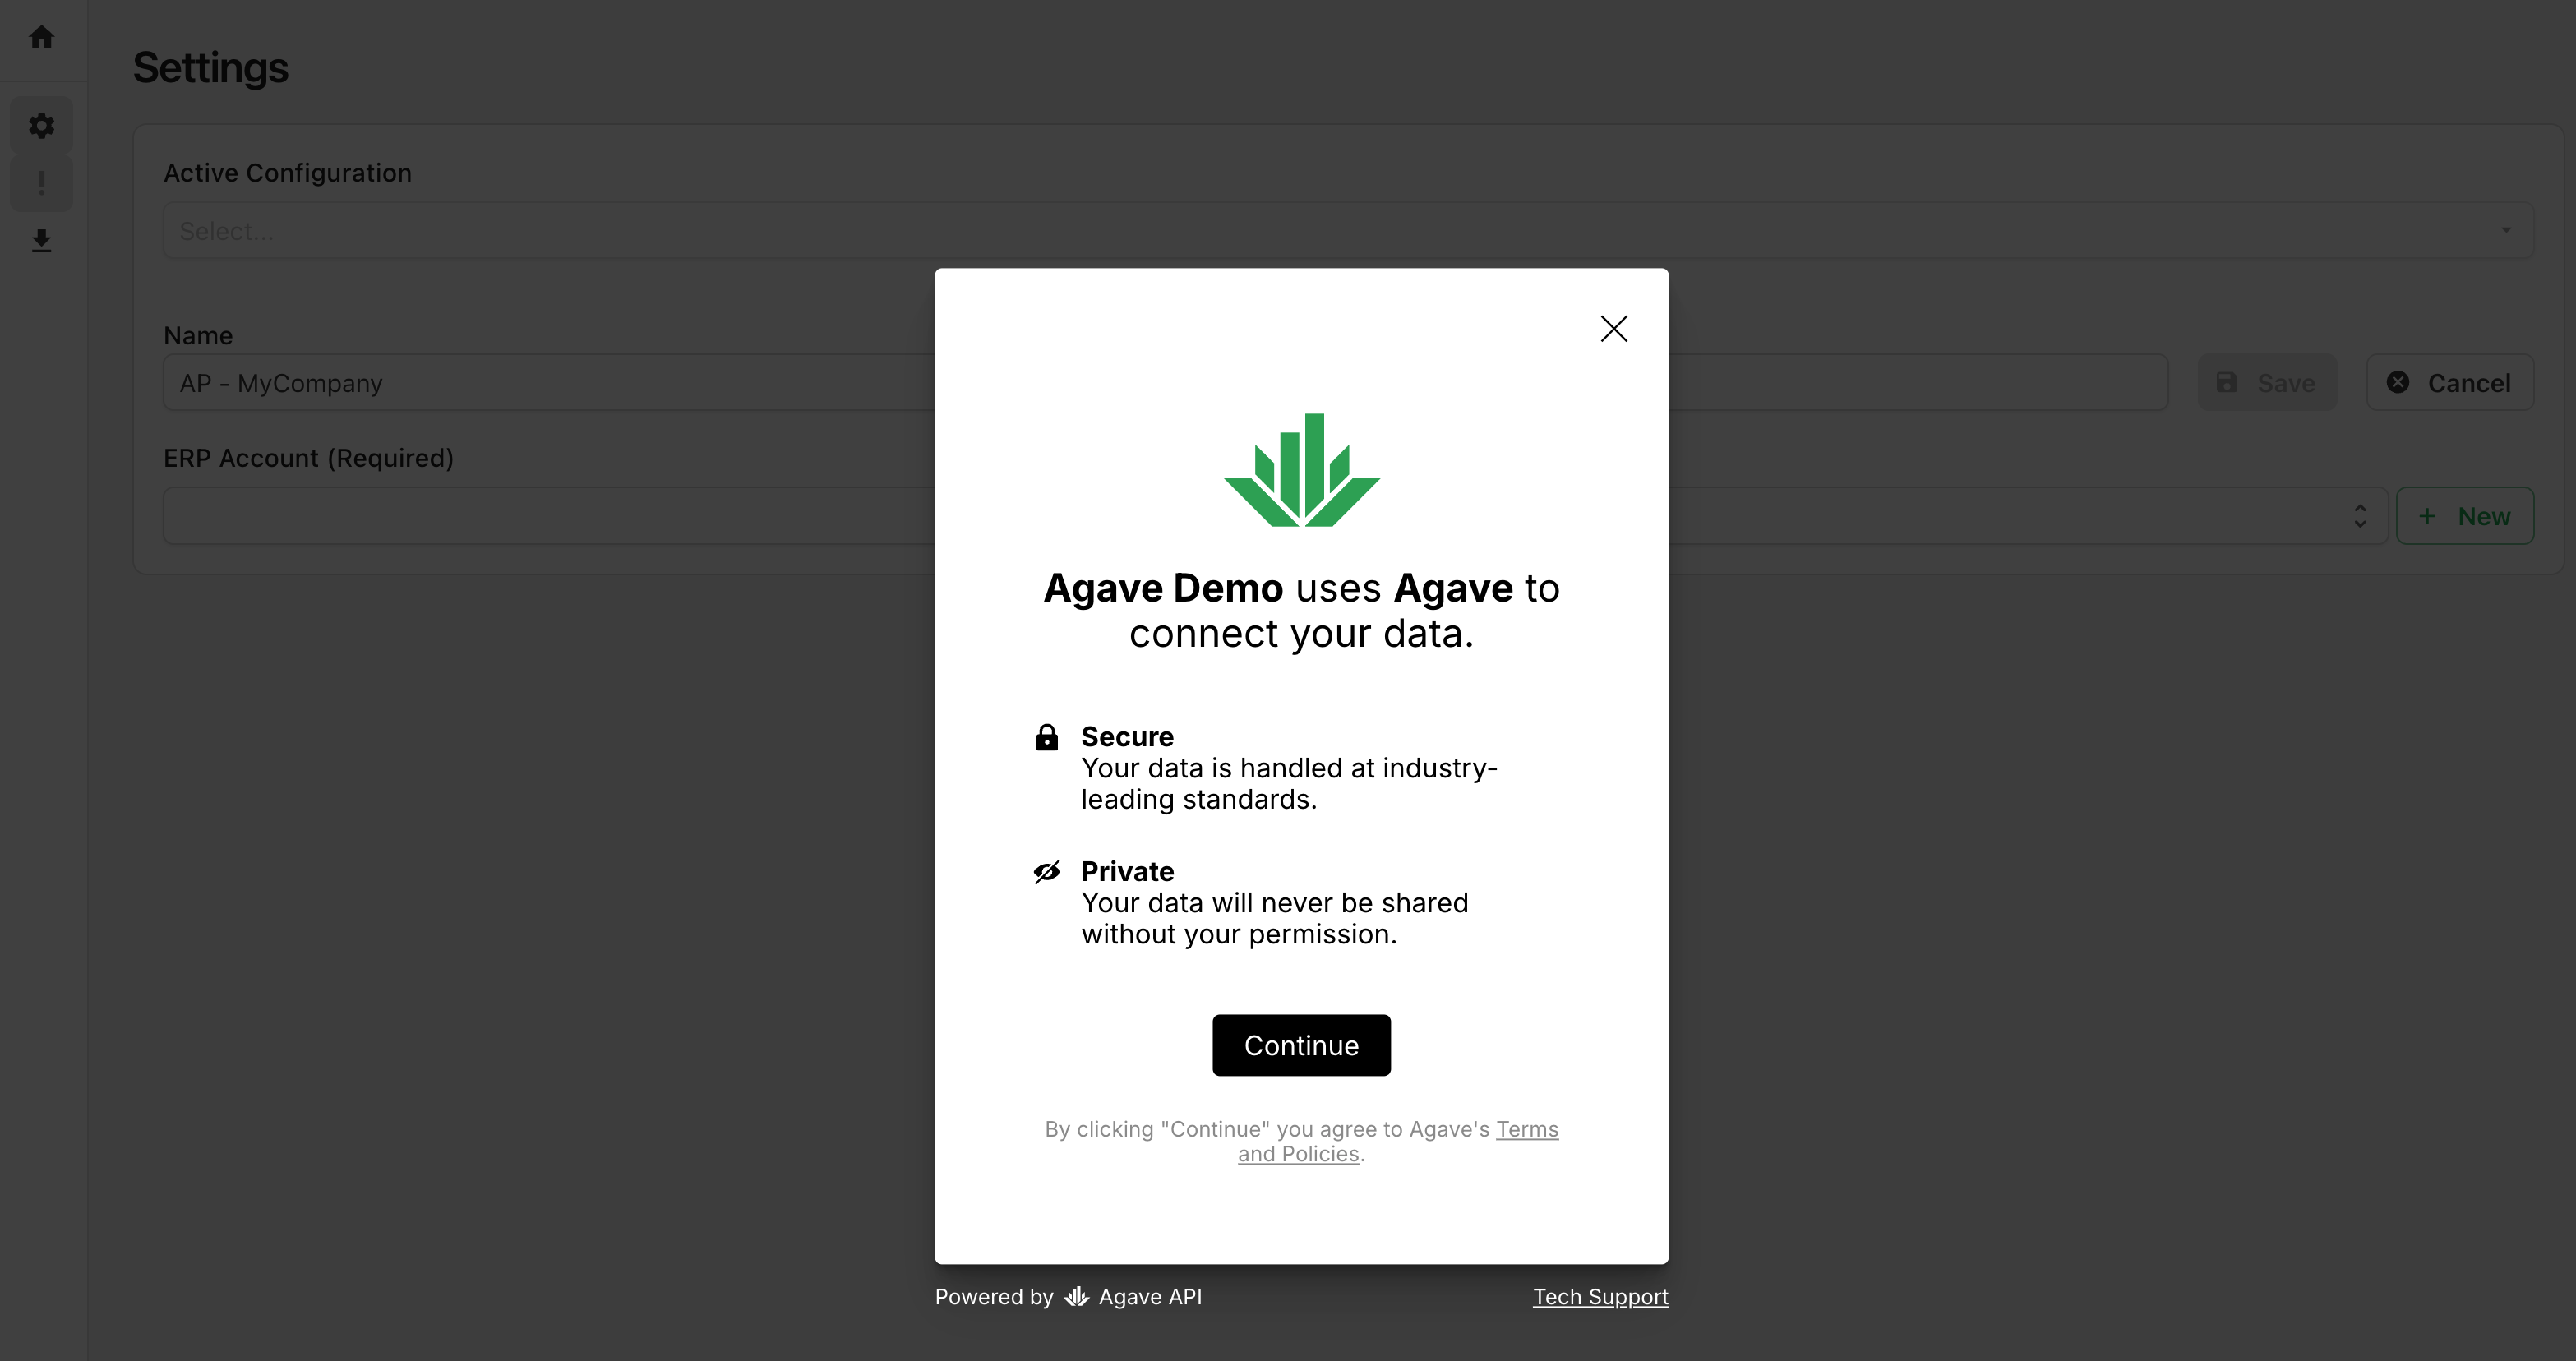
When the account connection workflow launches, click "Continue":
Select your accounting system from the displayed options:
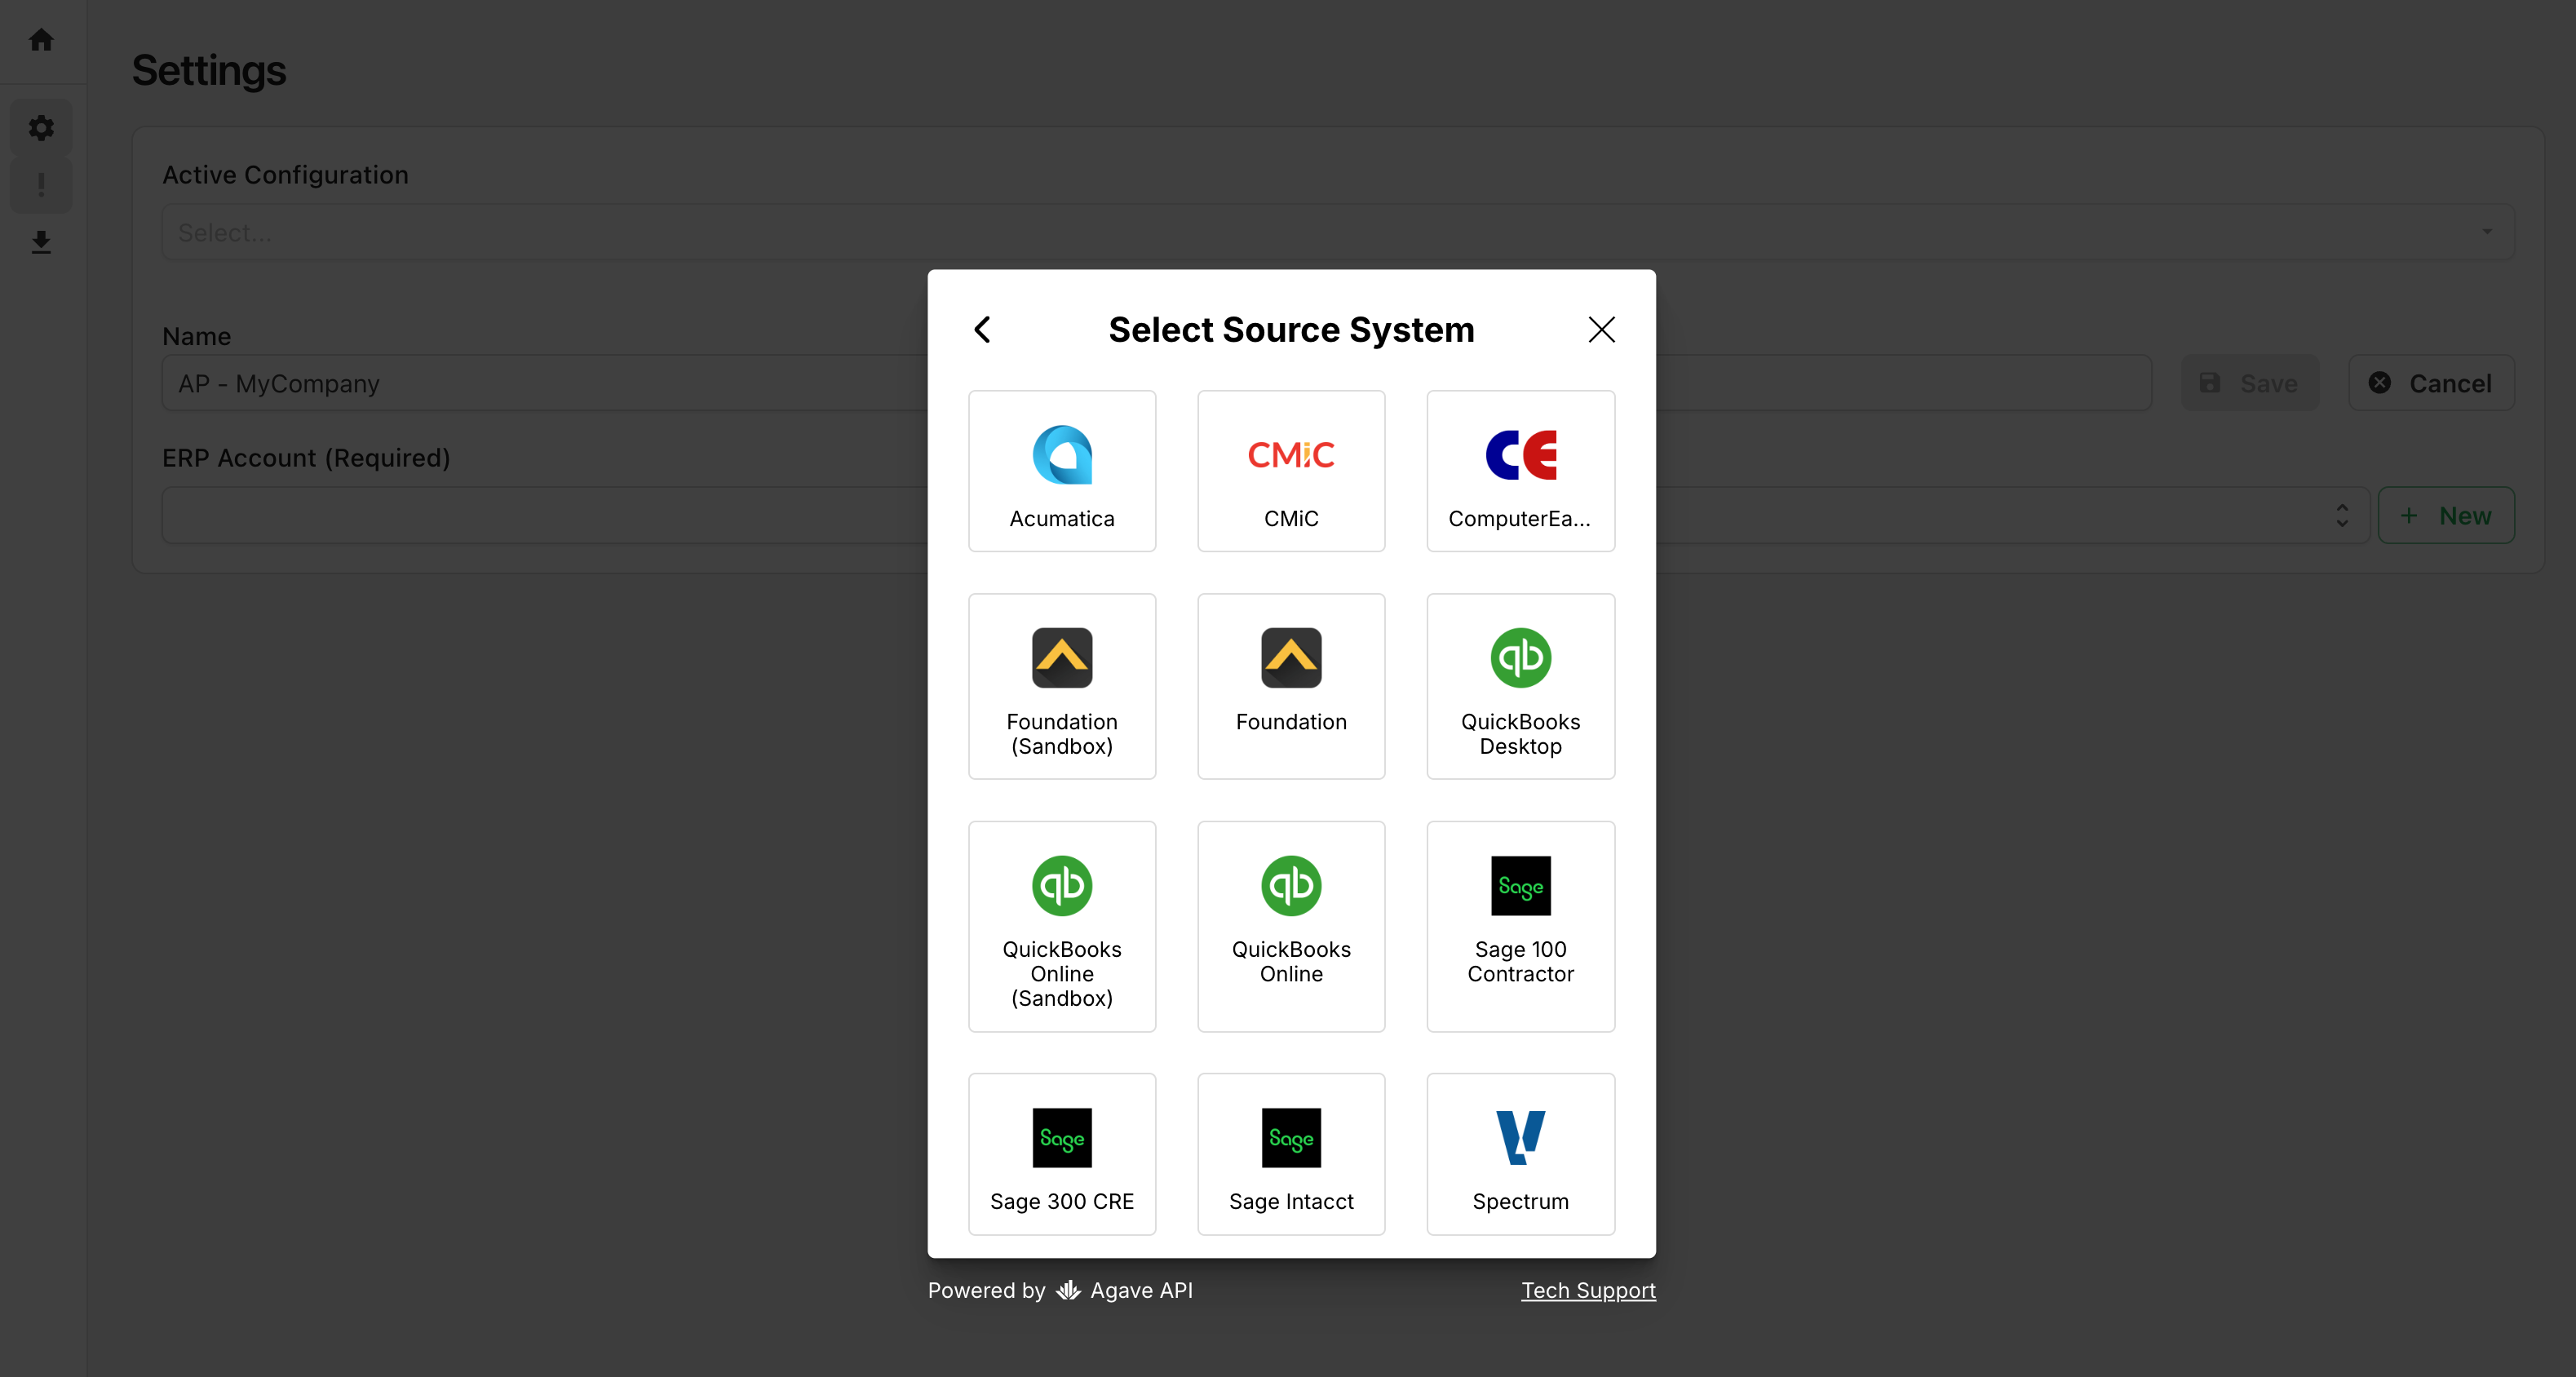
Follow the connection steps for your accounting/ERP system:
- Acumatica
- Autodesk Build
- CMiC
- Foundation
- Procore
- QuickBooks Desktop
- Sage 100 Contractor
- Sage 300 CRE
- Viewpoint Spectrum
- Viewpoint Vista
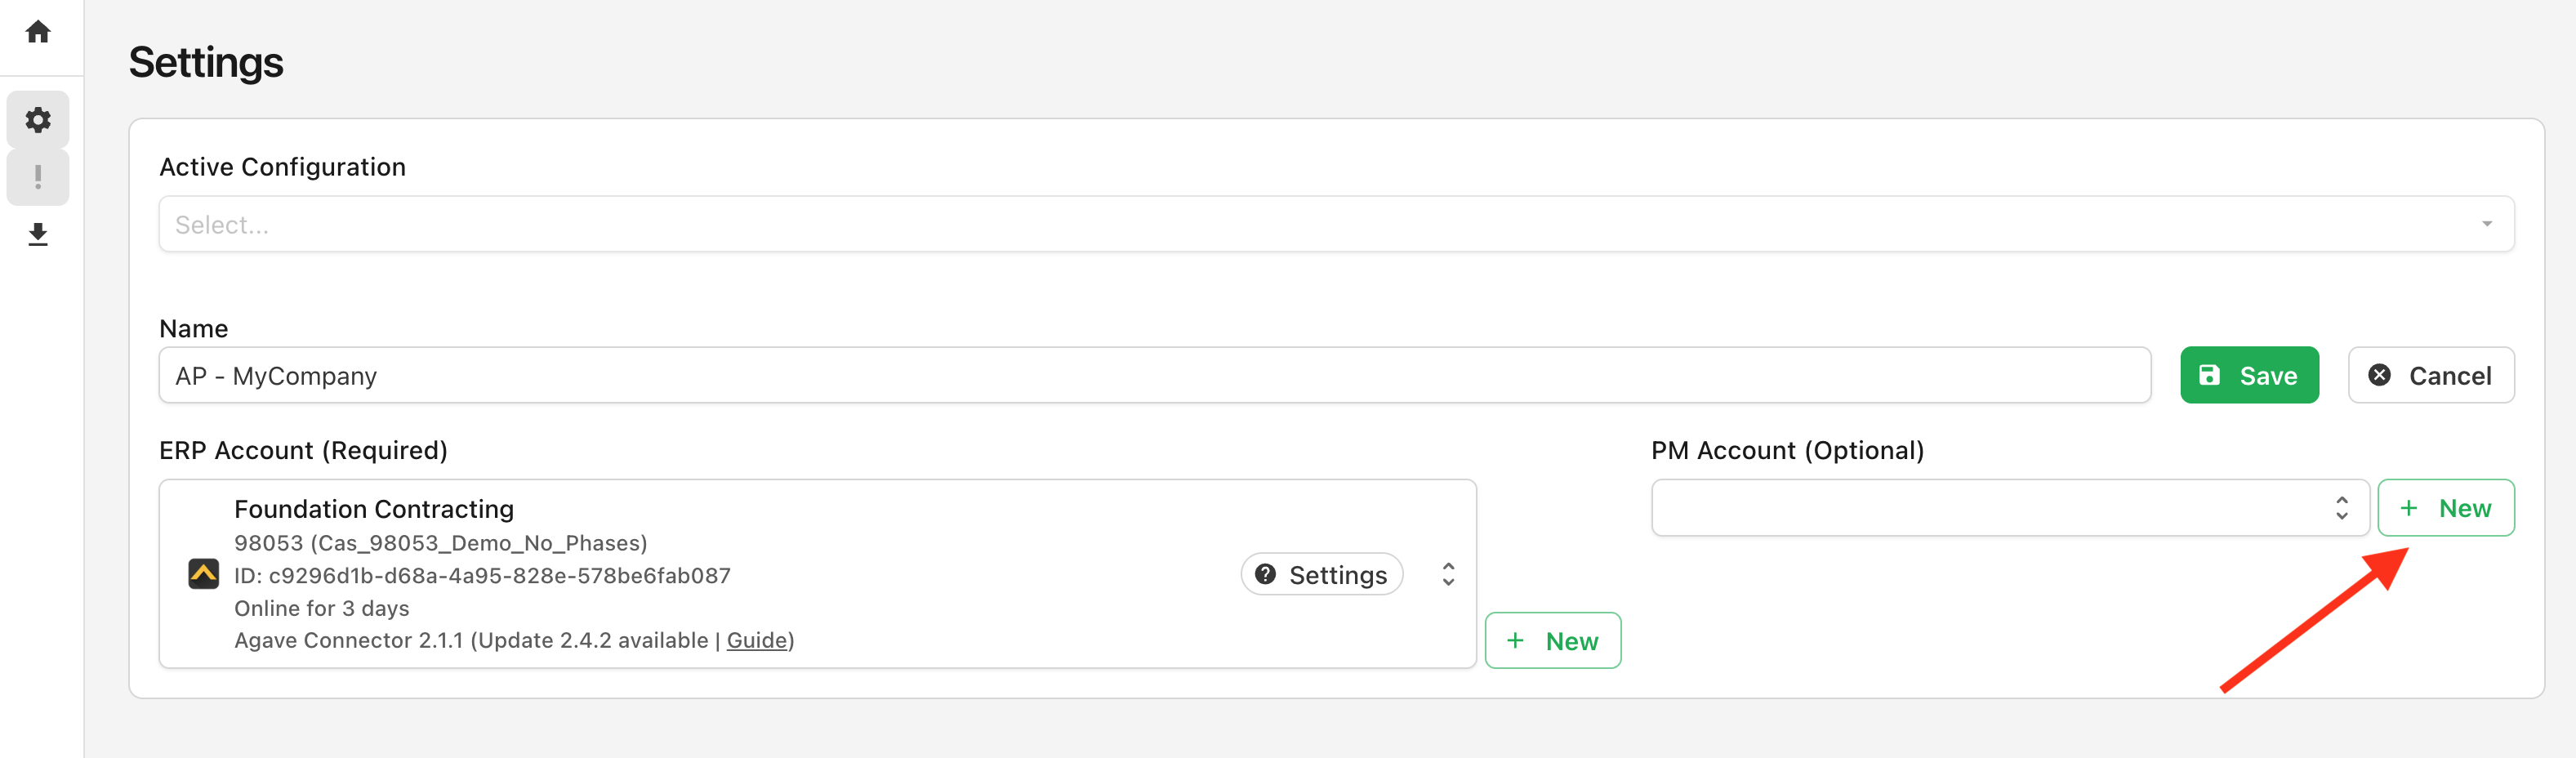
Upon completion, you can optionally connect a Project Management System or click Save to complete account connection:
Step 3: Connect Your Project Management System (Optional)
After connecting your accounting/ERP system, you can optionally connect your Project Management system. Agave uses this to enhance routing for Project Managers and other matching. You can also add this later.
Follow the same steps as for the accounting system, but using this prompt:
For system-specific connection guides, see below.