Viewpoint Spectrum Authentication
To authorize access to read and write data between Viewpoint Spectrum and Agave AP Automation, complete the steps below. These steps are adapted from the Agave Sync Spectrum authentication guide.
Creating this connection will not automatically send any data into Spectrum. After setup, finish connecting your account in Accounting/ERP System Connection.
Step 1: Whitelist Static IP Addresses
Step 1A: Hosted or Cloud Versions of Viewpoint Spectrum
Open a case with Viewpoint Customer Support to add Agave's IP address to your Viewpoint Spectrum Endpoint IP whitelist:
- Go to https://support.viewpoint.com/s/
- Log in to your Customer Support account.
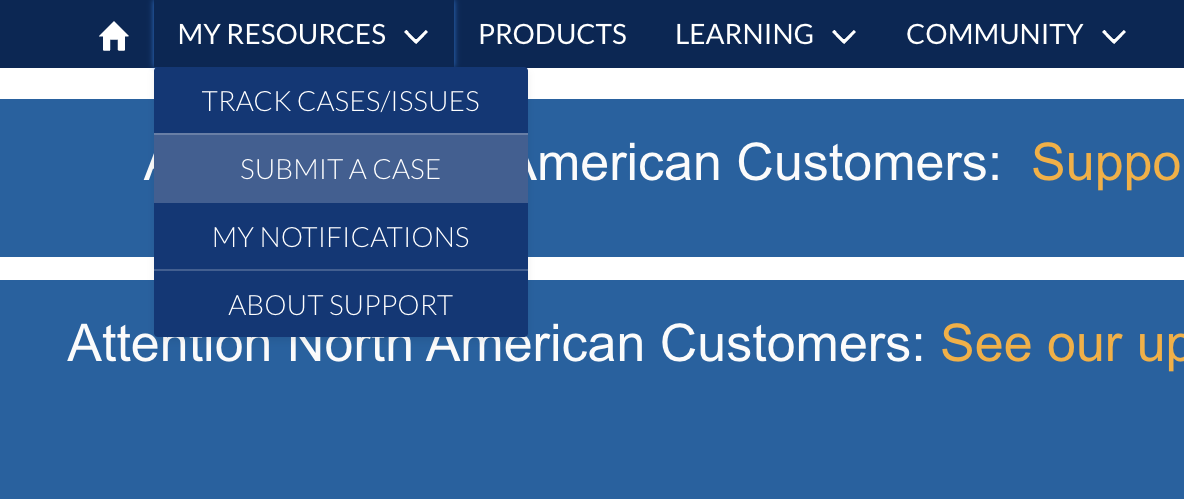
- Select My Resources, then Submit a Case.
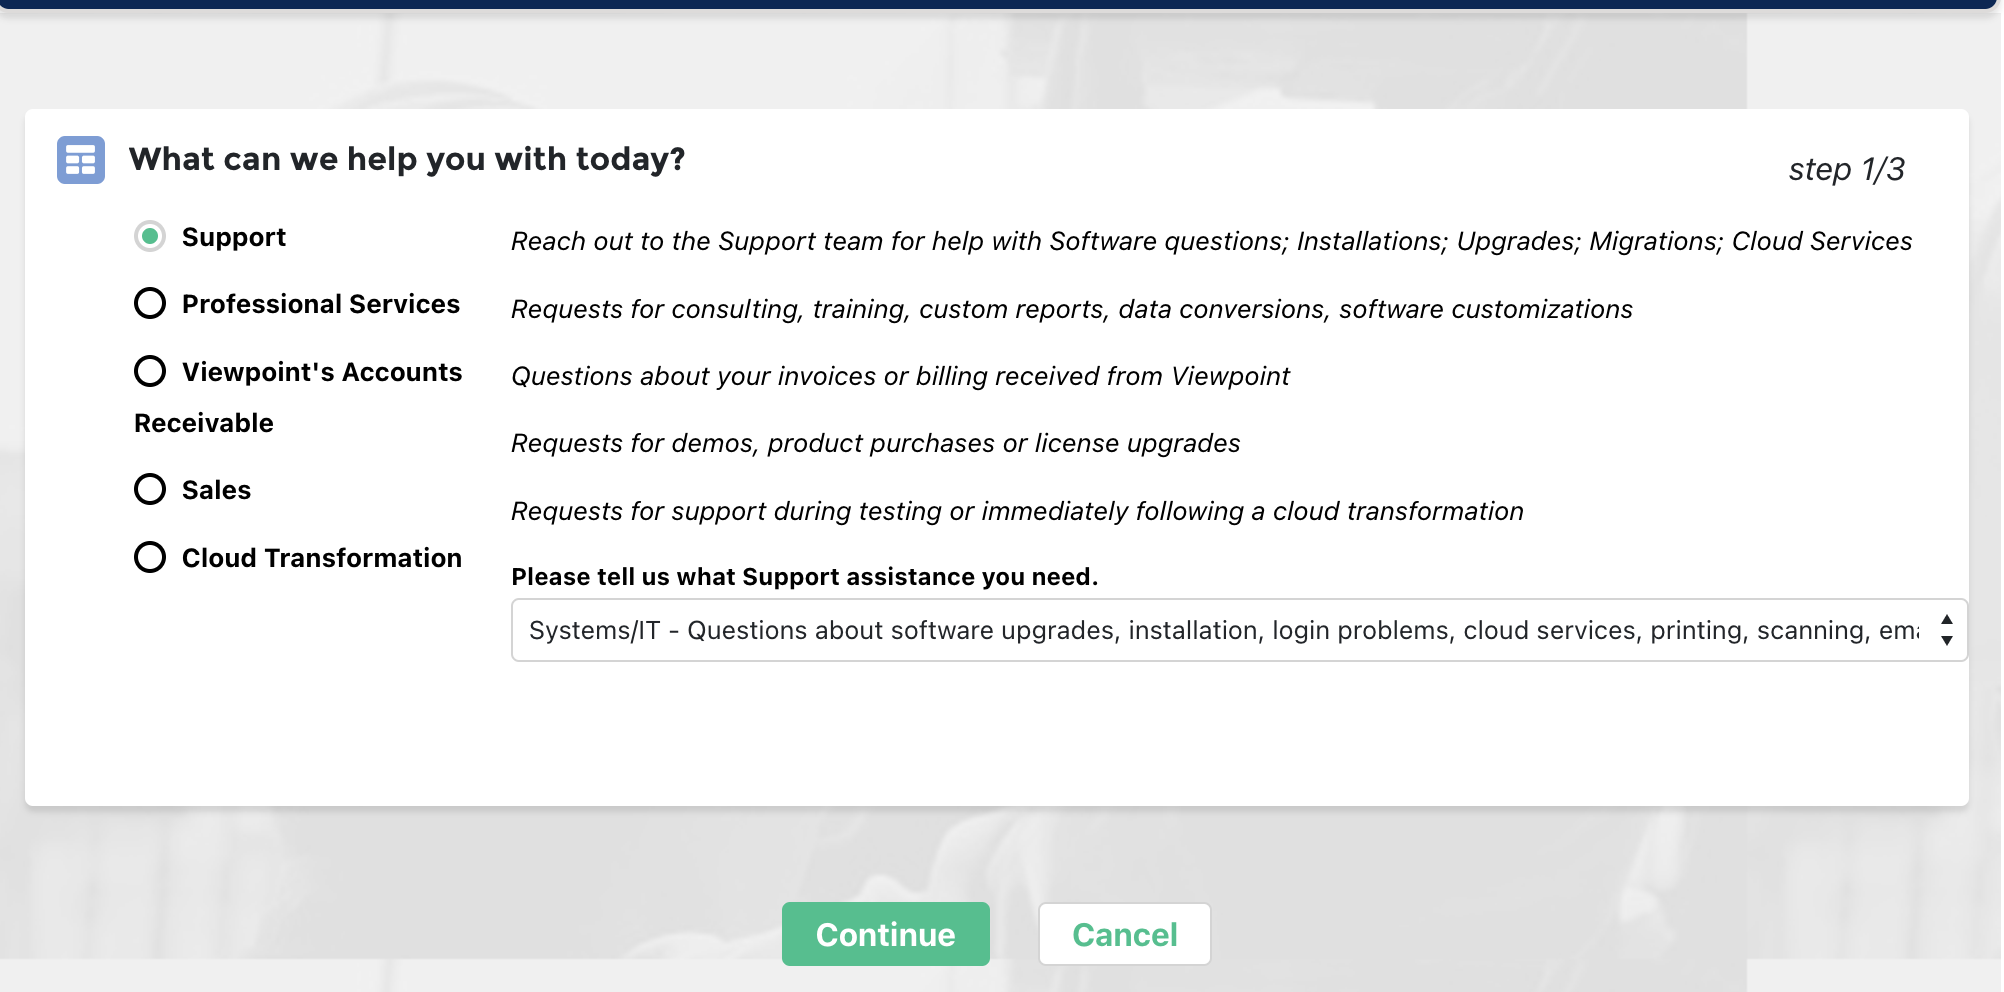
- Select Support, then Systems/IT
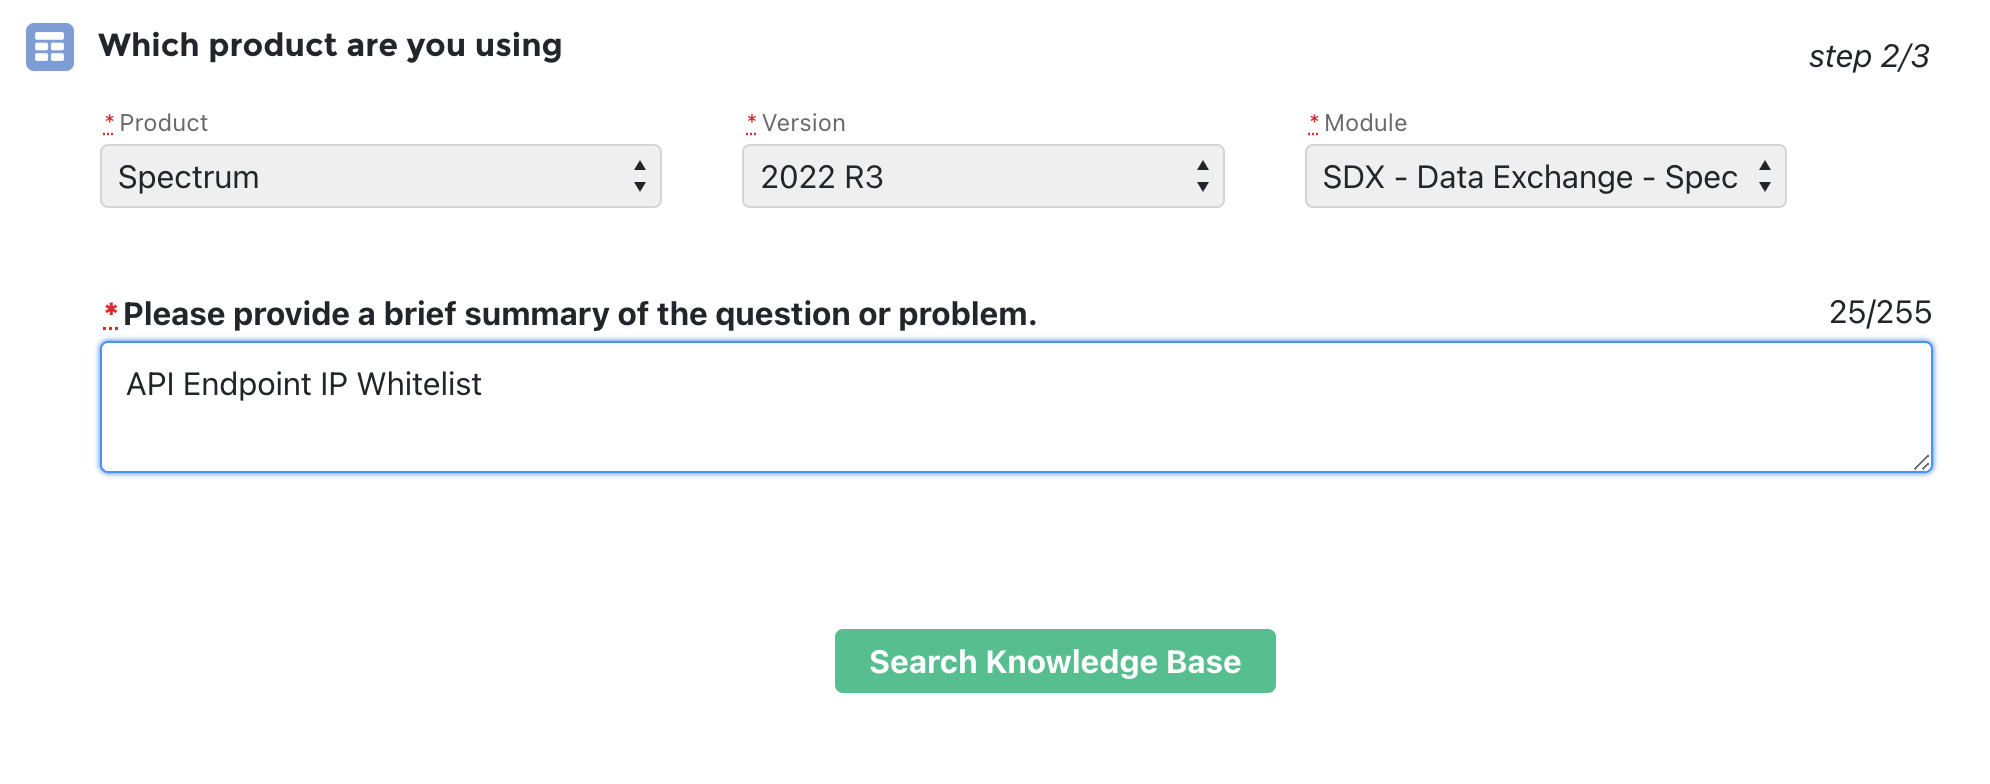
- Under Which product are you using?, input the following and select Search Knowledge Base:
- Product: select Spectrum.
- Version: select the version of your Spectrum instance (e.g. 2022 R3).
- Module: select "SDX - Data Exchange - Spectrum".
- Brief Summary: input "Endpoint IP Whitelist".
-
Scroll to the bottom of the page and press Continue to Case Creation.
-
Under Case Create, select a Priority. Under Description, add the following:
Hi - we are looking to whitelist our IPs for Spectrum Endpoint connectivity with our Spectrum instance. Here are our static IPs:
- 13.58.14.240
- 18.219.160.98
- 3.143.37.24
Could you also let us know what the database hostname (
xyz-data.dexterchaney.com), database name (Spectrum_00xxxxx), and port are for our instance?
-
Press Submit.
-
After submitting a case, you should receive a response from Viewpoint Support within 24-48 hours confirming that the IP addresses have been whitelisted.
Step 1B: On-premise Versions of Viewpoint Spectrum
If you are on an on-premise version of Viewpoint Spectrum, you will need the following three static IP addresses to connect to your SQL server by adding them to your firewall for your network:
- 13.58.14.240
- 18.219.160.98
- 3.143.37.24
If you are unable to authenticate in Agave even after adding the above static IP addresses, we recommend following the guide on troubleshooting common on-premise connection issues.
Step 2: Create Authorization ID
The next step is to configure an Authorization ID and enable the required Web Services in Spectrum. Agave uses the Web Services to write data back to Spectrum (for example, when exporting approved AP invoices).
To enable Web Services:
- Login to your Viewpoint Spectrum account.
- Press the + at the top of the page.
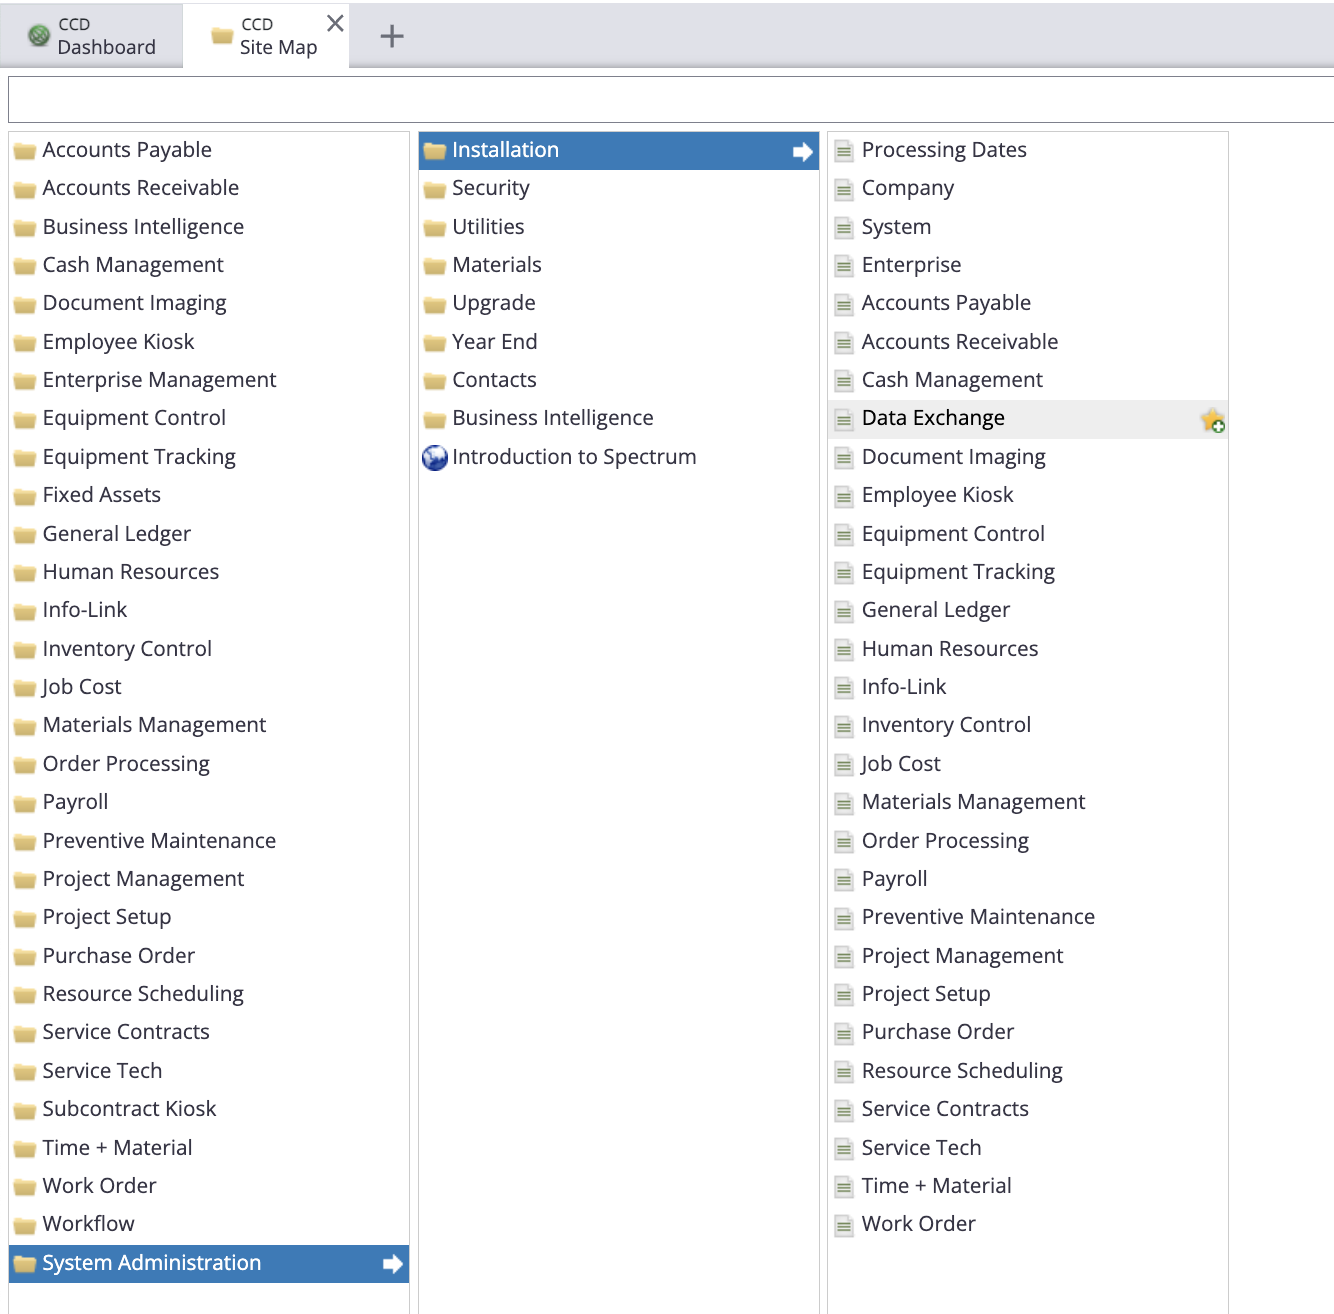
- Select System Administration, then Installation, then Data Exchange.
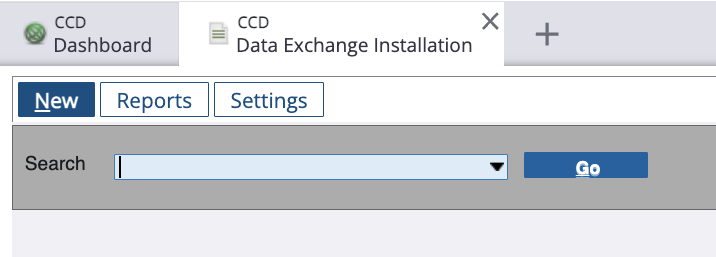
- In Data Exchange screen, select New.
-
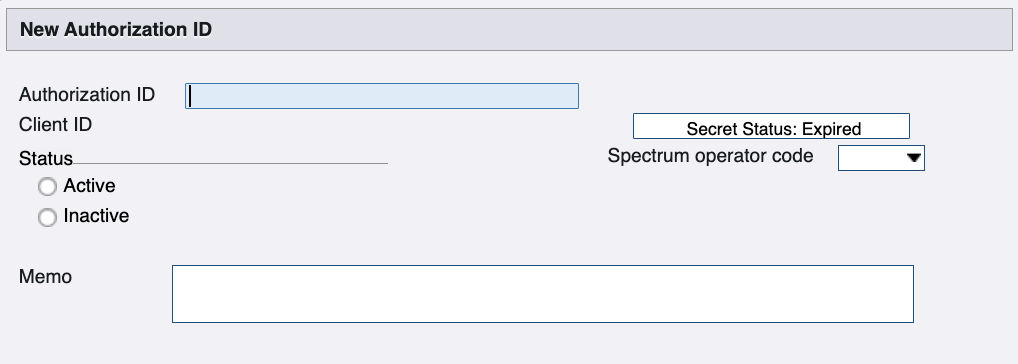
Input a name for the Authorization ID (e.g. "Agave").
-
Select a Company Code and Operator Code for the Authorization ID, and select
Activefor Status.
You can use an existing Operator Code. It is recommended to select one for a user that has full permissions throughout Spectrum, such as the CFO or Controller. The authorization ID inherits some permissions from the operator, so if you use an operator with limited permissions, then you may encounter Spectrum permission errors when syncing data.
-
Add a Memo for the Authorization ID (e.g. "Access for Agave").
-
Select Build. Then select the relevant Web Services you are looking to support for the integration. For example, the below authorizes access to retrieve details about Jobs from the Job Cost module.
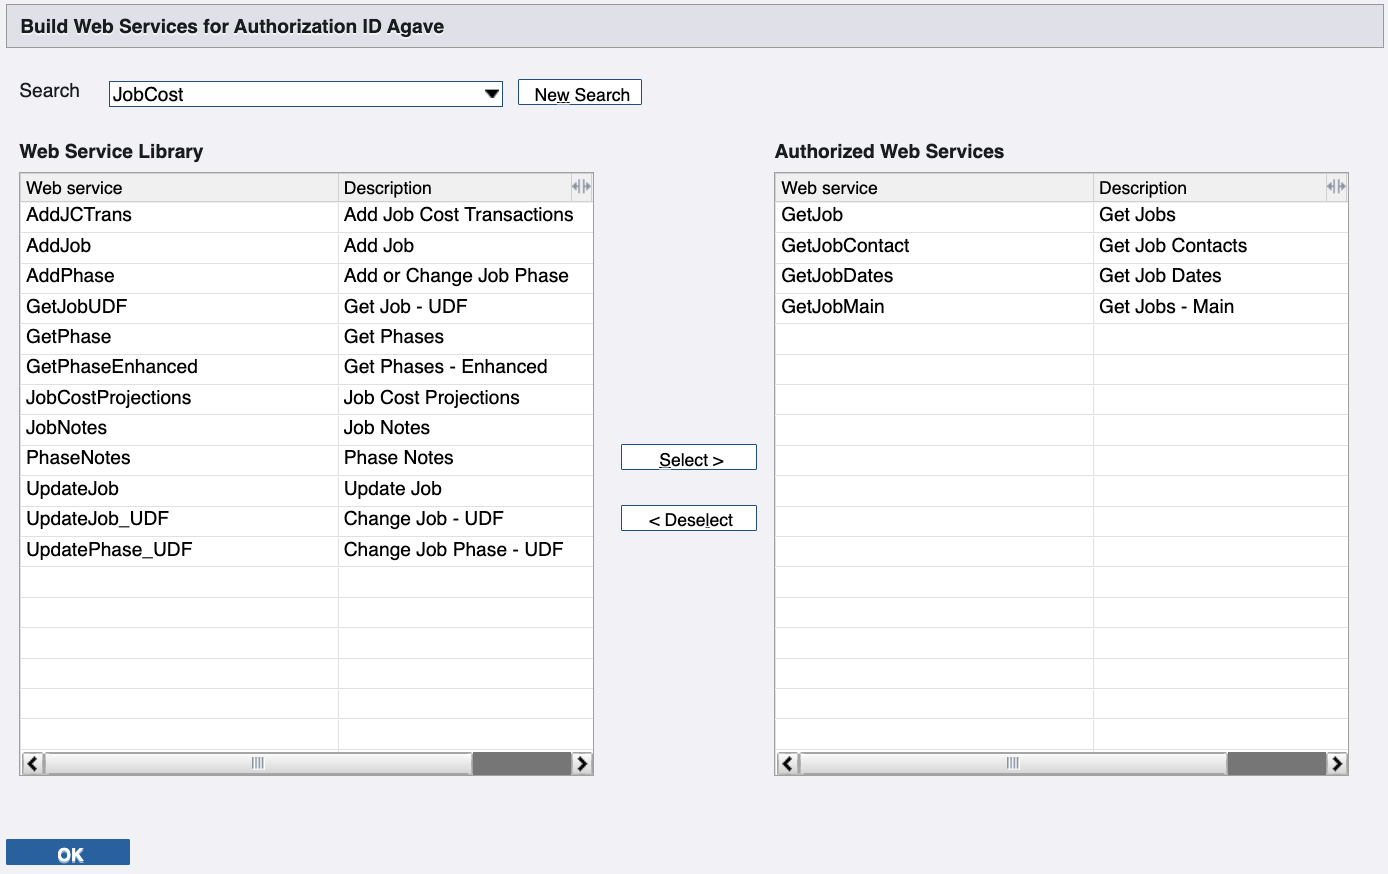
When creating an Authorization ID, you will need to enable the following Web Services for the corresponding Agave endpoint you plan to use:
| Data | Service | Web Service(s) |
|---|---|---|
| AP Invoices | AccountsPayable | AddAPInvoice, APMultiLineInvoice |
| AR Invoices | AccountsReceivable | AddARInvoice, ARMultiLineInvoice |
| AR Payments | AccountsReceivable | Add_CashReceipts |
| Budget Line Items | JobCost | AddPhase, GetPhase, GetPhaseEnhanced, PhaseNotes |
| Change Orders | AccountsReceivable | ARChangeRequest, ARChngReqBlankBIUpdate |
| Cost Projections | JobCost | JobCostProjections |
| Customers | AccountsReceivable | AddCustomer, CustomerNotes, CustomerBillto, CustomerShipto, GetCustomers |
| Employees | Payroll | GetEmployee, EmployeeNotes |
| Inventory | Inventory | AddInv_Req, UpdateInv_SellPrice |
| Prime Contracts | AccountsReceivable | ARScheduleOfValues |
| Projects | JobCost | AddJob, GetJob, GetJobContact, GetJobDates, GetJobMain, UpdateJob |
| Purchase Orders | PurchaseOrder | POBatch, PODetail, POHeader |
| Service Sites | WorkOrder | AddWOSiteAddress |
| Subcontracts | AccountsPayable | UpdateSubcontract, UpdateSubcontractPhases, SubcontractNotes |
| Timecard Entries | Payroll | PreTimeCard_Batch |
| Vendors | AccountsPayable | AddVendor, GetVendors, UpdateVendor, UpdateVendor_Locations, VendorNotes |
| Work Orders | WorkOrder | WorkOrderHeader |
For AP Automation, enable at minimum AP Invoices, Vendors, and Projects (plus GetJobMain under JobCost).
We also recommend enabling all Web Services in the table above except Payroll-related ones (Employees and Timecard Entries).
Make sure you always add the GetJobMain Web Service under the JobCost Service. We use this endpoint to confirm your Spectrum account has linked successfully.
- Select OK.
Step 3: Create Info-Link User
Agave AP Automation uses Spectrum's Info-Link module to read records from Spectrum for invoice coding and matching.
You will need to create an Info-Link user, and provision them access to specific Viewpoint Spectrum tables which are grouped into "Categories".
To enable an Info-Link user:
- Login to your Viewpoint Spectrum account.
- Press the + at the top of the page.
- Select System Administration, then Installation, then Info-Link.
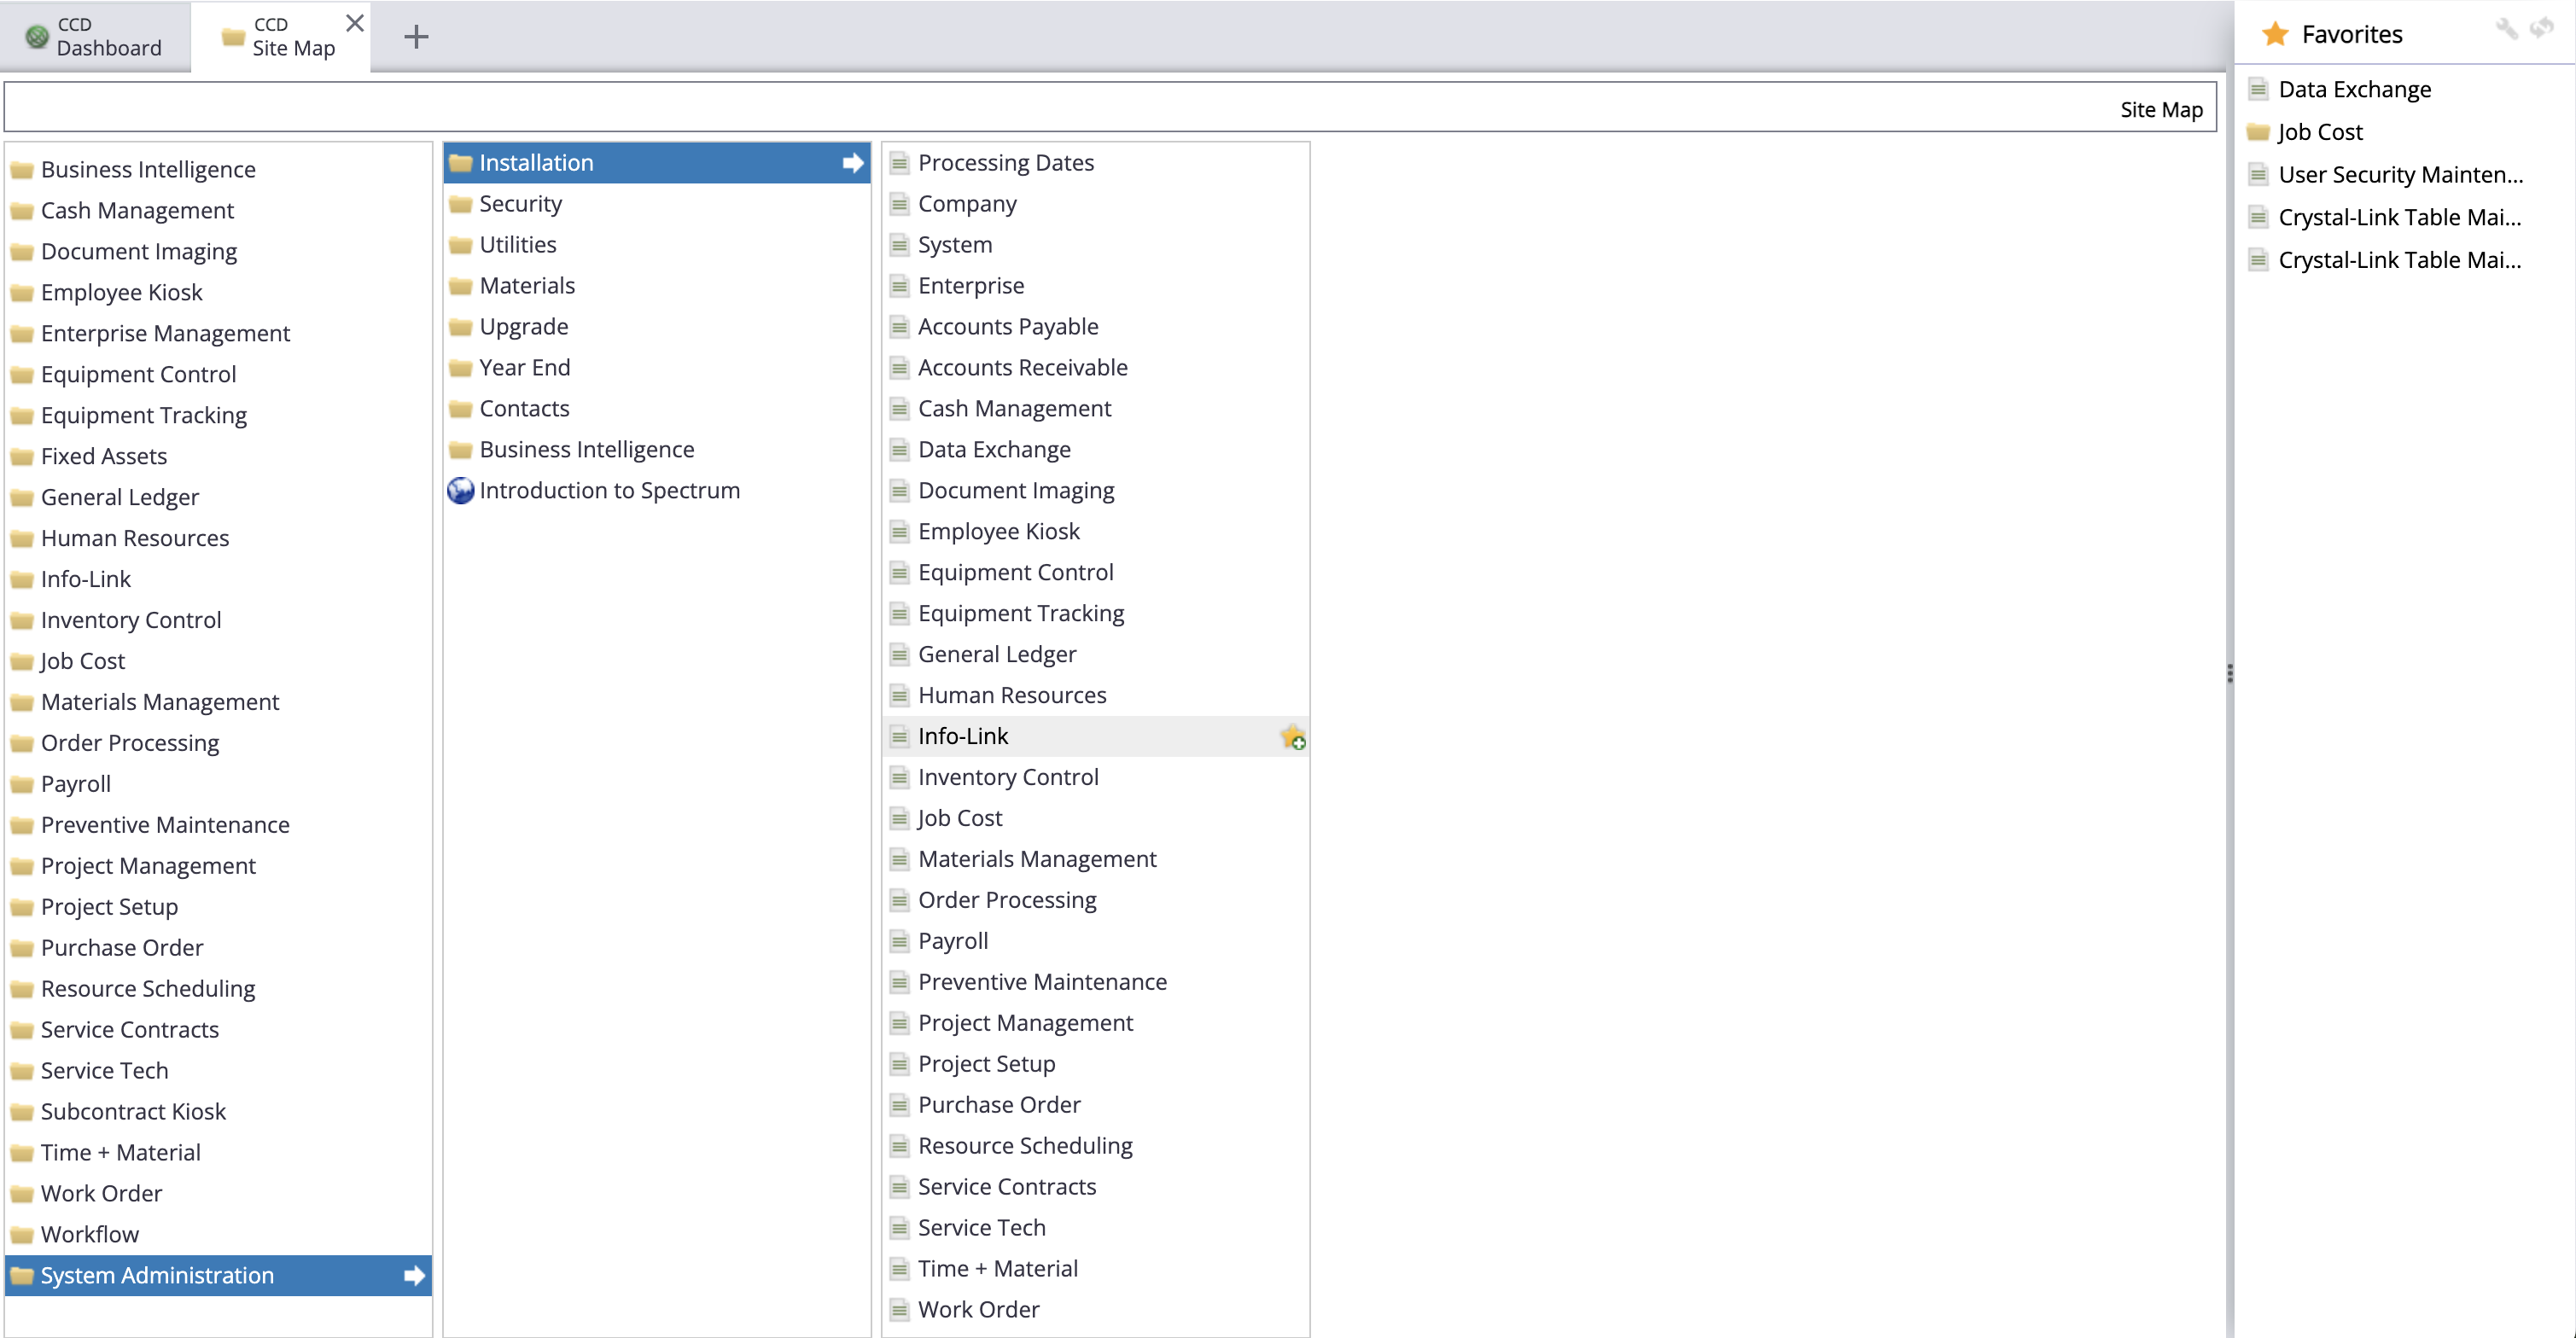
- Continue to press "Reset" until the User ID for Info-Link is incremented at least twice. For example, if you started at "INFO0001", it should now be "INFO0003". Then press Save.
Spectrum needs to be refreshed to connect with Agave. This will not reset your existing Info-Link connections.
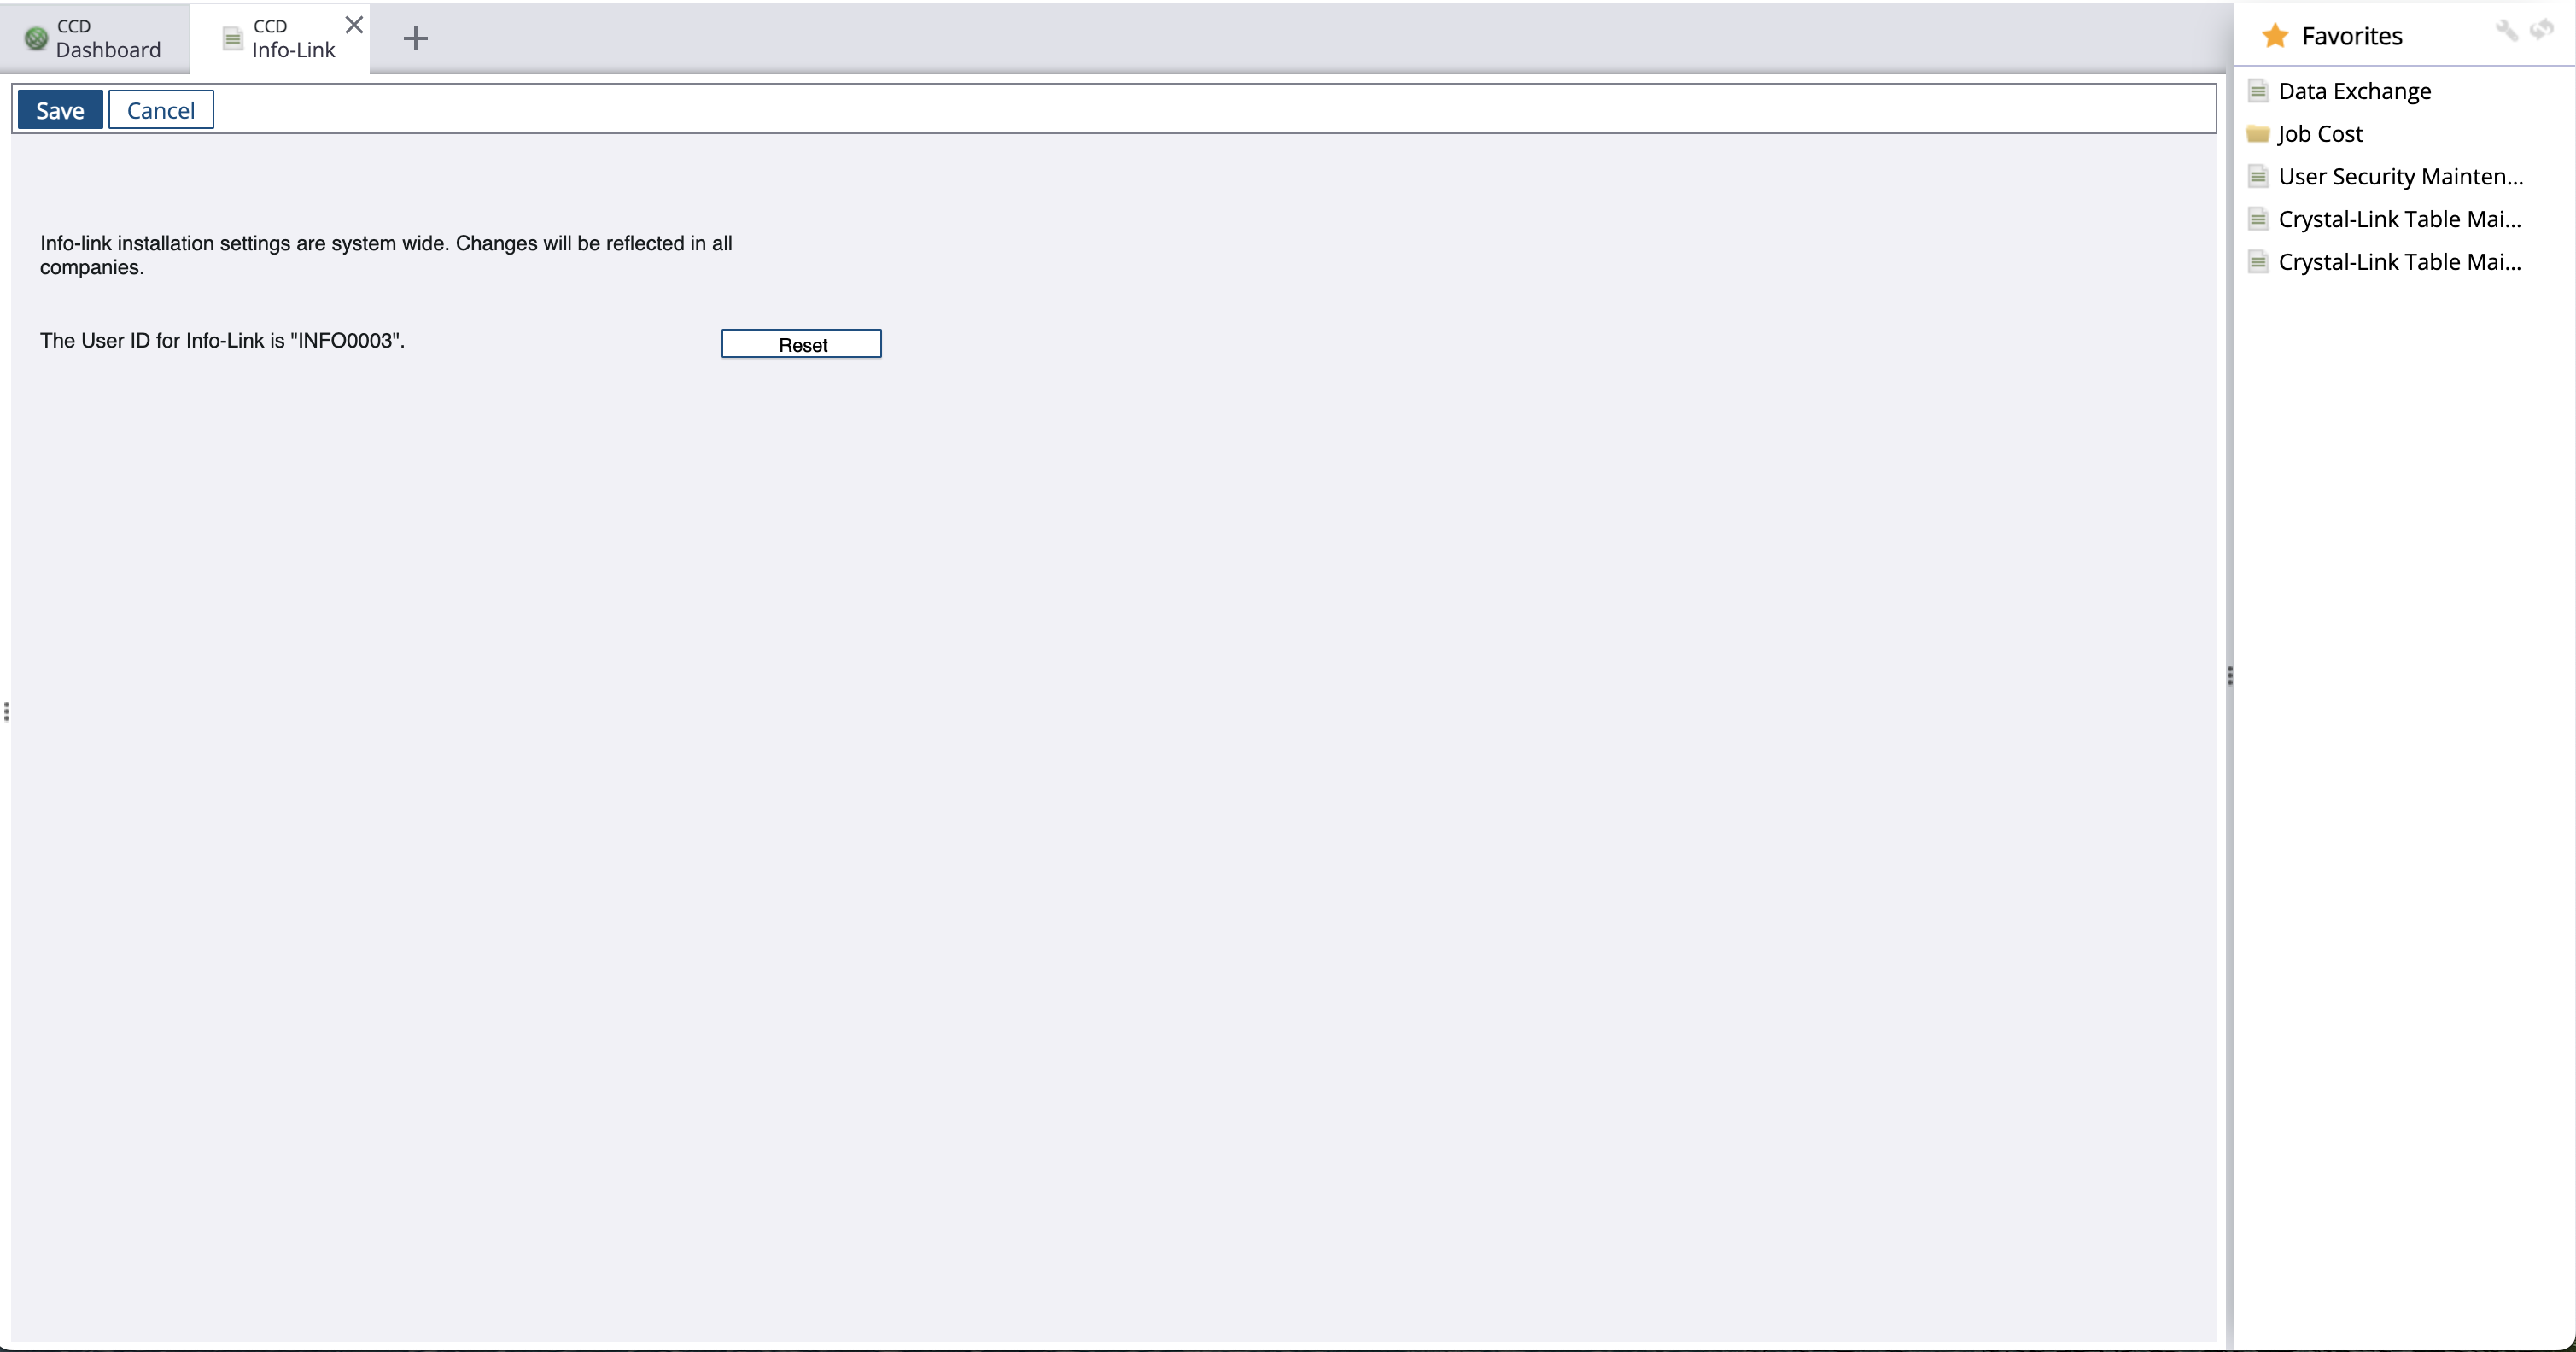
- Return to the Site Map. Select Info-link, then Table Categories Maintenance.
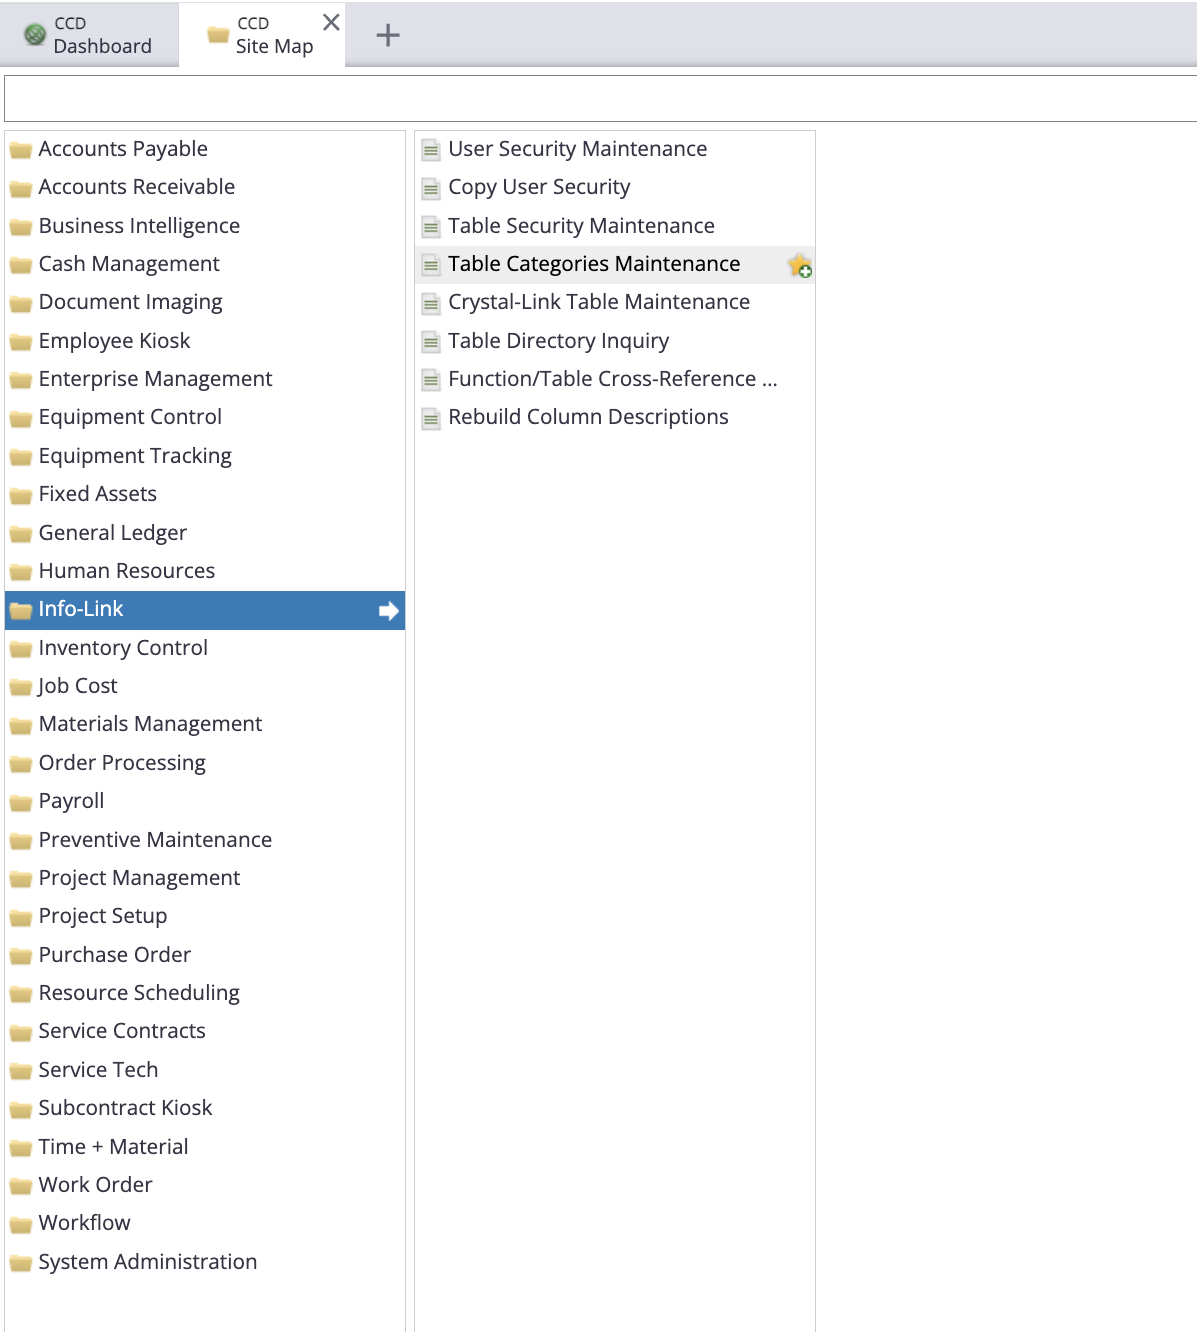
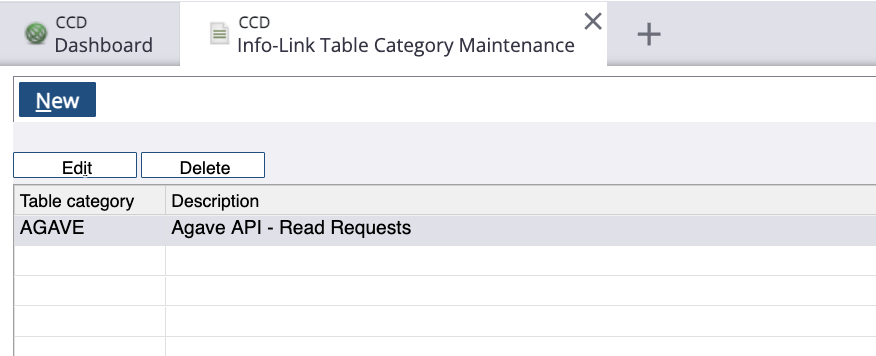
- Select New, and add a Table Category and Description. You can create these Categories however you see fit. If you would like to keep it simple, we recommend creating one Table Category.
Make sure you have followed step 4 above to ensure the User ID for Info-Link has been incremented at least twice before continuing.
-
Return to the Site Map. Select Info-link, then Table Security Maintenance.
-
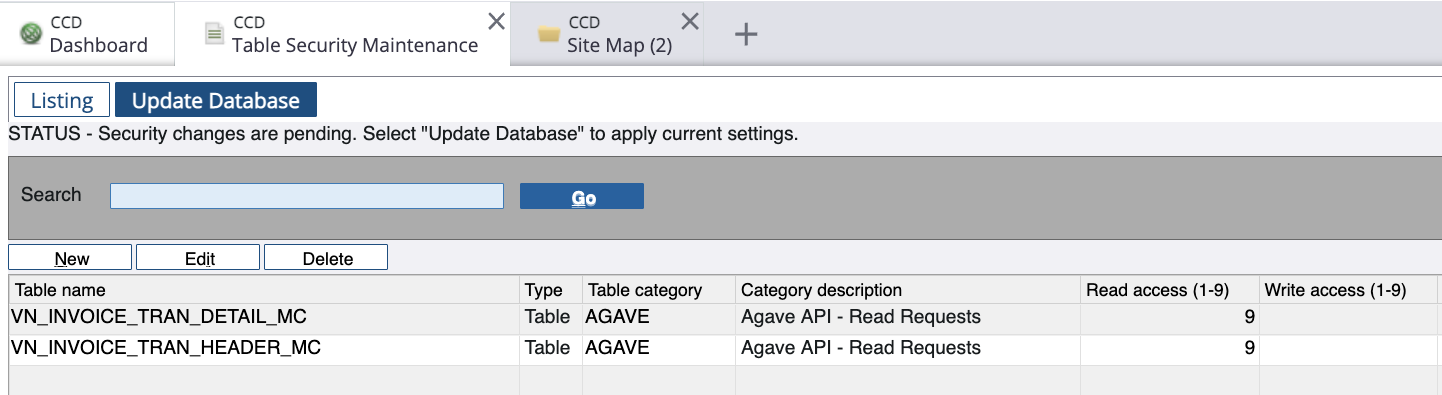
Select New, and add the names of Tables for which you want to support read or write requests. We recommend setting Read and Write Access to "9", unless you have more granular security permissions.
Make sure you add the JC_JOB_MASTER_MC, VN_VENDOR_MASTER_MC, and GL_MASTER_MC tables. You will also need VN_VENDOR_CONTACT_DETAIL. These are the default tables we check to confirm your Spectrum account has linked successfully.
If you use Cost Centers, you will also need to add EM_COST_CENTERS_MC.
For reference, here are the Info-Link tables commonly required for AP Automation and related coding:
You only need to enable Info-Link tables for records you plan to use in Agave.
- AP Invoices
- AP Payments
- Cost Codes
- Cost Types
- Departments
- Job Costs
- Projects
- Purchase Orders
- Subcontracts
- Tax Codes
- Vendors
For a full list of Spectrum tables and access levels, see the Agave Sync Spectrum FAQs.
For example, adding the below Tables adds support for reading AP Invoice Header and Line Item Tables:
-
Select Update Database.
-
Return to the Site Map. Select Info-link, then User Security Maintenance.
-
Select New, then select a Company. Either add an existing Database user by selecting from the drop-down or type in a new Database user. If it's a new Database user, press the "Enter" (or "Return") key, and input a Password. Then select the Table Category. We recommend setting Read and Write Access to "9", unless you have more granular security permissions.
Make sure you have followed step 4 above to ensure the User ID for Info-Link has been incremented at least twice before continuing.
Make sure the Link User you create is uniquely named across Viewpoint Spectrum Companies, otherwise you might run into database validation issues. If you have any concerns, feel free to contact us at support@useagave.com.
Your password must meet the following criteria:
- Be at least 8 characters long
- Contain at least one letter, one number, and one special character (e.g. !, @, #, $, etc.)
- Not be part of an online data leak
- We use Have I Been Pwned to securely check your password, without sending us your actual password to their servers. See here for more information.
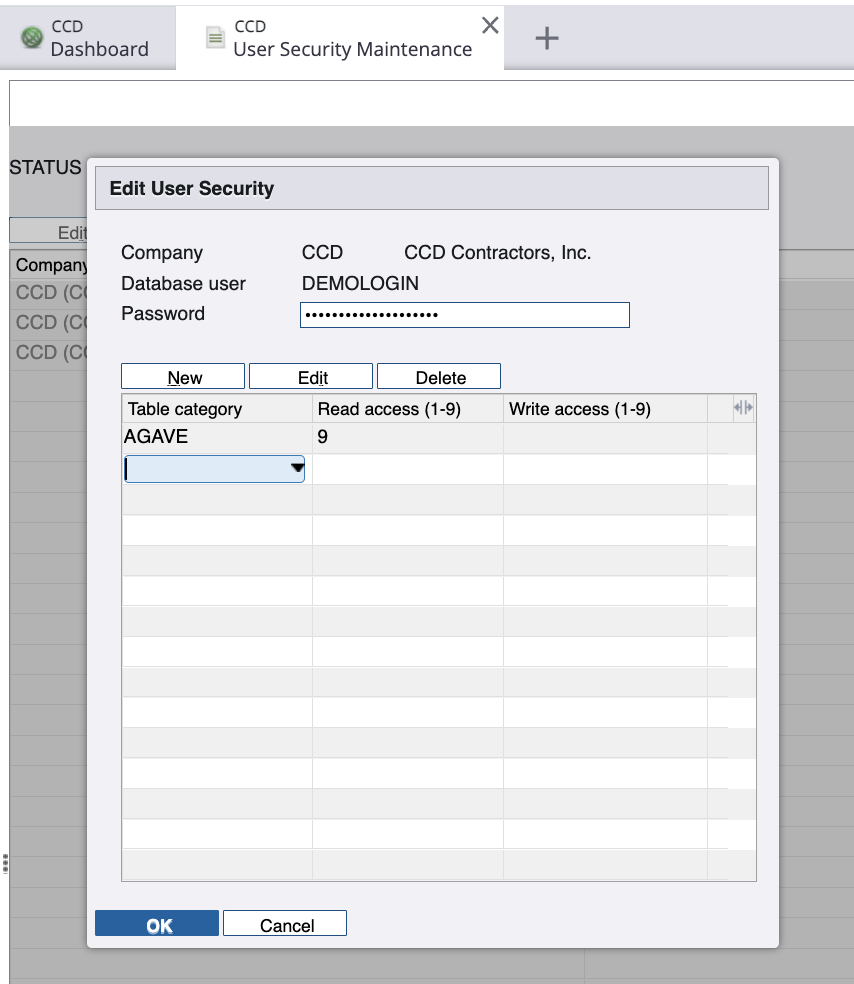
- Select Update Database.
Once you have completed the above steps, let your Agave Account Manager know. You can then finish connecting Spectrum in Accounting/ERP System Connection.
Frequently Asked Questions
How do I troubleshoot Invalid Authorization ID when connecting to Data Exchange?
-
Ensure the
GetJobMainWeb Service is added for the Authorization ID. See Step 2 above. -
Ensure that Data Exchange is enabled for the company:
Navigate to System Administration > Installation > Company:
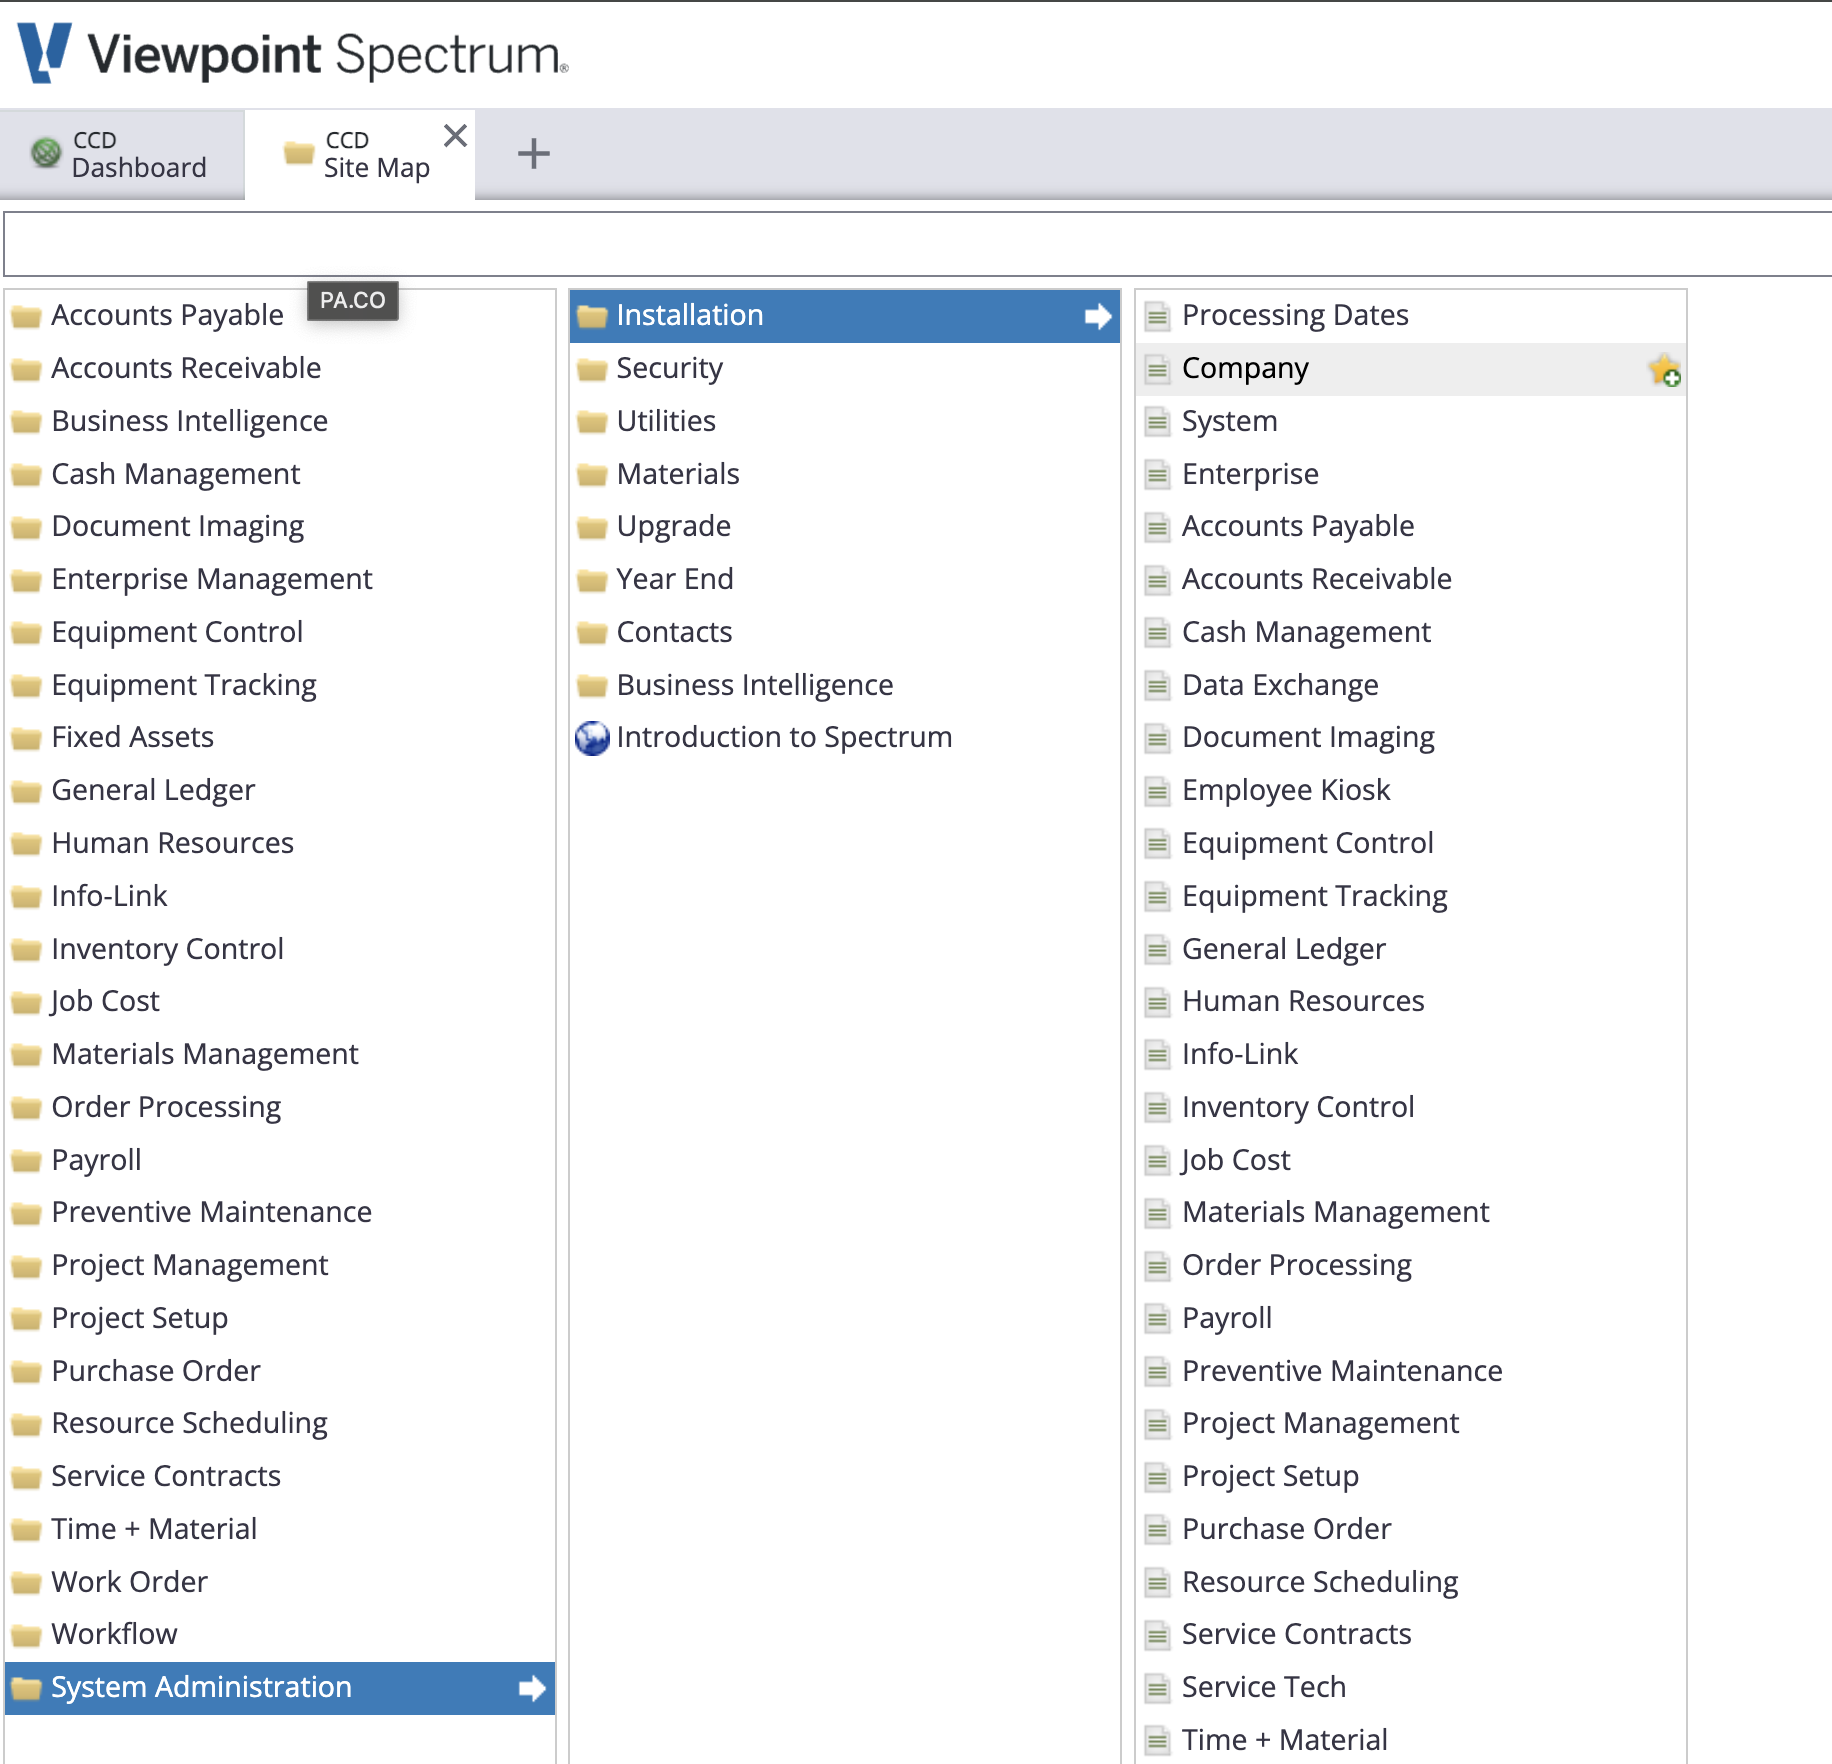
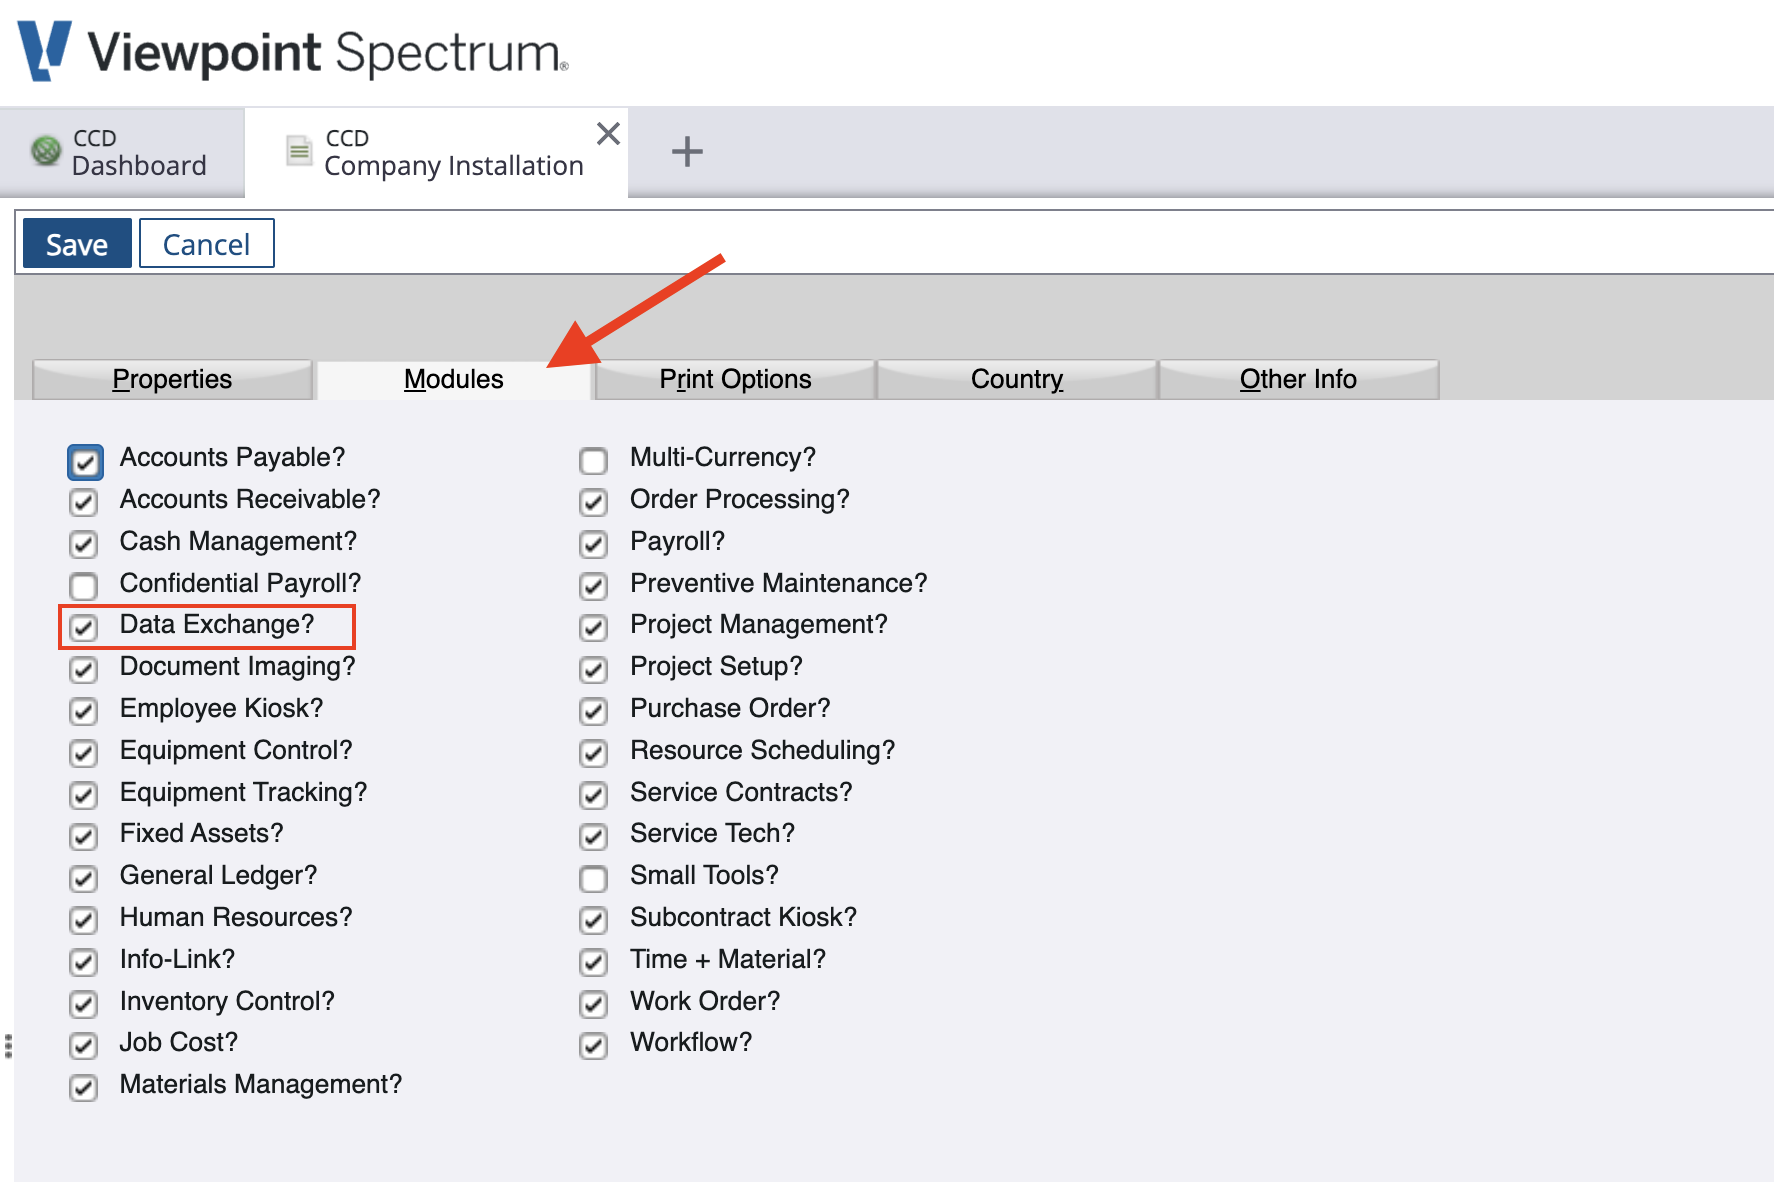
Go to the Module tab and ensure Data Exchange is selected: