Expense Management — Field PWA Guide
What is the Field PWA?
The Agave Expenses app is a mobile web application (PWA) for field staff to submit expense receipts from their phone. It is available at:
https://app.agaveapi.com/admin/em
It is designed to be installed to your home screen for a full-screen, app-like experience — no app store download required.
Why do field users have a separate app?
The full Agave admin dashboard is built for back-office staff on desktop. Field users need something different:
- Fast — snap a photo and submit in seconds
- Mobile-first — large touch targets, camera integration, portrait layout
- Focused — only their expenses and their card transactions, nothing else
- Offline-friendly install — add to home screen, open like a native app
The PWA connects directly to your company's Plaid card feed, so users see exactly which purchases still need a receipt.
What you can do in the app
| Feature | Description |
|---|---|
| View unsubmitted transactions | See card charges assigned to you that don't have a receipt yet |
| Upload receipts | Take a photo or pick from your library |
| Match to transactions | Tap a transaction to upload its receipt directly |
| Track submitted expenses | View all your receipts with vendor, date, project, and amount |
| Archive expenses | Remove draft expenses you no longer need |
| Pull to refresh | Reload your list when installed to home screen |
You only see your own expenses and your assigned card transactions. You cannot see other team members' expenses or access admin settings.
For Admins: Invite a field user
Field users are regular Agave team members with Expense Management access. They do not need AP Automation admin rights.
- Log in as an Owner or Admin.
- Go to Admin → Users.
- Click Invite User.
- Enter the user's Name and Email.
- Under Permissions, ensure the user has Expense Management access.
- Click Invite. A welcome email is sent automatically with a link to activate their account and set a password.
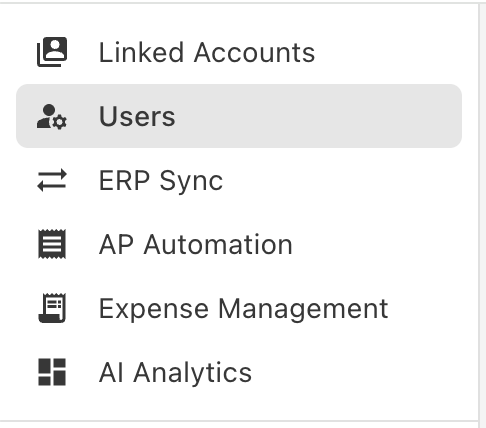
Navigate to Admin -> Users
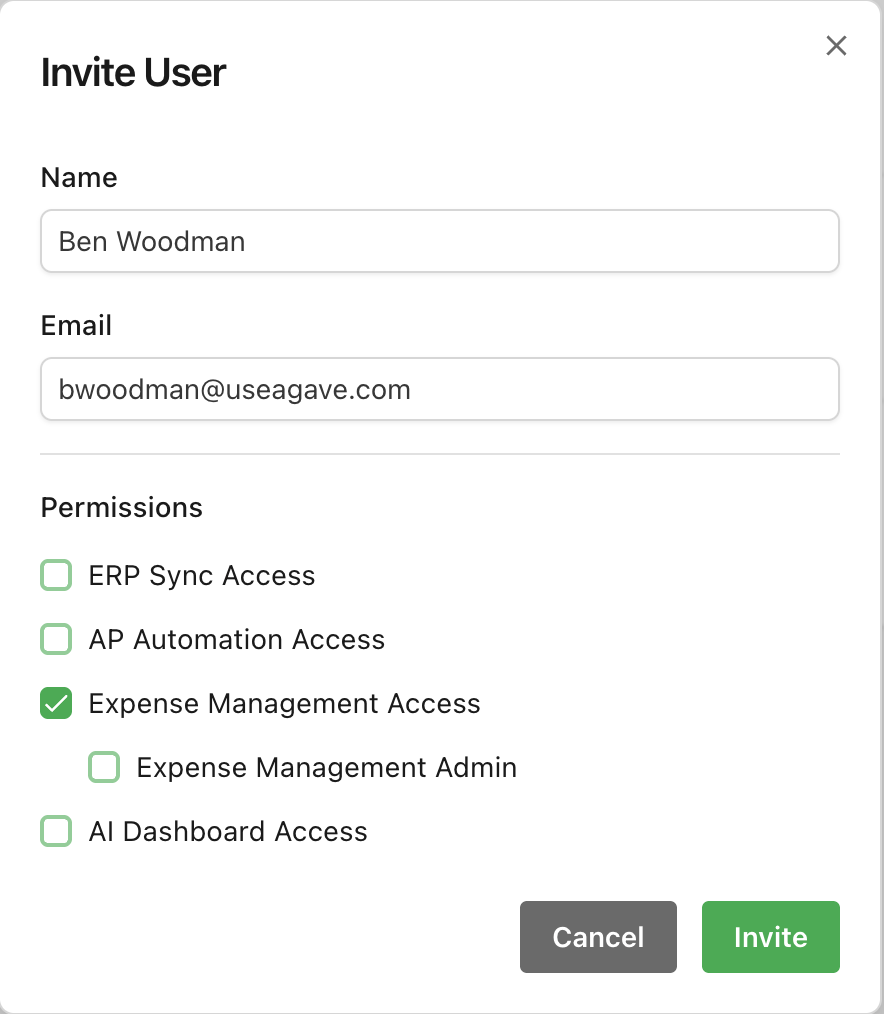
Add user
Resend welcome email (if needed):
- On the Users page, find the user.
- Click Send Welcome Email.
Screenshot placeholder: Users list with Send Welcome Email action for an unverified user. After inviting, return to Connected Cards and assign their card(s) (Step 2).
Before you start
Your Agave admin must have:
- Invited you to the team and granted Expense Management access
- Assigned your company credit card(s) to you in Connected Cards
- Optionally configured which fields (project, description) you need to fill in
You will receive a welcome email to activate your account. If you did not receive it, ask your admin to resend it from the Users page.
Field Team: Getting started
Step 1: Activate your account
- Open the Activate Your Agave Account email from Agave.
- Click activate your account.
- Set your password.
Step 2: Log in
- Open Safari (iOS) or Chrome (Android) on your phone.
- Go to your Agave login page: https://app.agaveapi.com/admin/em
- Sign in with your email and password.
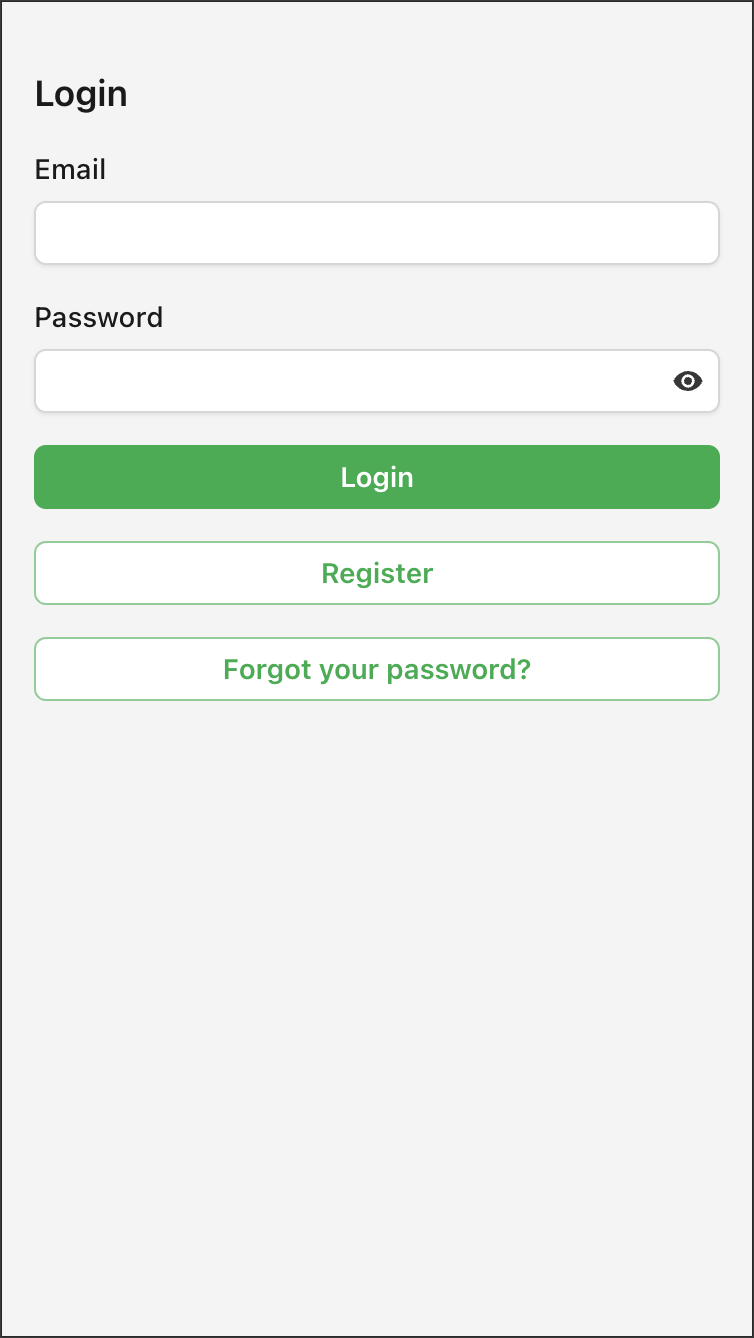
Login
Step 3: Install to your home screen
On first visit, an Install Agave Expenses modal appears with instructions. You can also install manually:
On iPhone (Safari):
- Tap the Share button in the Safari toolbar.
- Scroll down and tap Add to Home Screen.
- Tap Add in the top right corner.
On Android (Chrome):
- Tap the menu button (⋮) in the top right.
- Tap Add to Home screen.
- Tap Add to confirm.
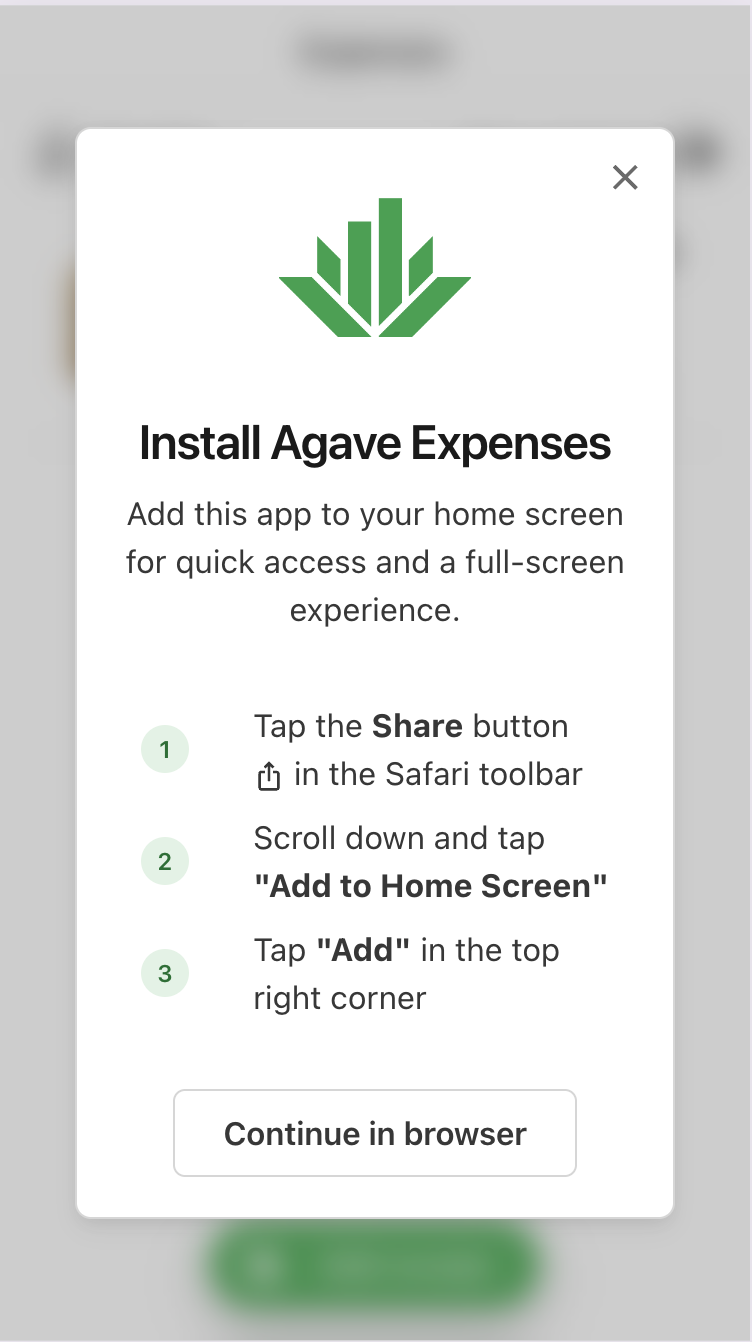
Add to homescreen
Tap Continue in browser if you prefer not to install.
Submitting a receipt
Option A: From an unsubmitted transaction (recommended)
When your company card has been charged and the transaction appears in the app:
- Open Agave Expenses.
- In the Unsubmitted Transactions section, tap the transaction.
- If shown, complete the Add details step:
- Select a coding profile if your admin set one up
- Enter project and/or description if required
- On the Upload image step, choose how to add your receipt:
- Take photo — opens your camera
- Photo library — pick an existing photo
- Wait for the upload to complete.
- You'll see a Submitted to accounting team confirmation.
- The transaction disappears from the unsubmitted list.
- Your expense appears in the Receipts list (or shows as "processing" while AI reads the receipt).
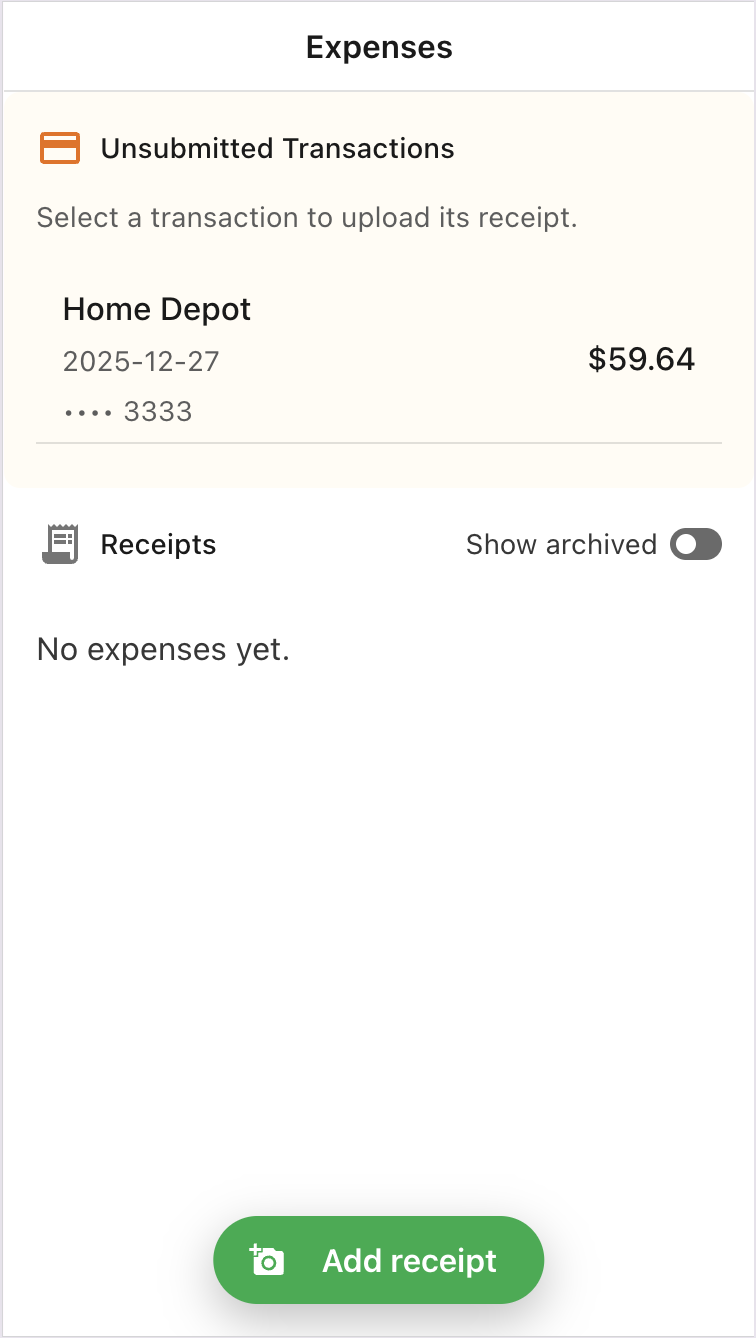
Expenses home
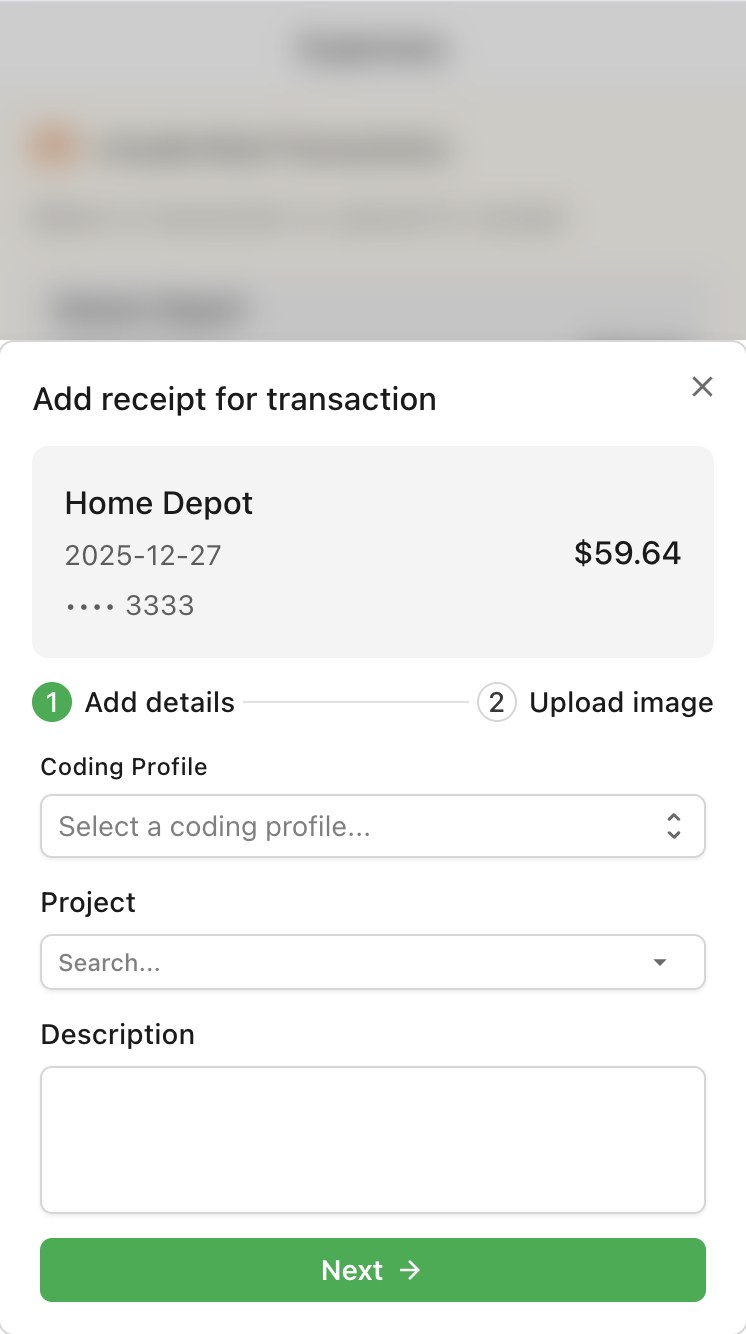
Add details
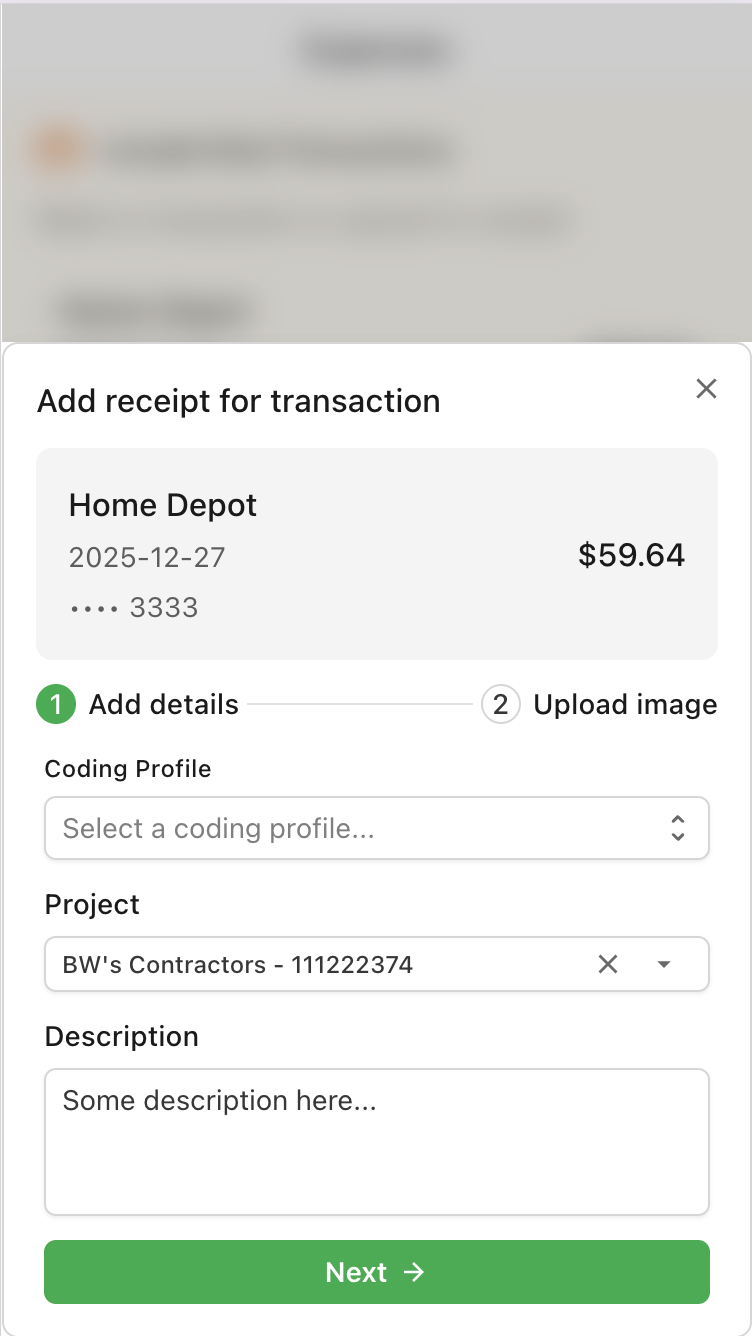
Upload image
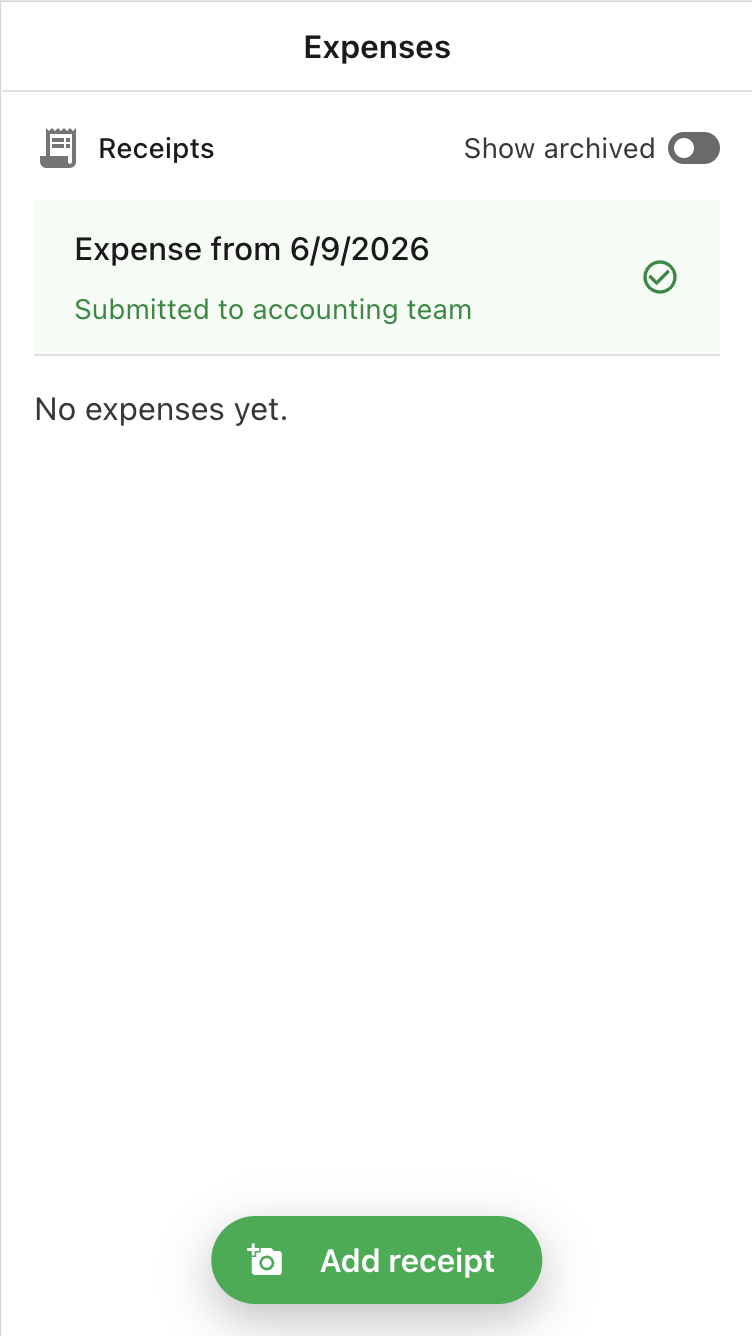
Submitted
Option B: Standalone receipt (no matching transaction)
For cash purchases or charges not yet synced:
- Tap the Add receipt button at the bottom of the screen.
- Complete Add details if prompted.
- Upload your receipt image.
- The expense appears in your Receipts list after processing.
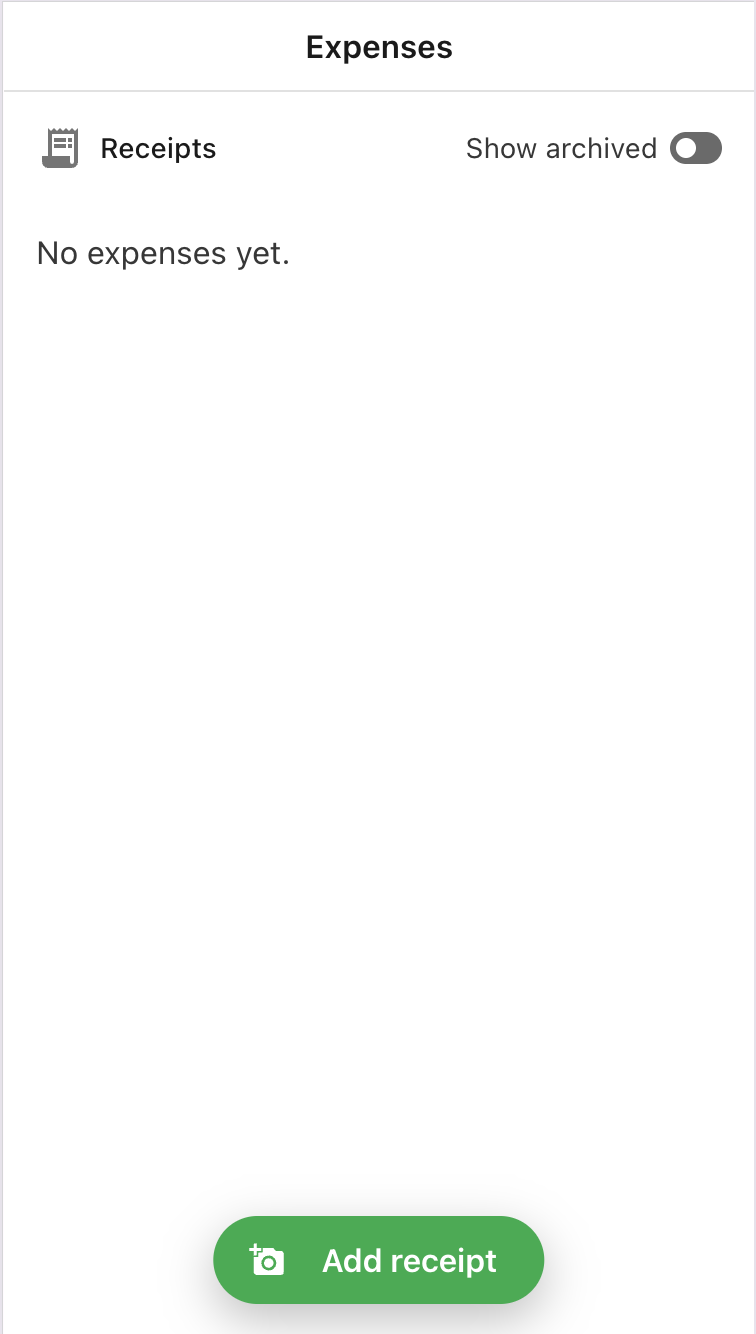
Expenses home
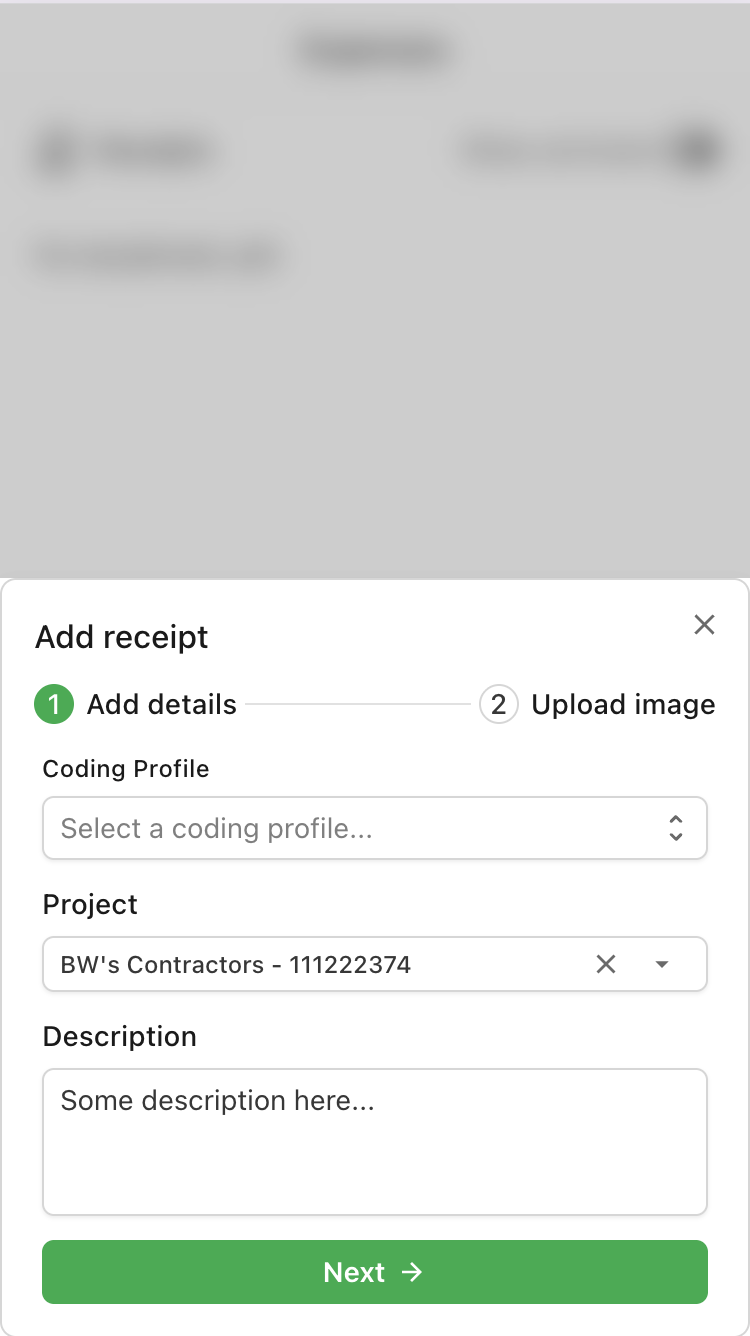
Add details
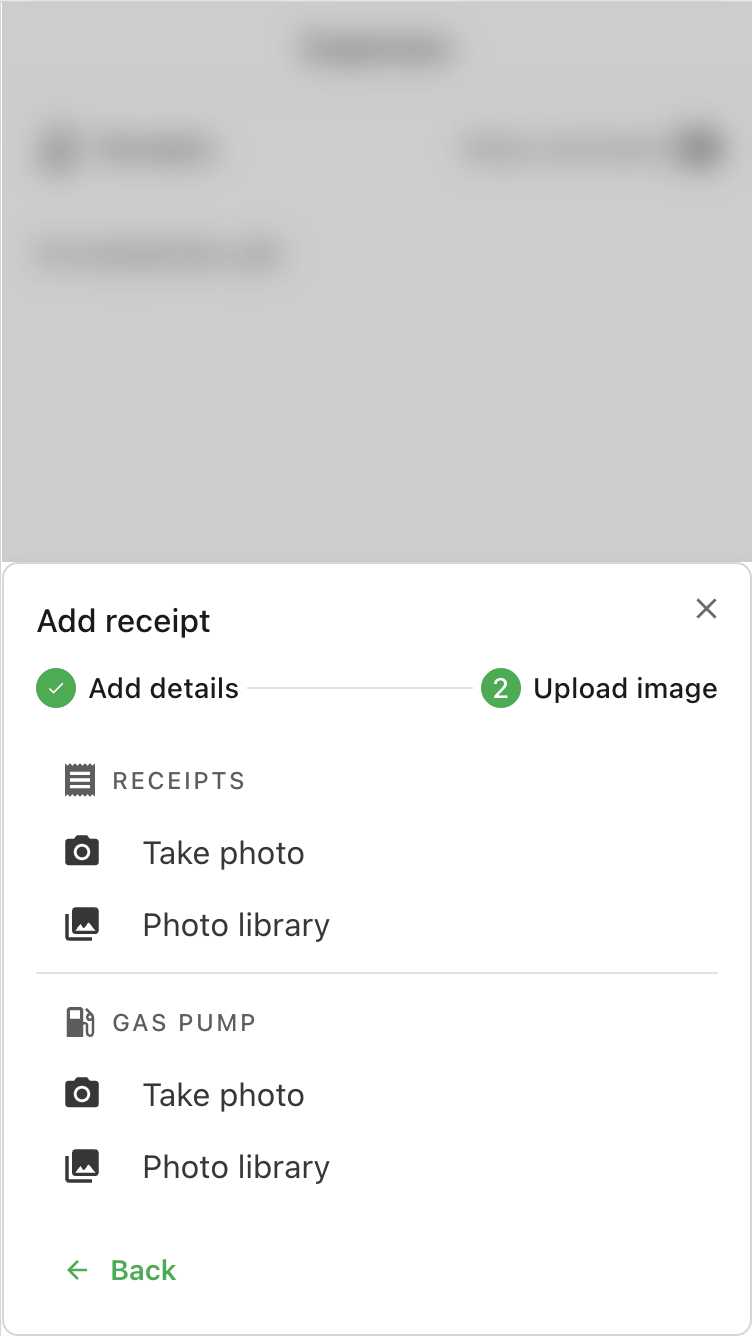
Upload image
Submitted
Managing your receipts
View a receipt
Tap the receipt thumbnail on any expense to open it full screen.
Screenshot placeholder: Receipt lightbox showing full-size receipt image.
Archive an expense
- Tap the ⋮ menu on an expense.
- Select Archive.
Archived expenses are hidden by default. Toggle Show archived at the top of the Receipts list to see them, then tap ⋮ → Unarchive to restore.
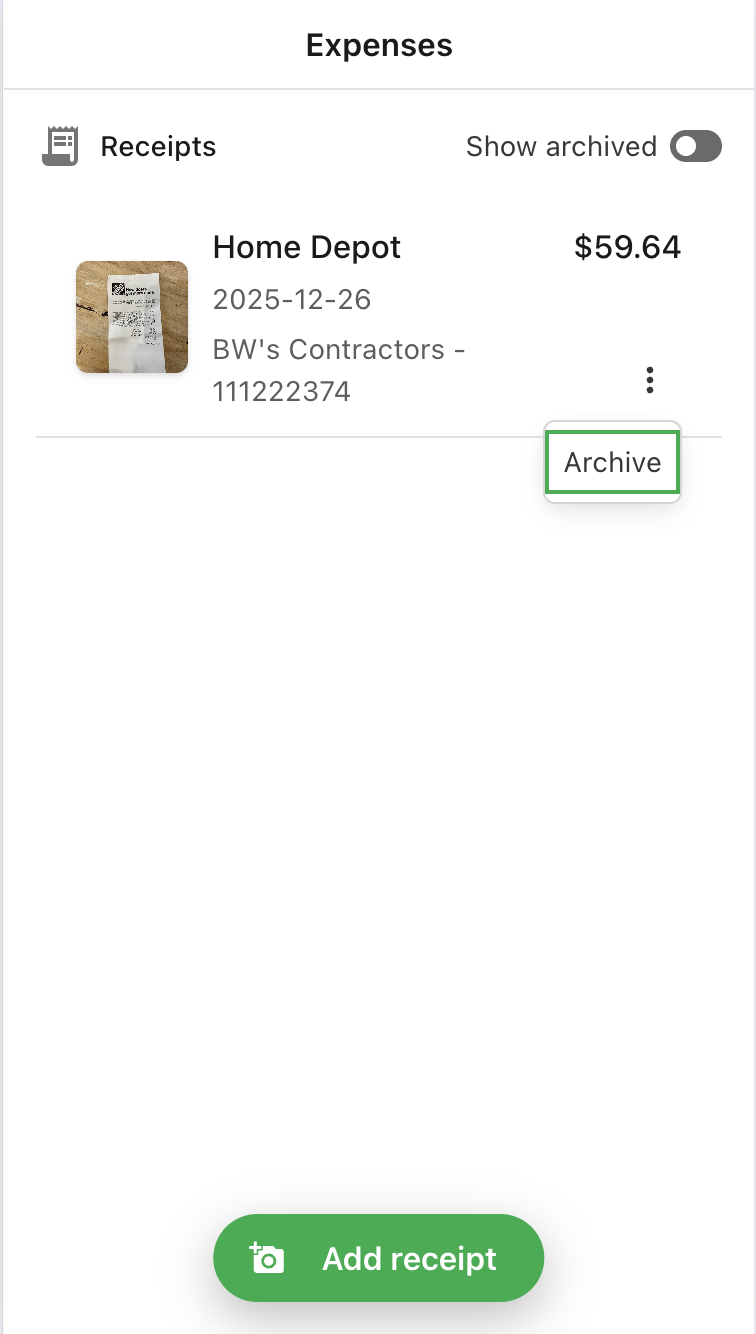
Expenses home
Refresh your list
If you installed the app to your home screen, pull down from the top of the screen to refresh transactions and expenses.
What happens after you submit
You don't need to do anything else after uploading. Behind the scenes:
- AI reads your receipt — extracts vendor, amount, date, and line items.
- Your expense is sent to your accounting team for review (if configured).
- Once approved, it syncs to your company's ERP.
You'll see the expense status update in your Receipts list. If your admin rejects an expense, they will contact you directly.
Quick reference
| Item | Value |
|---|---|
| App URL | /admin/em |
| App name (home screen) | Agave Expenses |
| Login URL | /login |
| Upload methods | Camera, photo library |
| Receipt types | Standard receipt, Gas pump |
| What you see | Your expenses + your card transactions only |
Troubleshooting
I can't open the app / I get an access error
- Make sure you activated your account via the welcome email.
- Confirm you can log in at the main Agave login page.
- Ask your admin to confirm you have Expense Management access.
I don't see any unsubmitted transactions
- Your admin may not have assigned a card to you yet — ask them to check Connected Cards in settings.
- Transactions may not have synced yet — try pull-to-refresh or check back later.
- The transaction may already have a receipt submitted.
The app asks for a project or description I don't have
- Your admin has set these fields as Required in Field App settings.
- Ask your admin for the correct project code, or ask them to make the field optional.
- If a coding profile is available, select it — it may pre-fill the project for you.
My receipt is stuck on "processing"
- Pull down to refresh the list.
- Processing usually takes under a minute. If it persists, contact your admin.
I closed the app before the upload finished
- Re-open the app and check your Receipts list — the upload may have completed.
- If the expense is not there, re-upload the receipt.
I want to use the app on desktop
The app works in a desktop browser, but it is designed for mobile. For full expense management on desktop, your admin uses the AP Automation inbox.
Related guides
- What is Expense Management?: What the product does and how an expense flows from card swipe to synced record
- Expense Management Users: What admins, reviewers, and submitters are each responsible for
Need help?
Contact your company's Expense Management admin, or reach out to support@useagave.com.